

 Service Center
Envelope Categorization
The envelope categorization feature allows administrators to logically archive envelopes in the list. By creating custom categories, setting sorting, and enabling quick search, it helps teams efficiently manage and find a large number of signing tasks by department, project, or file attributes.
Functional Value: Solves the problem of envelopes piling up and being difficult to find, improving archiving management efficiency in large-volume signing scenarios.
Note: Applicable Version: This feature is only available to Enterprise/Advanced Plan users. Permissions: Super administrators and administrators have full category management permissions; ordinary members only support viewing authorized envelope categories.
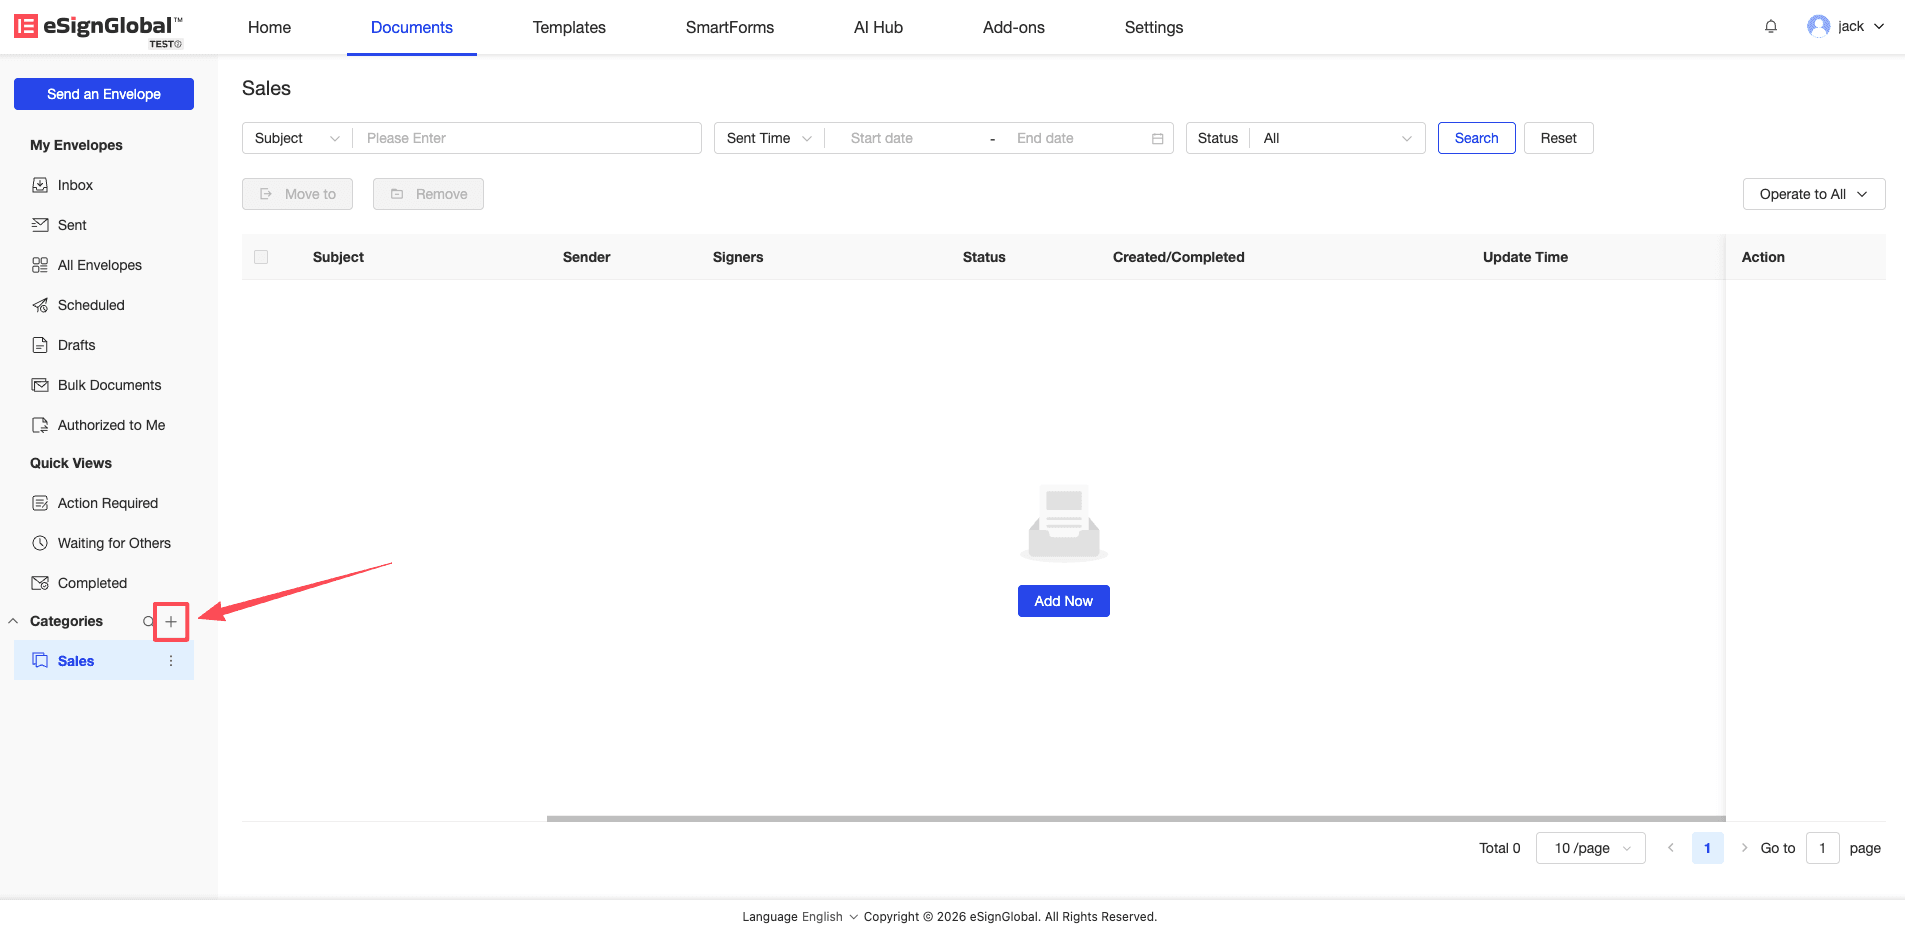
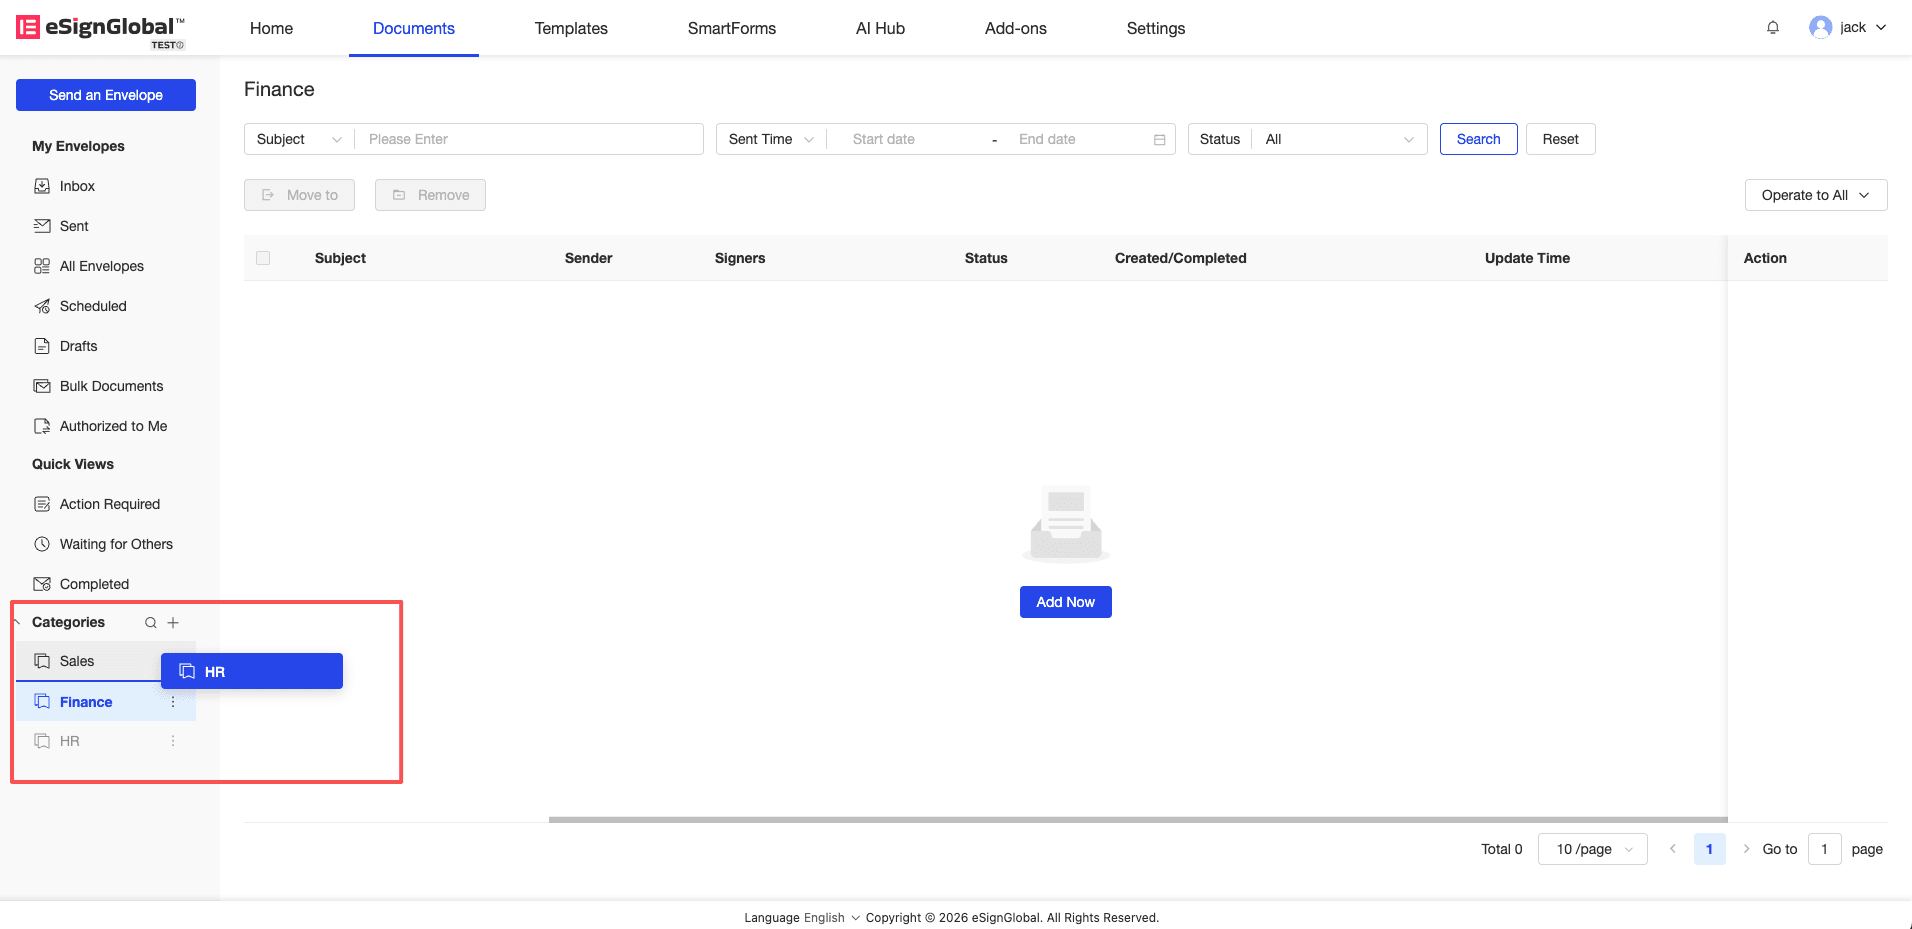
1. Add Envelope Category
Description: Administrators can quickly create top-level category folders in the sidebar.
-
Click the “+” icon next to “Envelope Categories” in the left menu bar.
-
In the “Create New Category” window that pops up, enter the category name (up to 50 characters) and click “Confirm”.
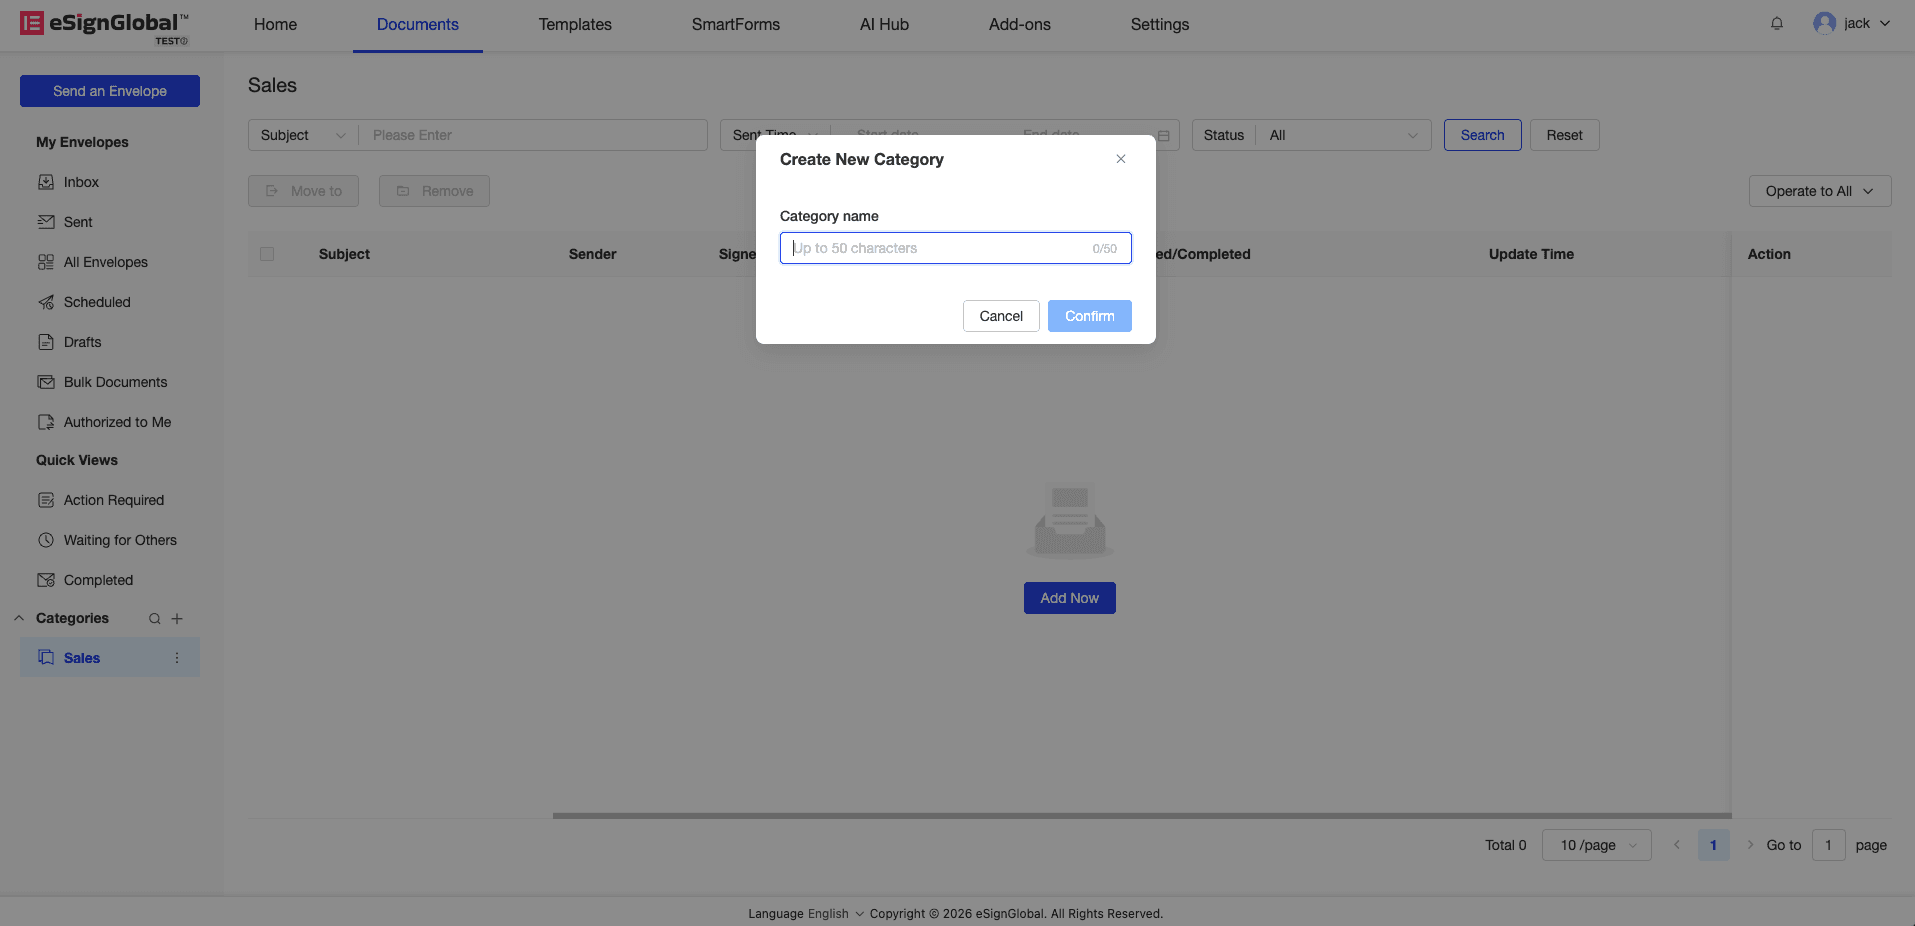
Tip: A workspace supports a maximum of 10 envelope categories. When there are more than 3 categories, the system will automatically collapse them. Click “show more” to view the complete list.
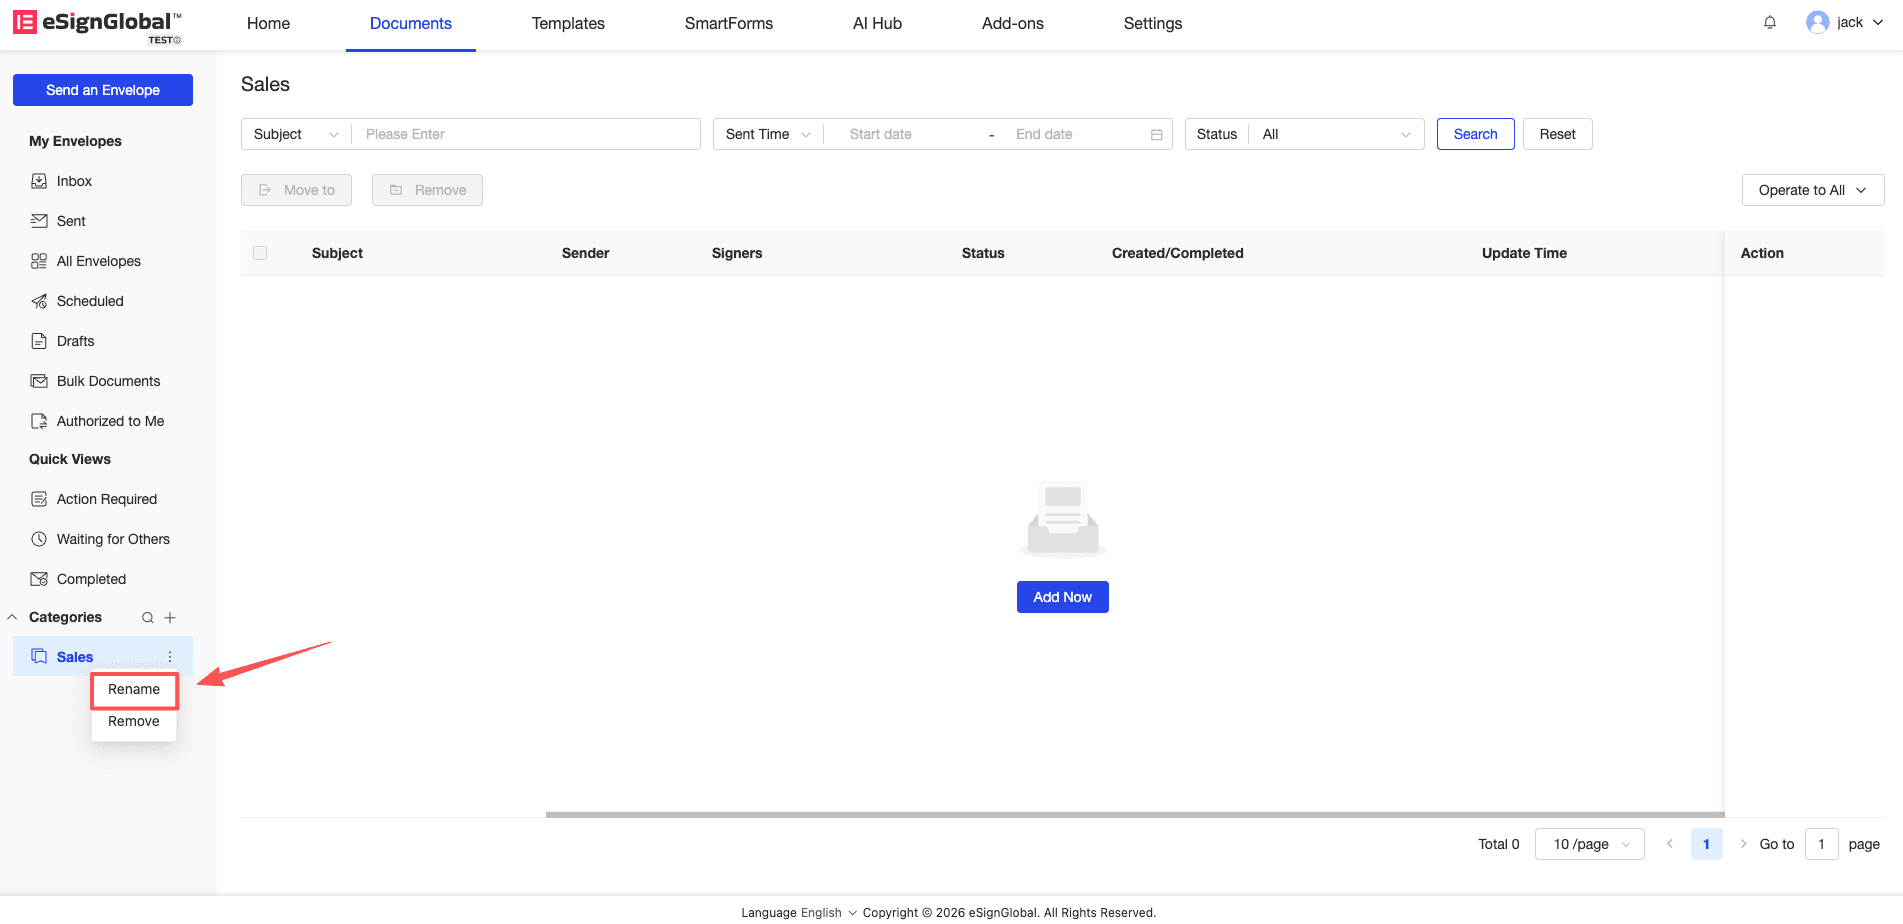
2. Manage & Adjust Categories (Rename & Delete)
Description: You can rename or delete existing categories at any time.
-
Hover the mouse over the corresponding category name and click the “vertical ellipsis” icon that appears.
-
Select “Rename” to directly edit the category name; select “Delete” to remove the category.
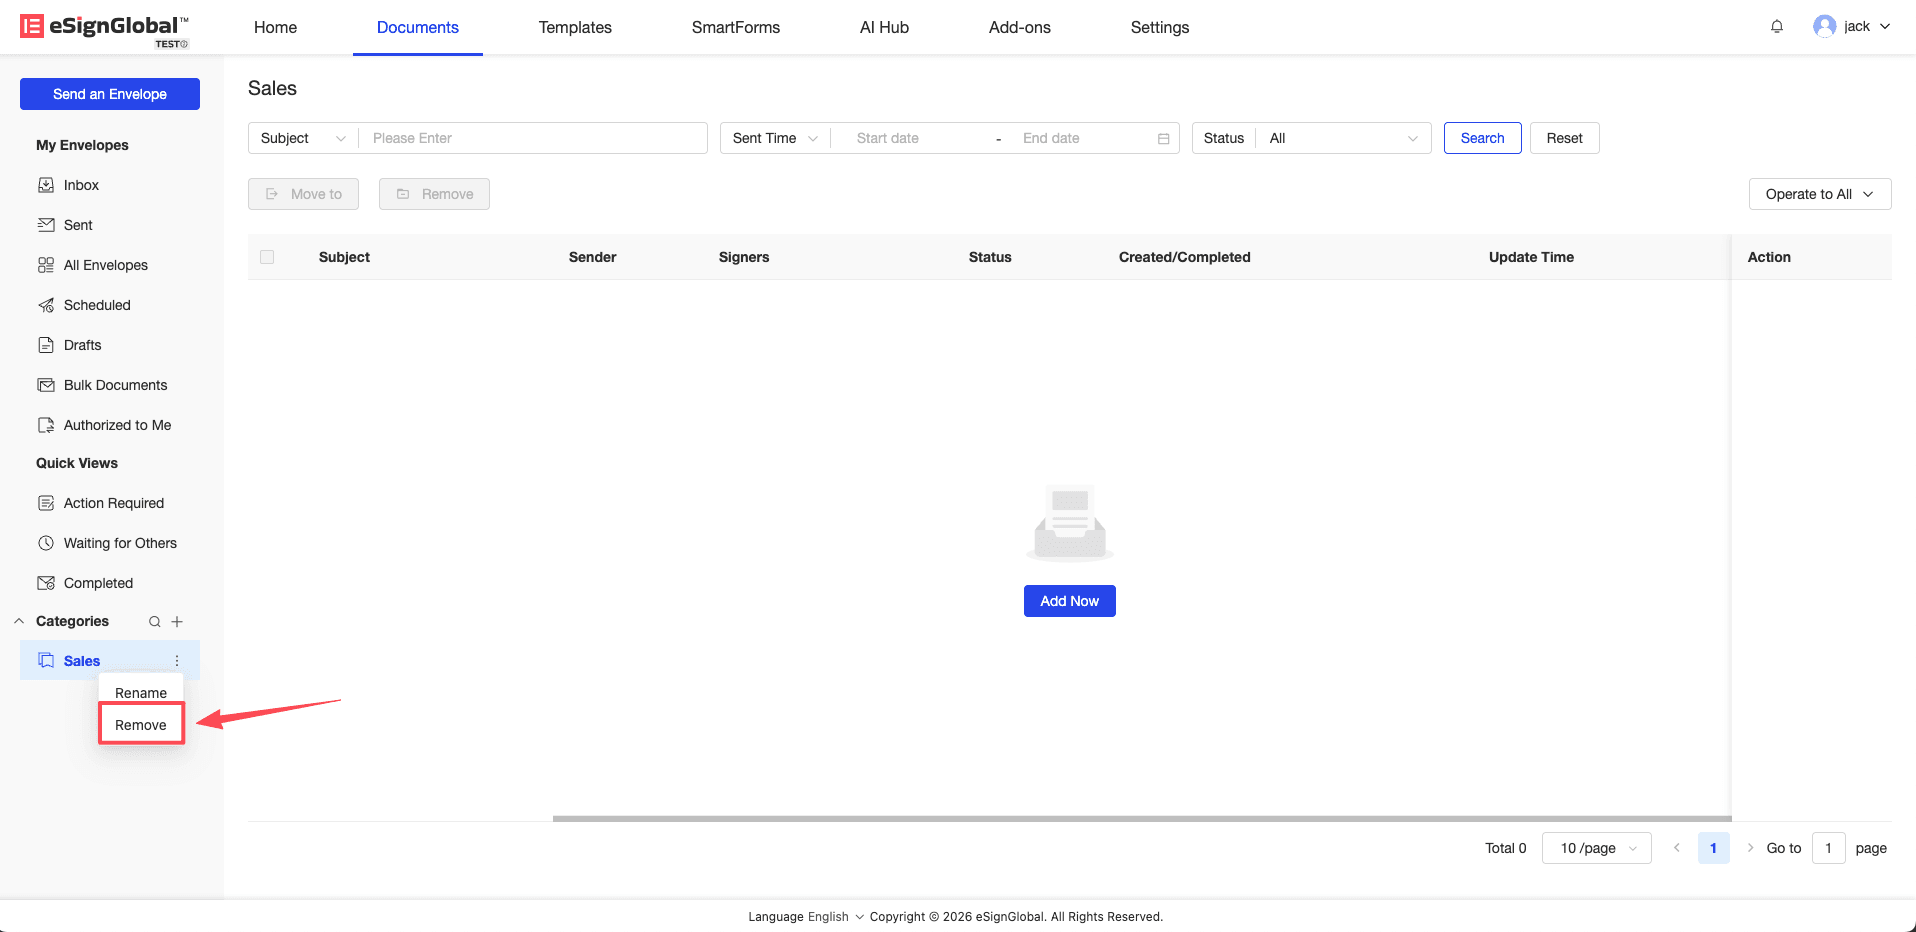
Warning: Deleting a category will not delete the envelopes in it. This operation only removes the association between the envelope and the category. You can still find the original files in the “All Envelopes” list.
3. Envelope Categorization Operation
Description: You can move single or batch envelopes to a specified category folder.
-
In the envelope list, check the envelopes that need to be categorized, and click the “Categorize” button above the list.
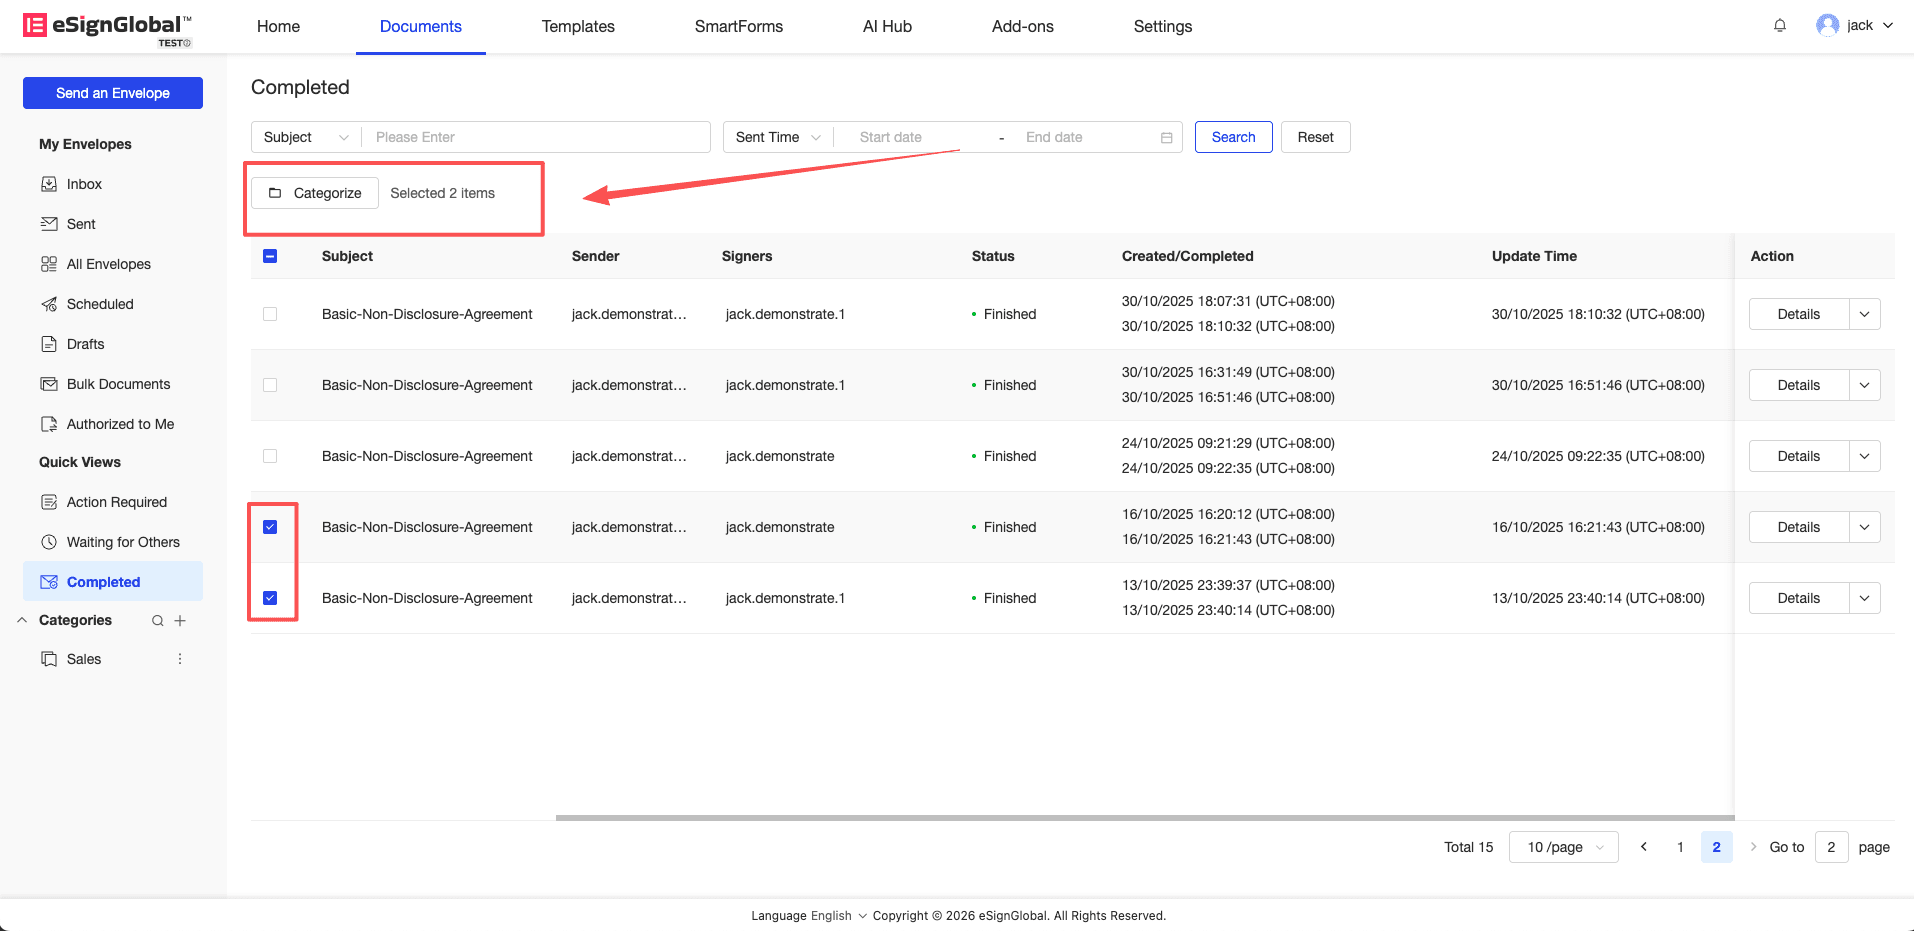
-
Select the target category in the pop-up drop-down menu.
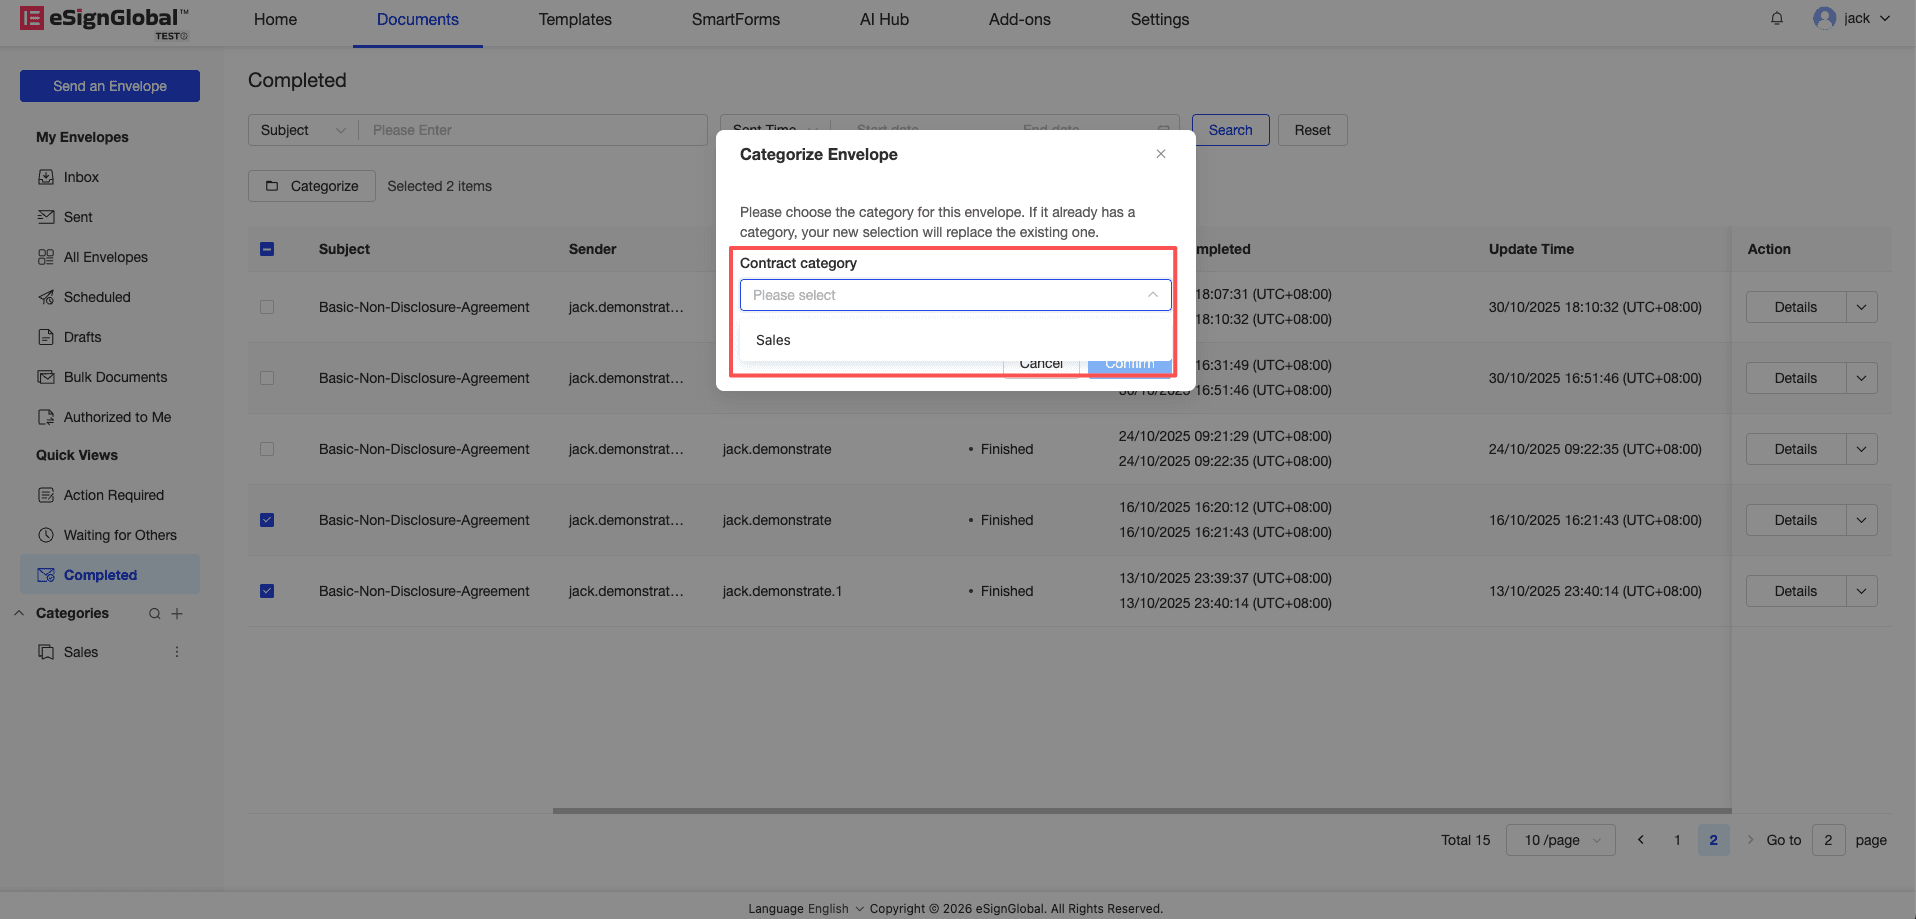
-
Click “Confirm”, and the system prompt “Categorized successfully” indicates that the categorization is successful.

Note: If the selected envelope already belongs to a category, the new selection will directly replace the existing category association.
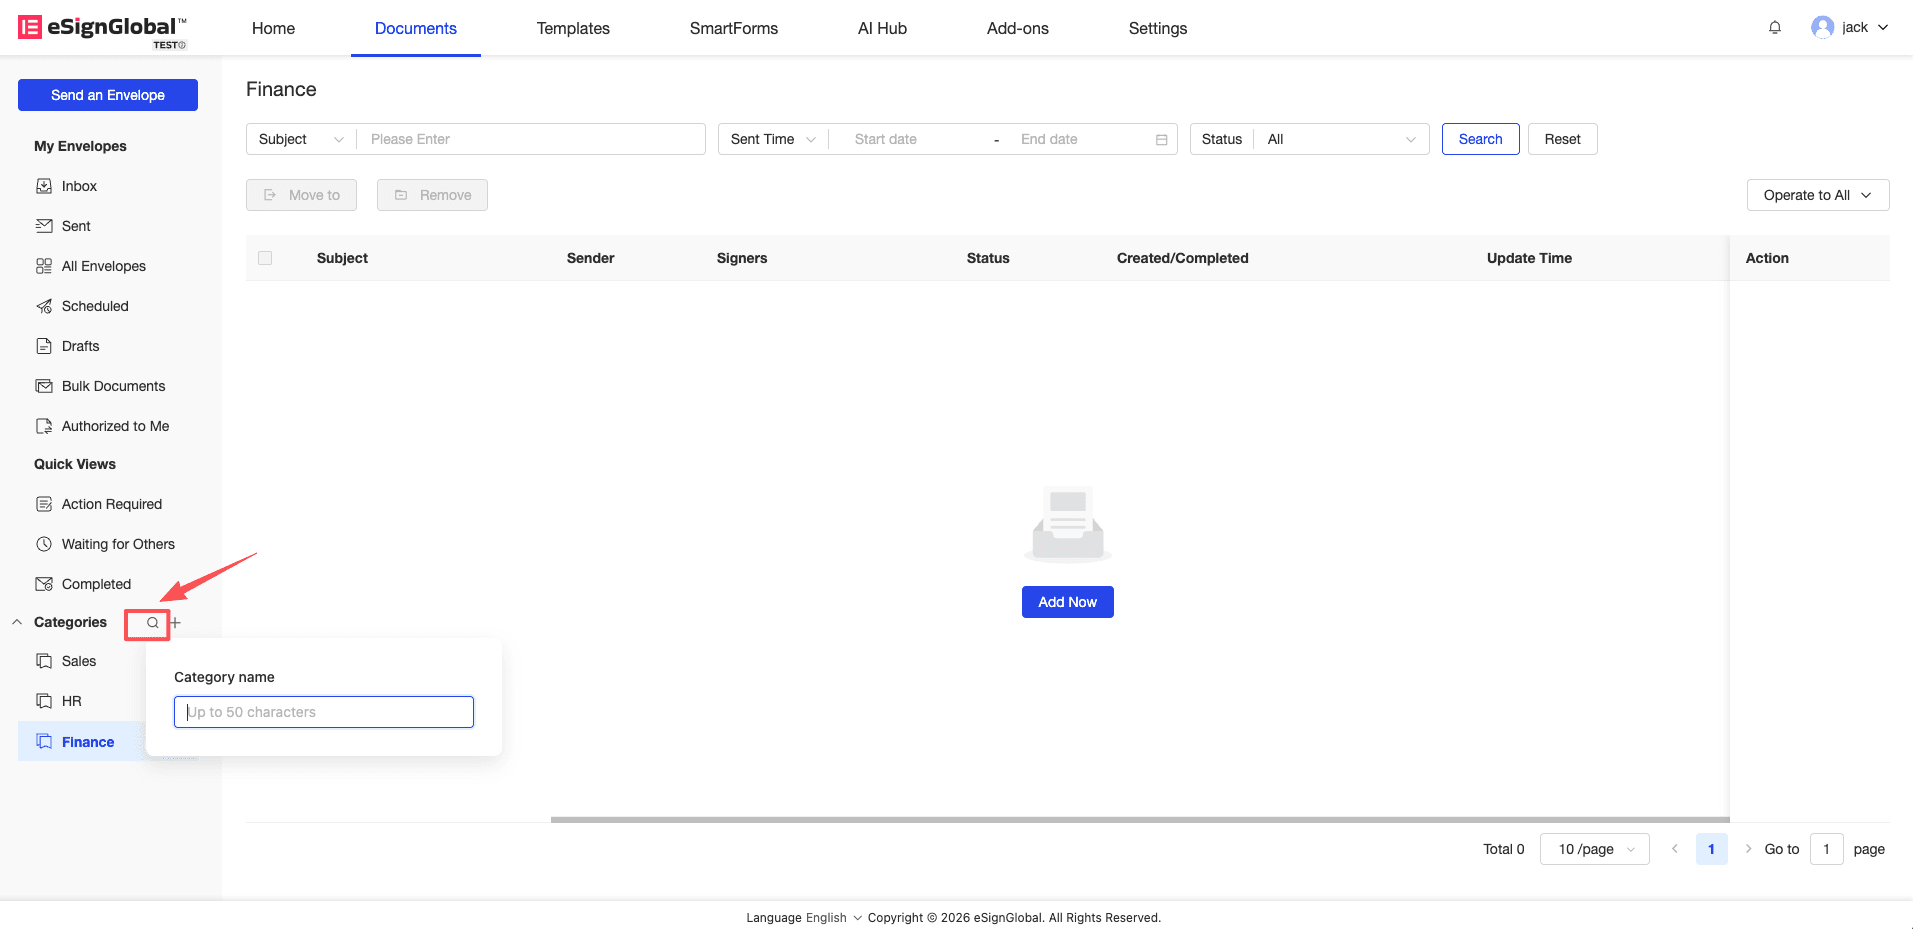
4. Category Ordering & Search
Description: Quickly adjust the display order of categories or locate target categories through sorting and fuzzy search.
-
Sorting: Adjust the order of categories by dragging.
-
Search: Click the search icon on the side of the category, enter keywords, and the system will filter and display matching category names in real time.
5. Remove from Category
Description: If an envelope no longer belongs to the current category, it can be removed from the current view.
-
Enter the corresponding category details page, select the target envelope, and click the “Remove” button.
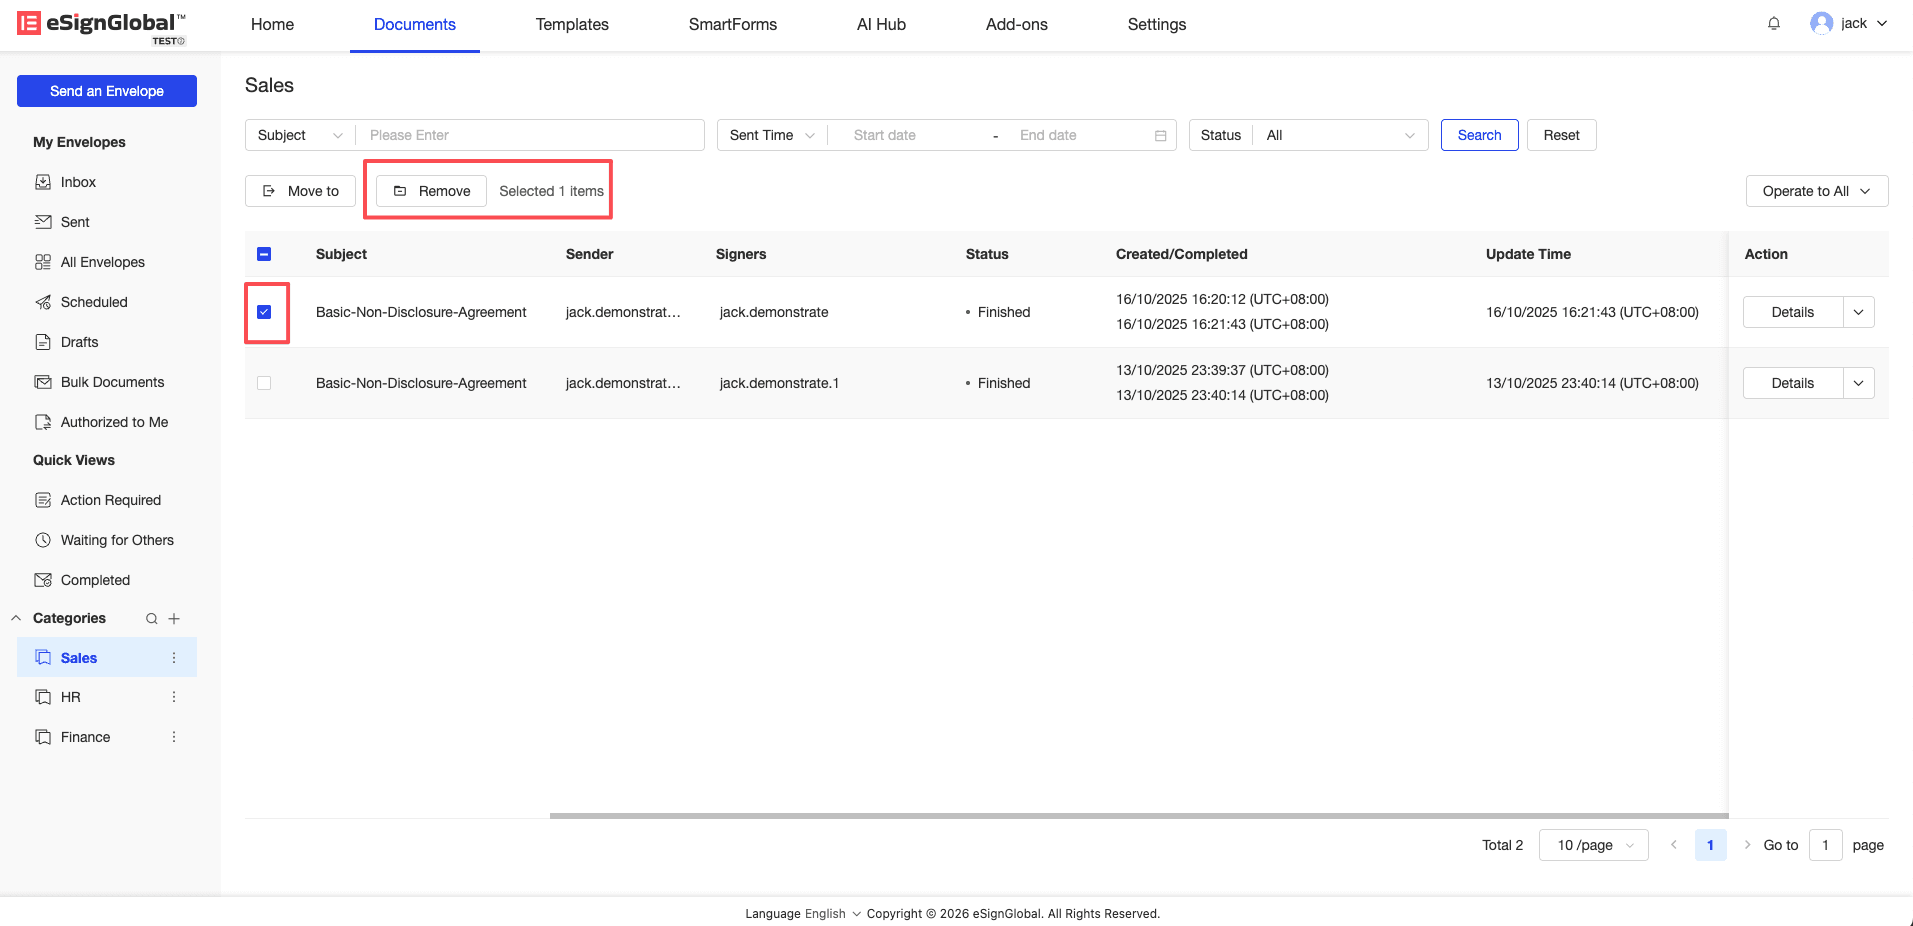
-
Click “Confirm” in the secondary confirmation pop-up window.

Note: This operation only “removes” the association under the current category view, and the signing status and physical data of the envelope itself will not be damaged.


