

 Service Center
Create SSO Configuration (OIDC Protocol)
Single Sign-On (SSO) allows enterprise employees to use a unified enterprise identity (such as Microsoft Entra ID and other OIDC protocol-based identity providers) to directly log in to the eSignGlobal platform. This not only eliminates the hassle of remembering multiple sets of account passwords, but also helps enterprises to centrally manage access rights and improve security compliance.
[Applicable Versions] Available in Professional Edition and above (requires the “Single Sign-on” plugin).
Prerequisites
- Permission Requirements: You must be a Workspace Super Admin to configure SSO. Regular members and regular administrators cannot access this configuration page.
- Plugin Requirements: Ensure that your workspace has installed and enabled the “Single Sign-on” plugin in the application plugin center.
- IdP Preparation: You need to create an application in your enterprise’s identity provider (IdP, such as Microsoft Entra ID) and obtain the relevant OIDC configuration information (such as Client ID, Client Secret, Issuer URL, etc.).
Configuration Steps
Step 1: Enter the SSO Configuration Page
After logging in to eSignGlobal, enter the management backend of the workspace, find the “Single Sign-on” plugin configuration entry, and click to enter the Add Configuration panel.
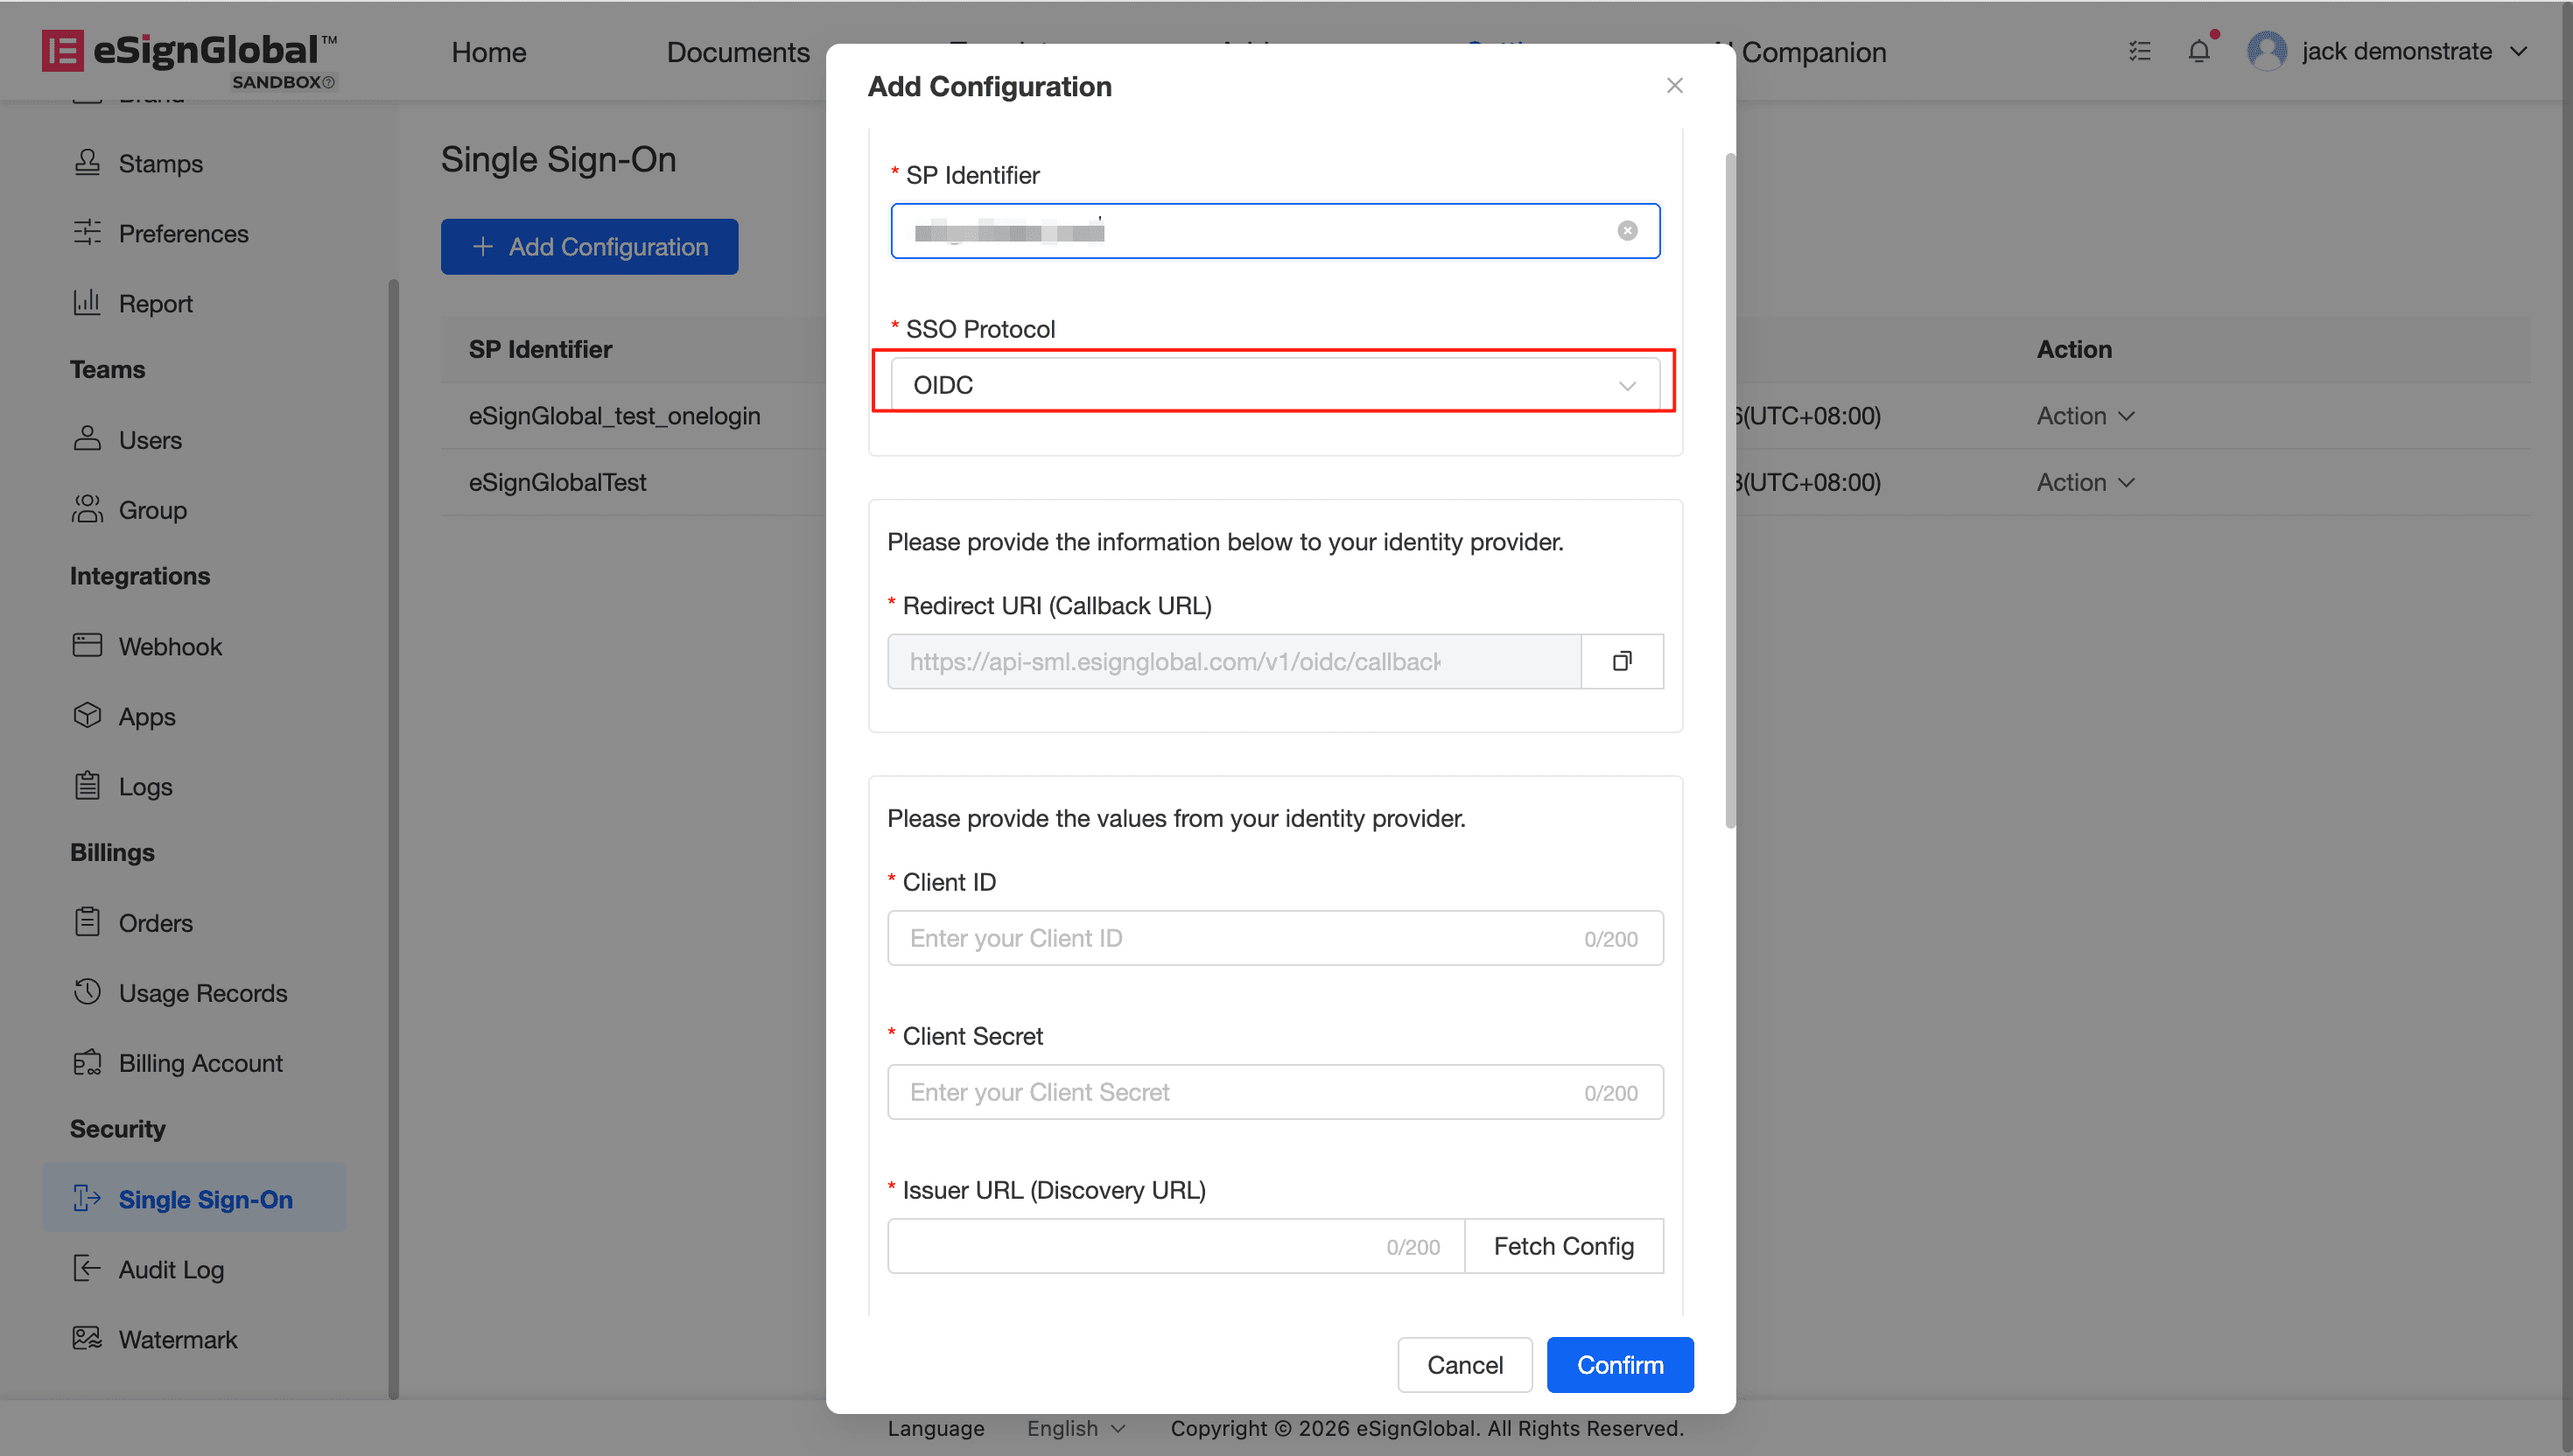
Step 2: Fill in Basic Information and Protocol Selection
- Enter SP Identifier:
In the
SP Identifierinput box, customize a string of identifiers. This identifier will be used to identify the workspace to which the employee belongs when logging in. (Please keep a record of this identifier, as it will be needed for subsequent logins). - Select Protocol:
In the
SSO Protocoldrop-down menu, selectOIDC.
Step 3: Obtain and Configure the Redirect Address
After selecting the OIDC protocol, the system will automatically generate a Redirect URI (Callback URL).
- Click the copy icon on the right side of the input box to copy the generated URL.
- Go to your Identity Provider (IdP) management console and fill in the copied URL into the corresponding redirect address (Redirect/Callback URL) configuration.
Step 4: Configure IdP Parameters and Client Credentials
In this step, you need to fill in the relevant parameters and key information extracted from the IdP. The system provides you with a convenient endpoint configuration fetching function:
- Fill in Client Credentials:
- Client ID: Fill in the client ID obtained after creating the application in the IdP.
- Client Secret: Fill in the client secret obtained from the IdP. (To ensure security, once the secret is saved, it will be irreversibly desensitized or replaced with asterisks when edited again).
- Fill in Issuer URL (Discovery URL): Enter the base Issuer address of your identity provider.
- Get Endpoint Configuration (Click the [Fetch Config] button):
- The system will attempt to automatically connect to your IdP and parse out
Authorization Endpoint,Token Endpoint,JWKS URI, andUserInfo Endpoint. - If in an intranet environment or automatic retrieval fails, the system will prompt “Failed to get configuration”. Don’t worry, you can manually fill in the corresponding information in the endpoint input boxes below.
- Note:
UserInfo Endpointis optional.
- The system will attempt to automatically connect to your IdP and parse out
Step 5: Save Configuration
After confirming that all basic information, client credentials, and endpoint information are correct, click [Confirm] at the bottom to save the configuration.


