Service Center
Create a New Smart Form
Before using the functions in this user manual, you need to understand the smart form limitations corresponding to different versions:
- Experience Version: Does not support smart form function
- Basic Version: Does not support smart form function
- Professional Version: Supports smart form function
Using eSignGlobal, you can use templates to create smart forms, achieve information collection, and initiate envelopes.
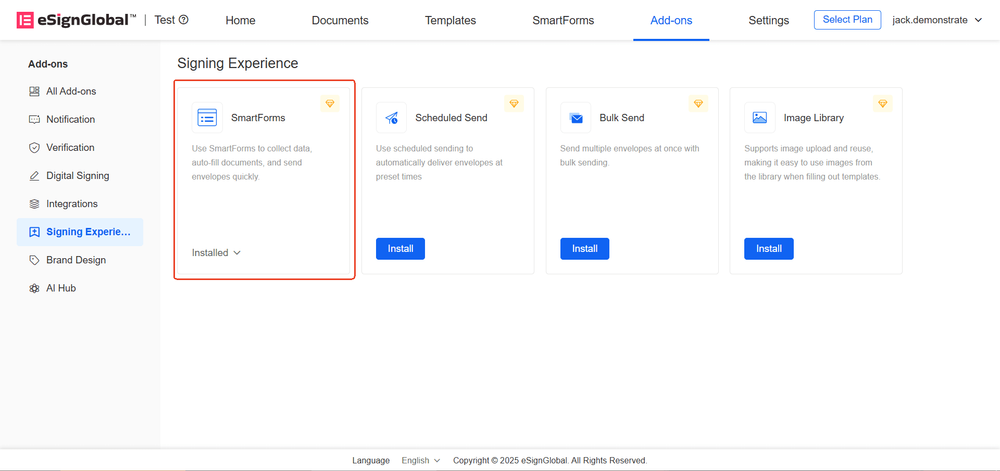
Install Plugin
-
Install the “Smart Form” plugin.
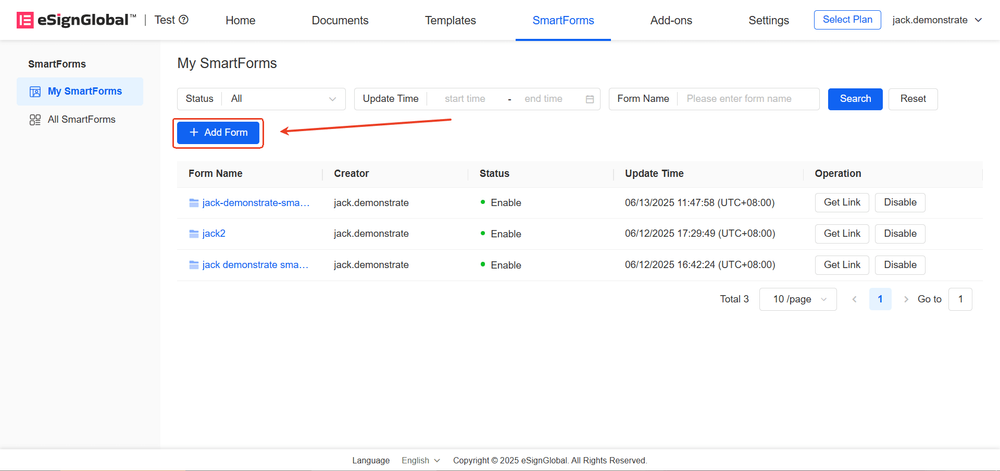
Template Selection
-
Enter the “Smart Form” page and click “Add Form”
-
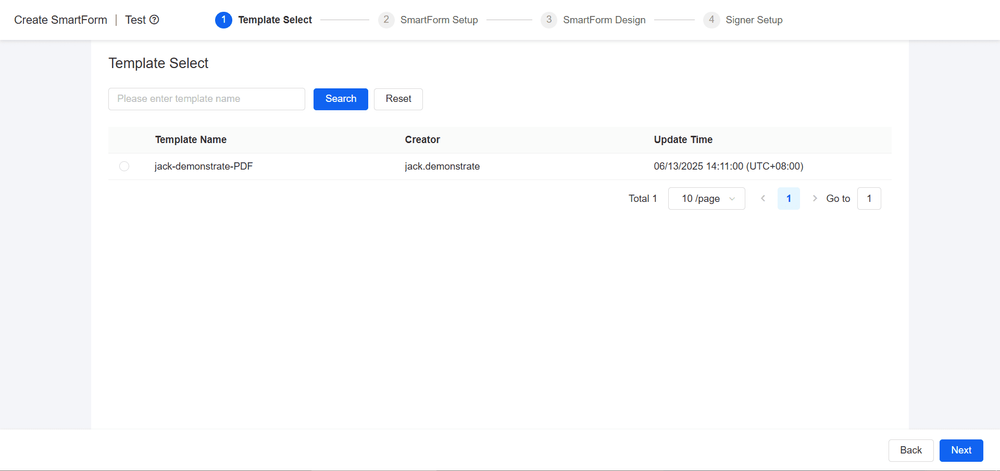
After selecting the template, click “Next”
Note:
- After selecting the template, the system will generate a smart form based on the template’s initiator’s fill-in controls
- Template requirements:
- The template must be in the enabled state
- Only PDF templates are supported
- The template must not contain checkbox components
Smart Form Settings
-
After setting the smart form name and recipient, click “Next”
a. Set the smart form name: Name your form
b. Set the recipient: Including the form filler and the signatory
i. Form filler: After the smart form is enabled, the form filler can access the QR code or link to fill in the form

1. When "Require Signature" is checked, the form filler needs to fill in the form and sign

2. When "Require Signature" is unchecked, the form filler only needs to fill in the form without signing

ii. Signatory: After the form is filled, the envelope will be automatically initiated to the signatory

1. Set immediately: When creating the form, the form creator specifies the signatory information

2. Set later: When using the form, the form filler specifies the signatory information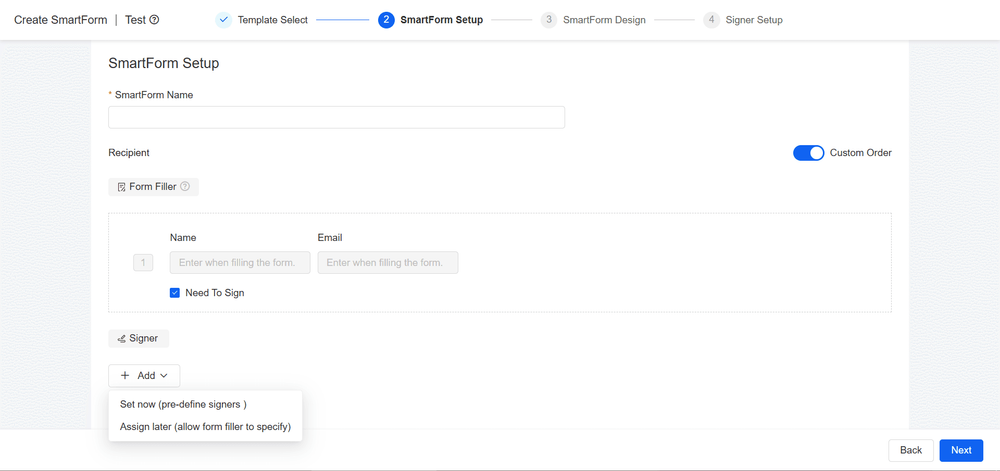
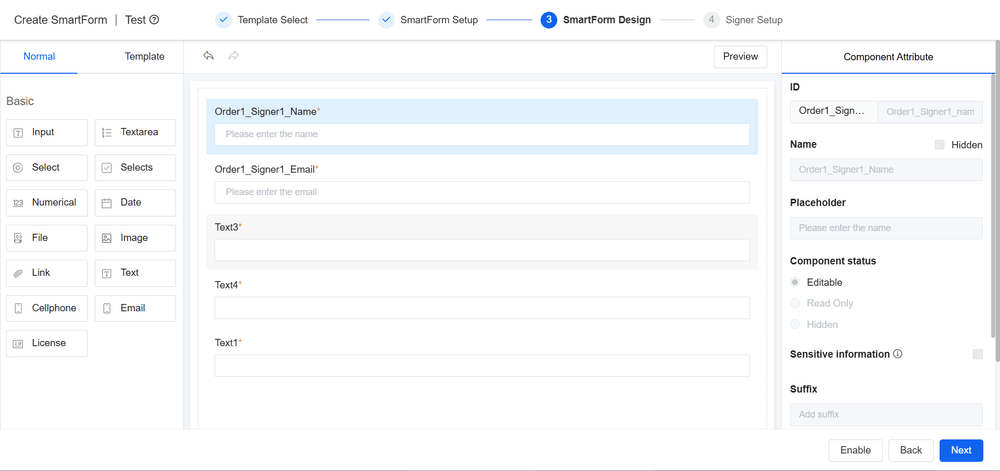
Smart Form Design
-
Enter the smart form design page, the system will automatically generate the signatory information controls, and generate template controls based on the associated template. Users can drag and drop new form controls and set control properties.
a. Form controls: Users can freely drag and drop form controls to the design page according to their needs.
b. Template controls: The smart form design page will generate the initiator’s fill-in controls related to the associated template.
i. When using the smart form, the form filler needs to complete the filling of these control contents.

ii. After filling, the system will automatically merge the filled information into the file and initiate the envelope based on this file.
c. Signatory information controls: If the signatory information needs to be specified by the form filler, the signatory information controls will be generated on the smart form design page, and the form filler needs to fill in the information when using the smart form.
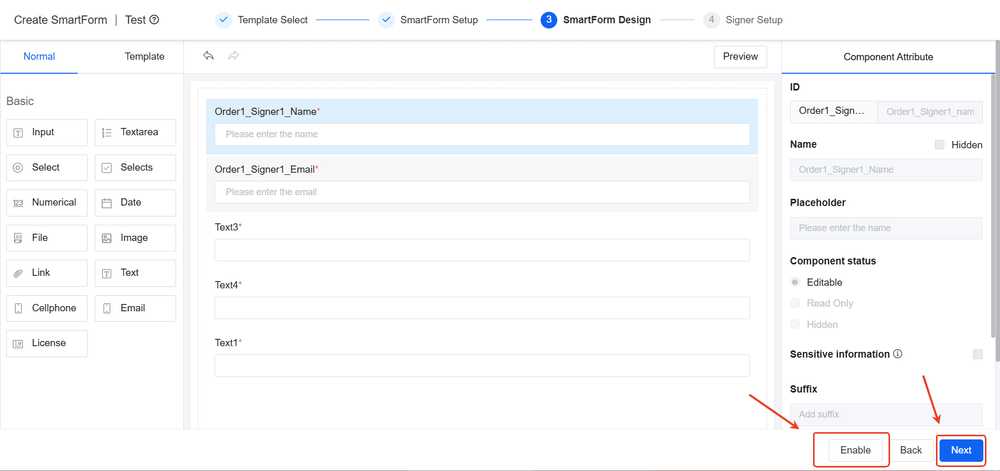
Note:
Signatory information controls and template controls cannot be deleted.
-
If there is no need to set the signatory information, you can directly click the “Enable” button to enable the smart form; if you need to set the signatory information, click the “Next” button to continue.
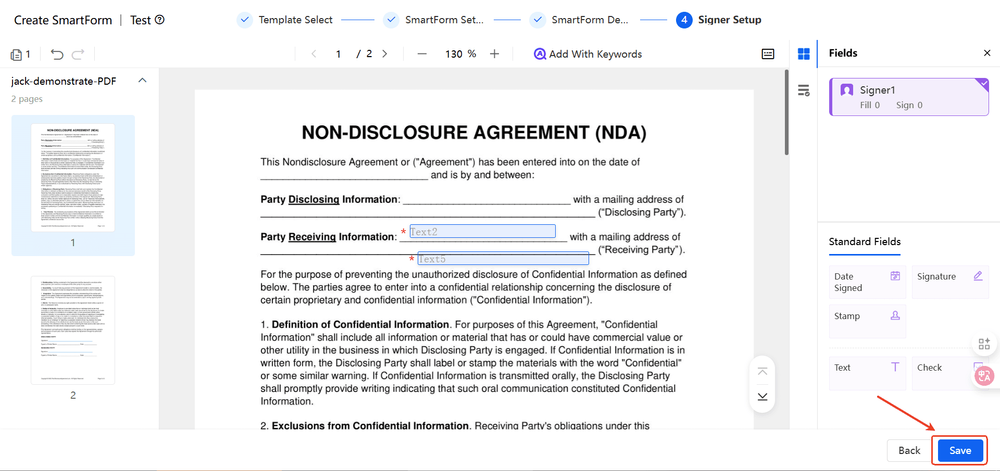
Signatory Settings
-
Add signatory controls and fill-in fields to the document, and assign the signatory.
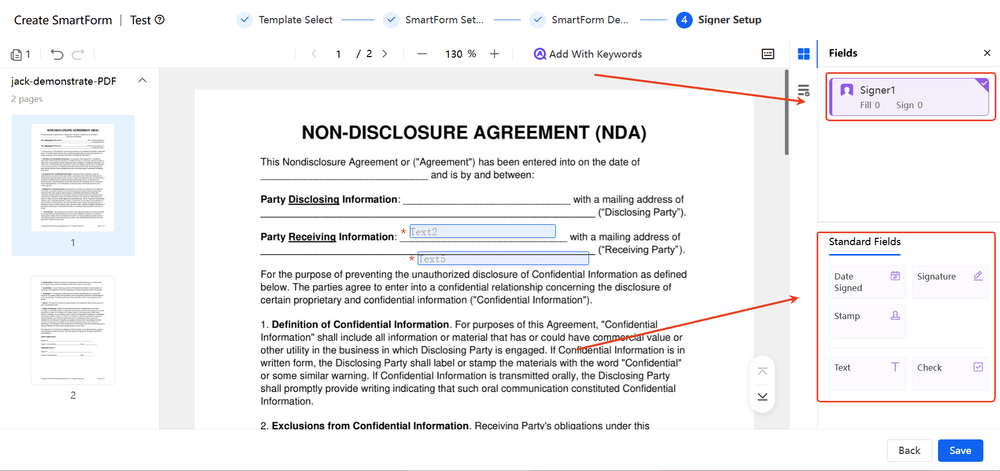
-
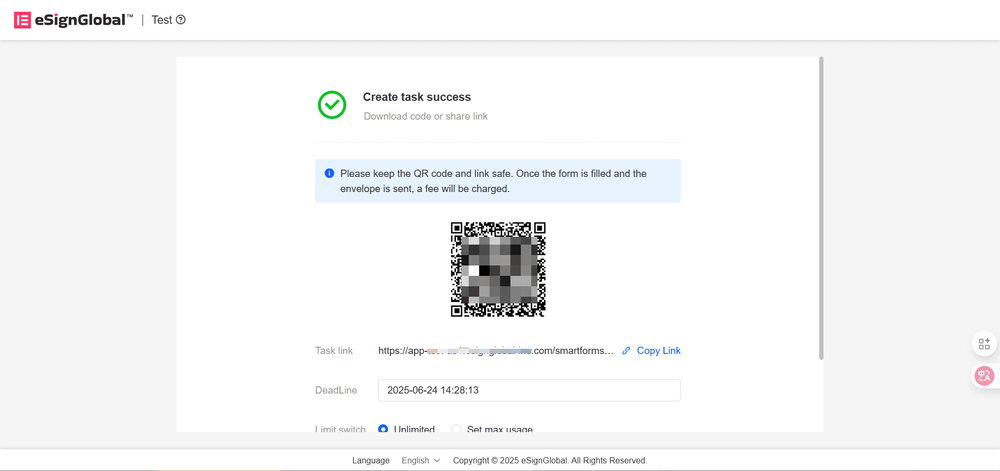
Click the “Save” button to save and enable the smart form.
-
After successful enablement, you can set the deadline and the maximum number of collections. After completing the settings, you can provide the QR code or link to the form filler.