Service Center
Batch Send Envelopes
Before using the functions in this user manual, you need to understand the batch sending limits corresponding to different versions:
- Trial Version: Does not support batch sending function
- Basic Version: Does not support batch sending function
- Professional Version: Supports batch sending function
eSignGlobal provides users with batch envelope initiation services. When faced with the need to send the same or personally differentiated signing documents to a large number of signers, you can create envelopes in batches by directly uploading a CSV file or manually entering data in the page table.
Step 1: Install the Batch Send Envelope Plugin
-
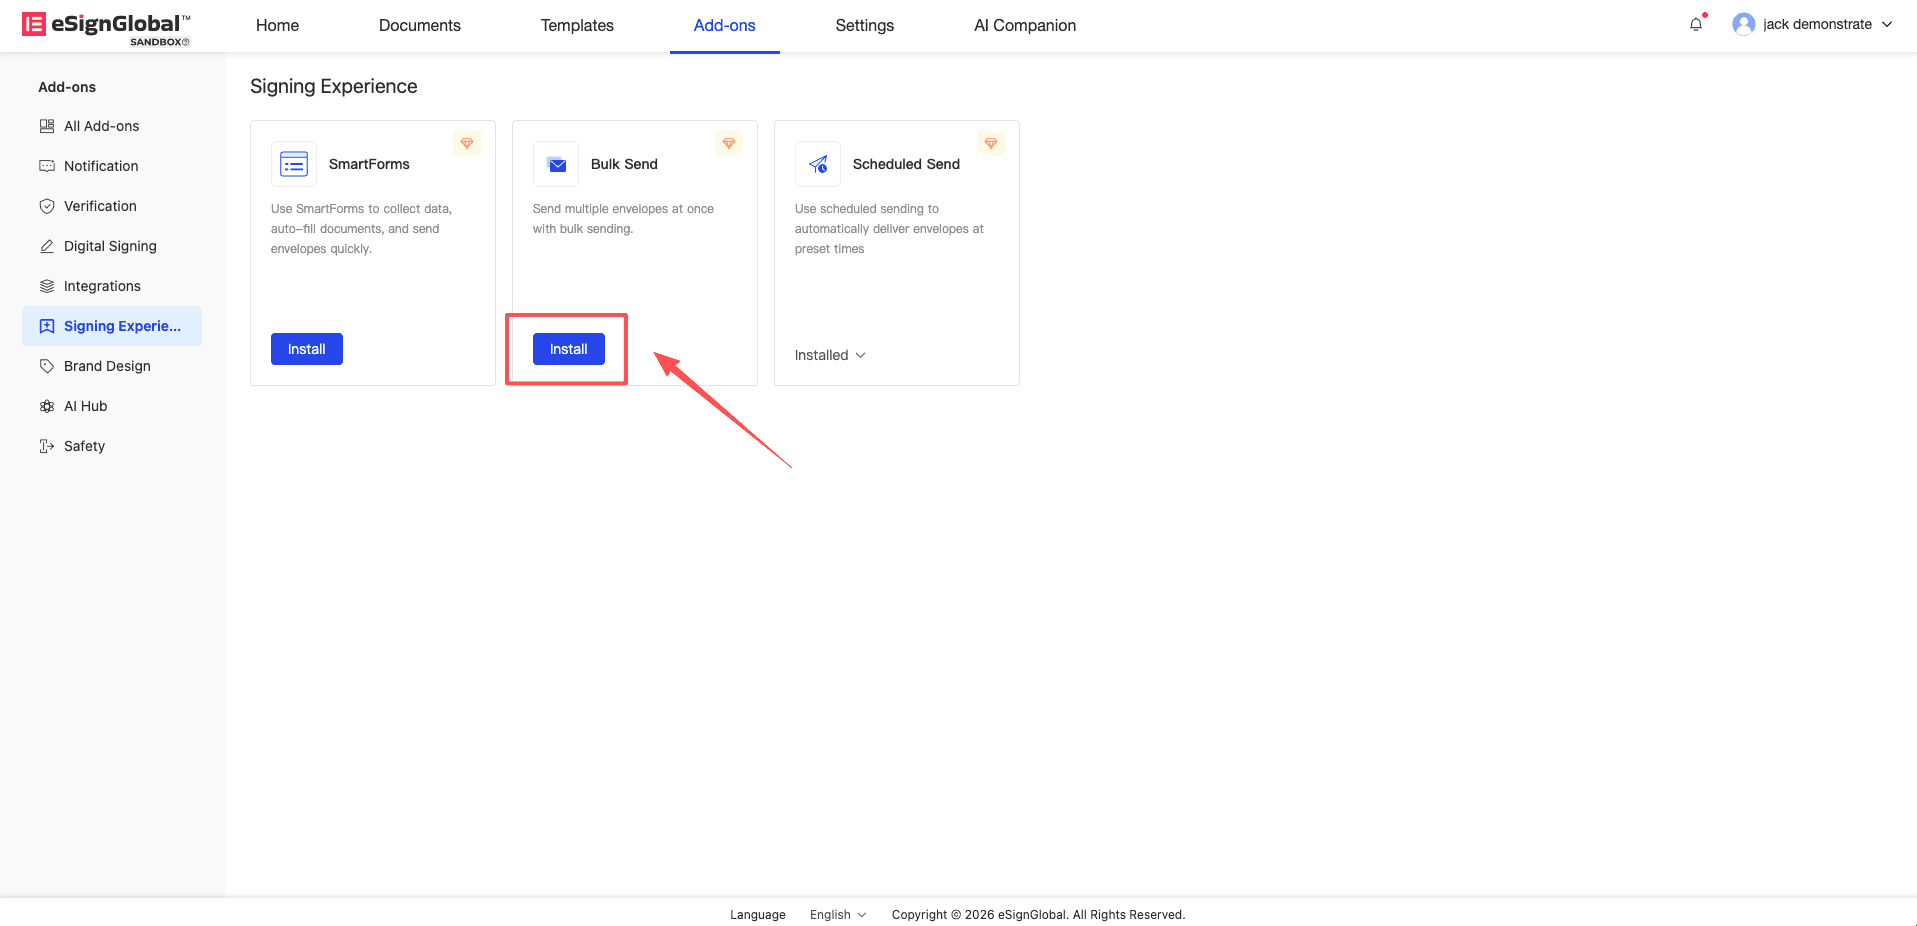
If you are using the batch initiation function for the first time, you need to find the batch send envelope plugin on the plugin application page and click [Install].
Step 2: Initiate and Set Up a Batch Sending Task
-
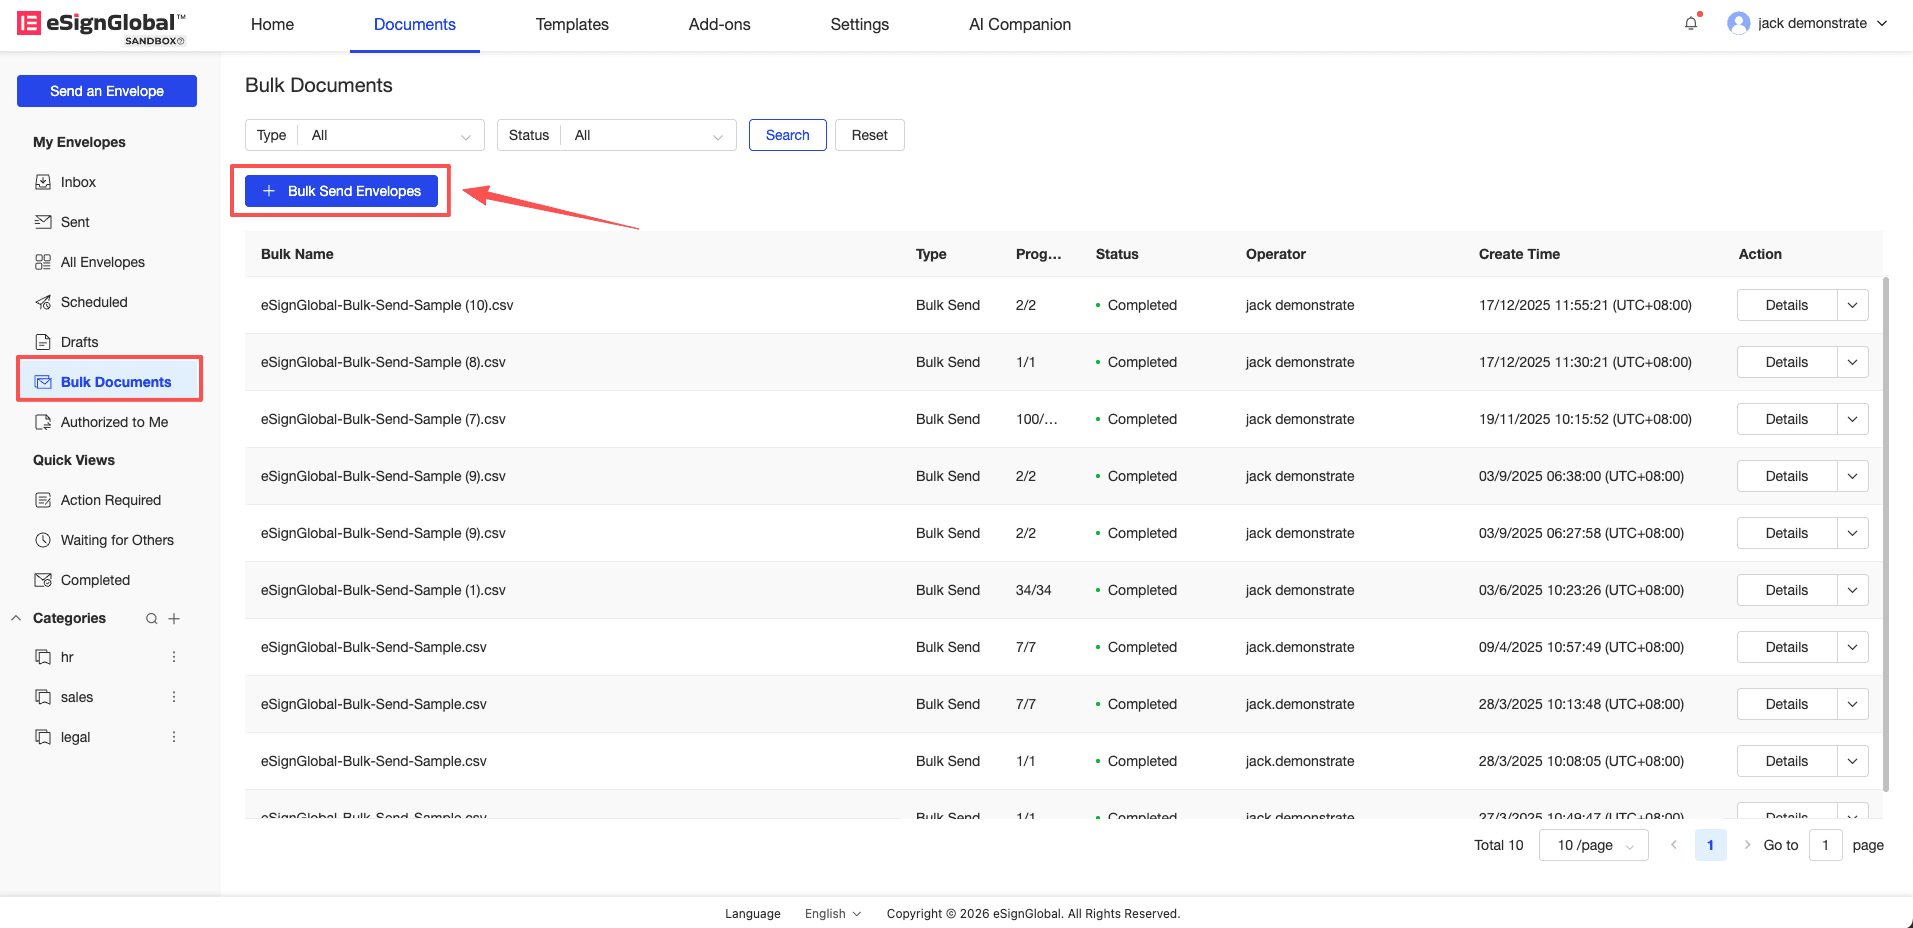
Enter the batch envelope list and click [Batch Send Envelope].
-
Upload the file to be signed or use a preset template to initiate the envelope.

-
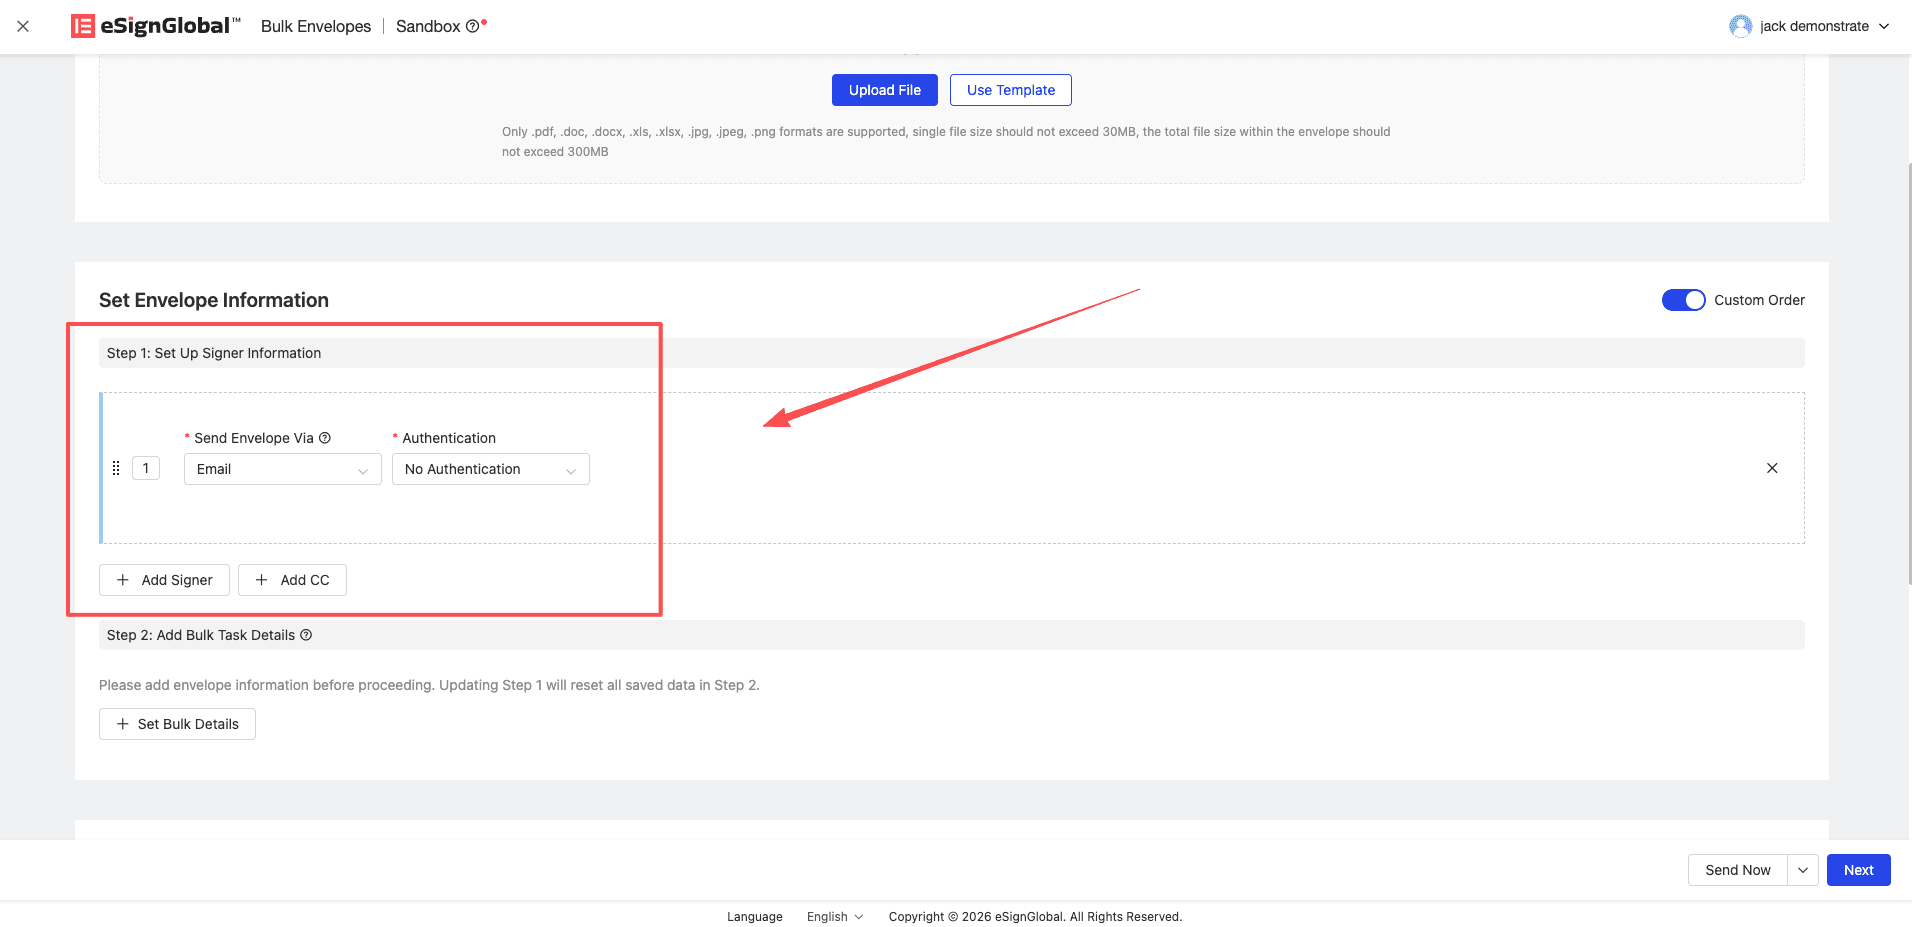
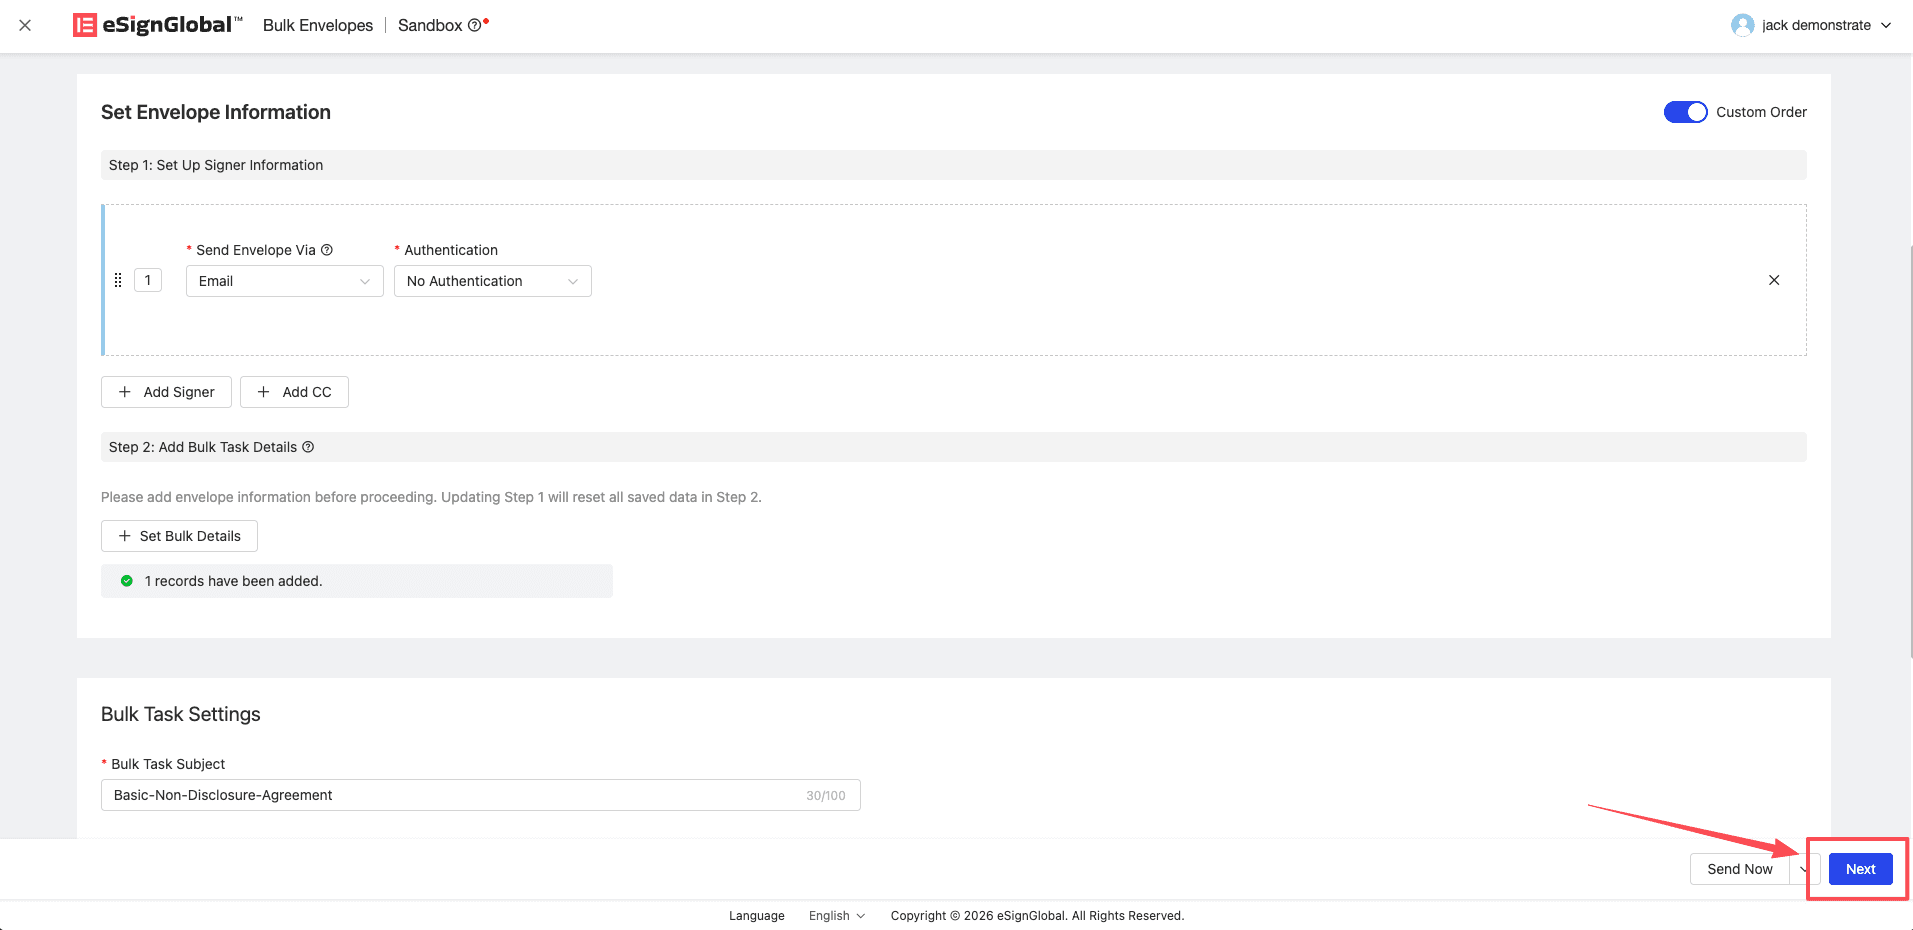
Set the signer and CC information, and select the notification method and authentication method.
-
Click the Set Batch Task Information button.
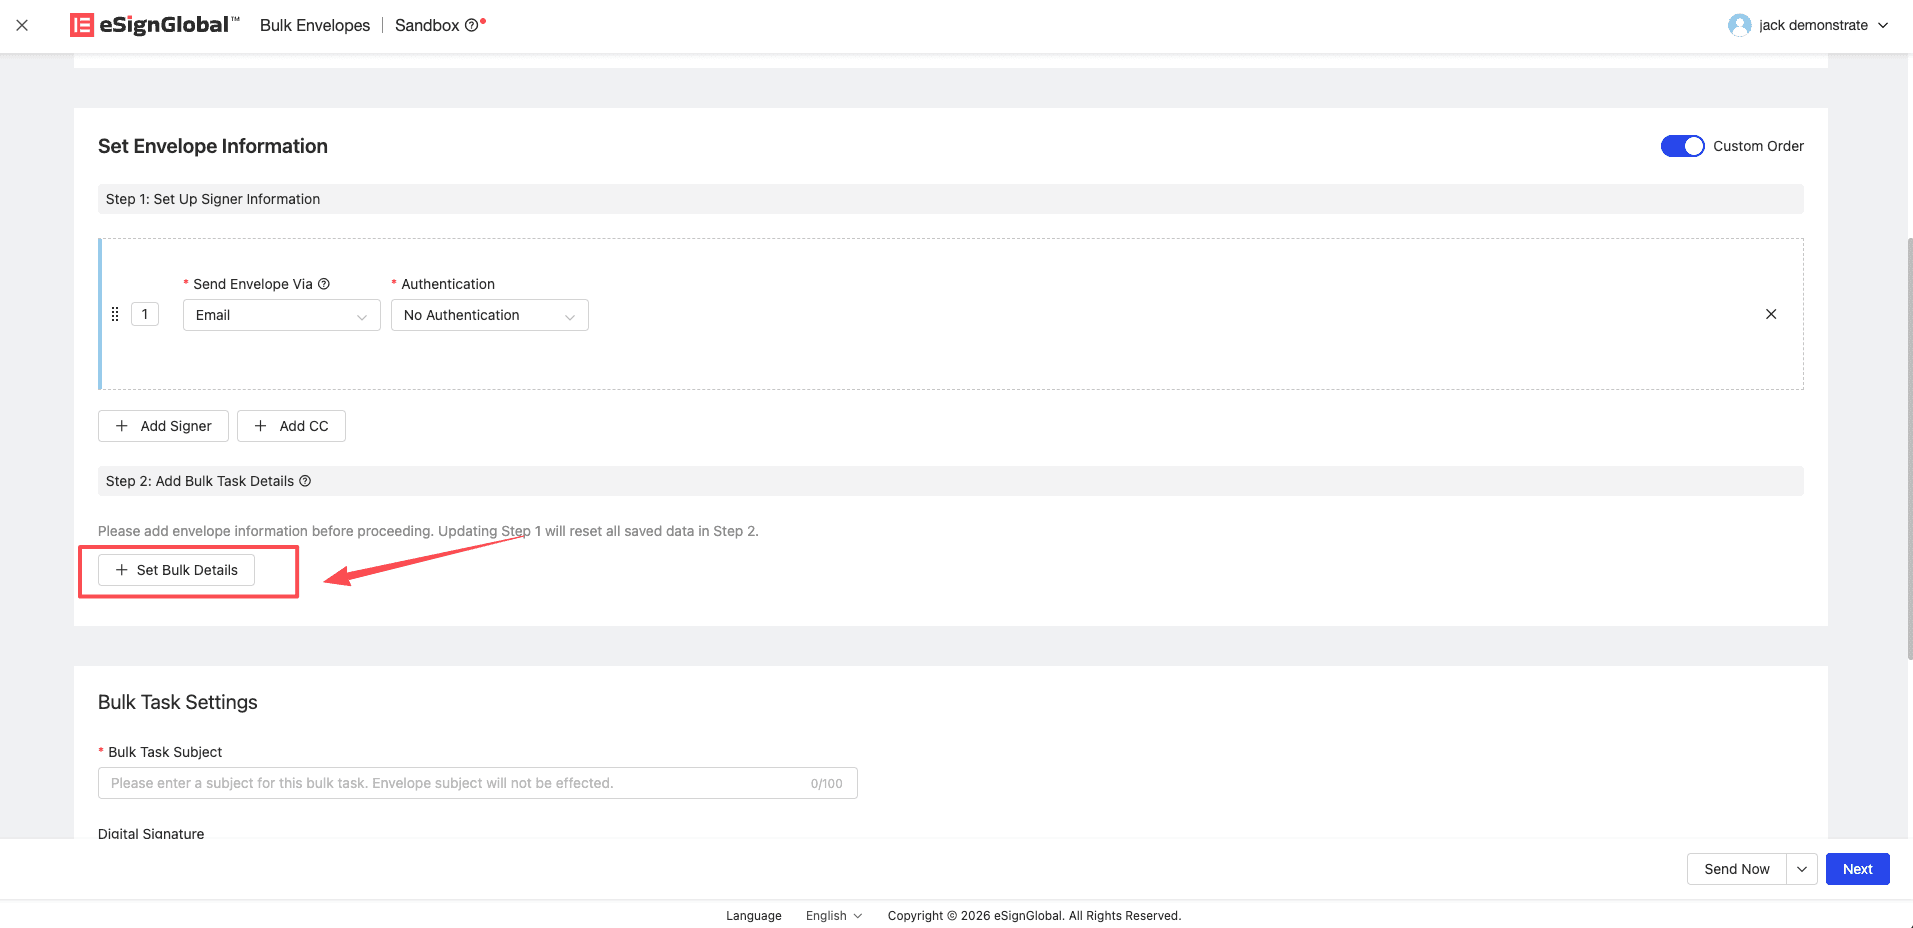
Step 3: Enter Data by Manually Adding
Note:
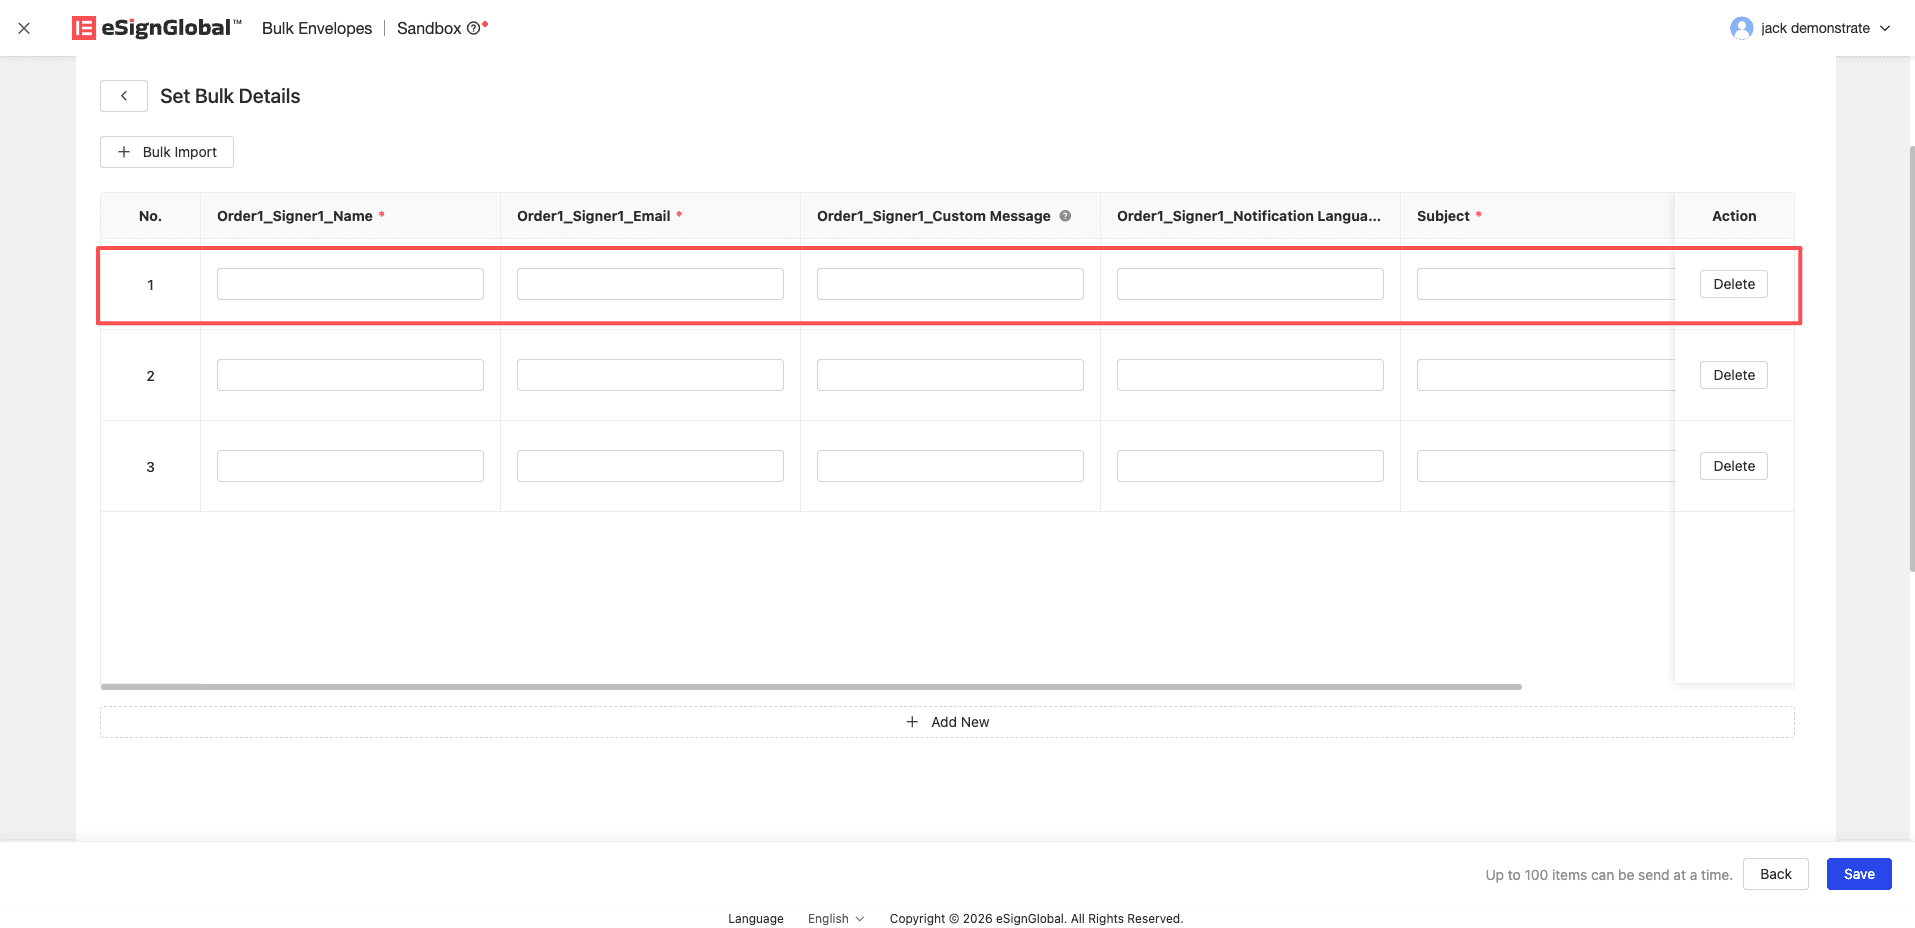
- Suitable for initiating small batches of data. You can add the envelope data information to be initiated one by one in the form of a table on the page.
-
In the table area of the batch task details, click the Add button to continue adding blank rows, or operate the delete icon at the end of each row to delete the specified row.
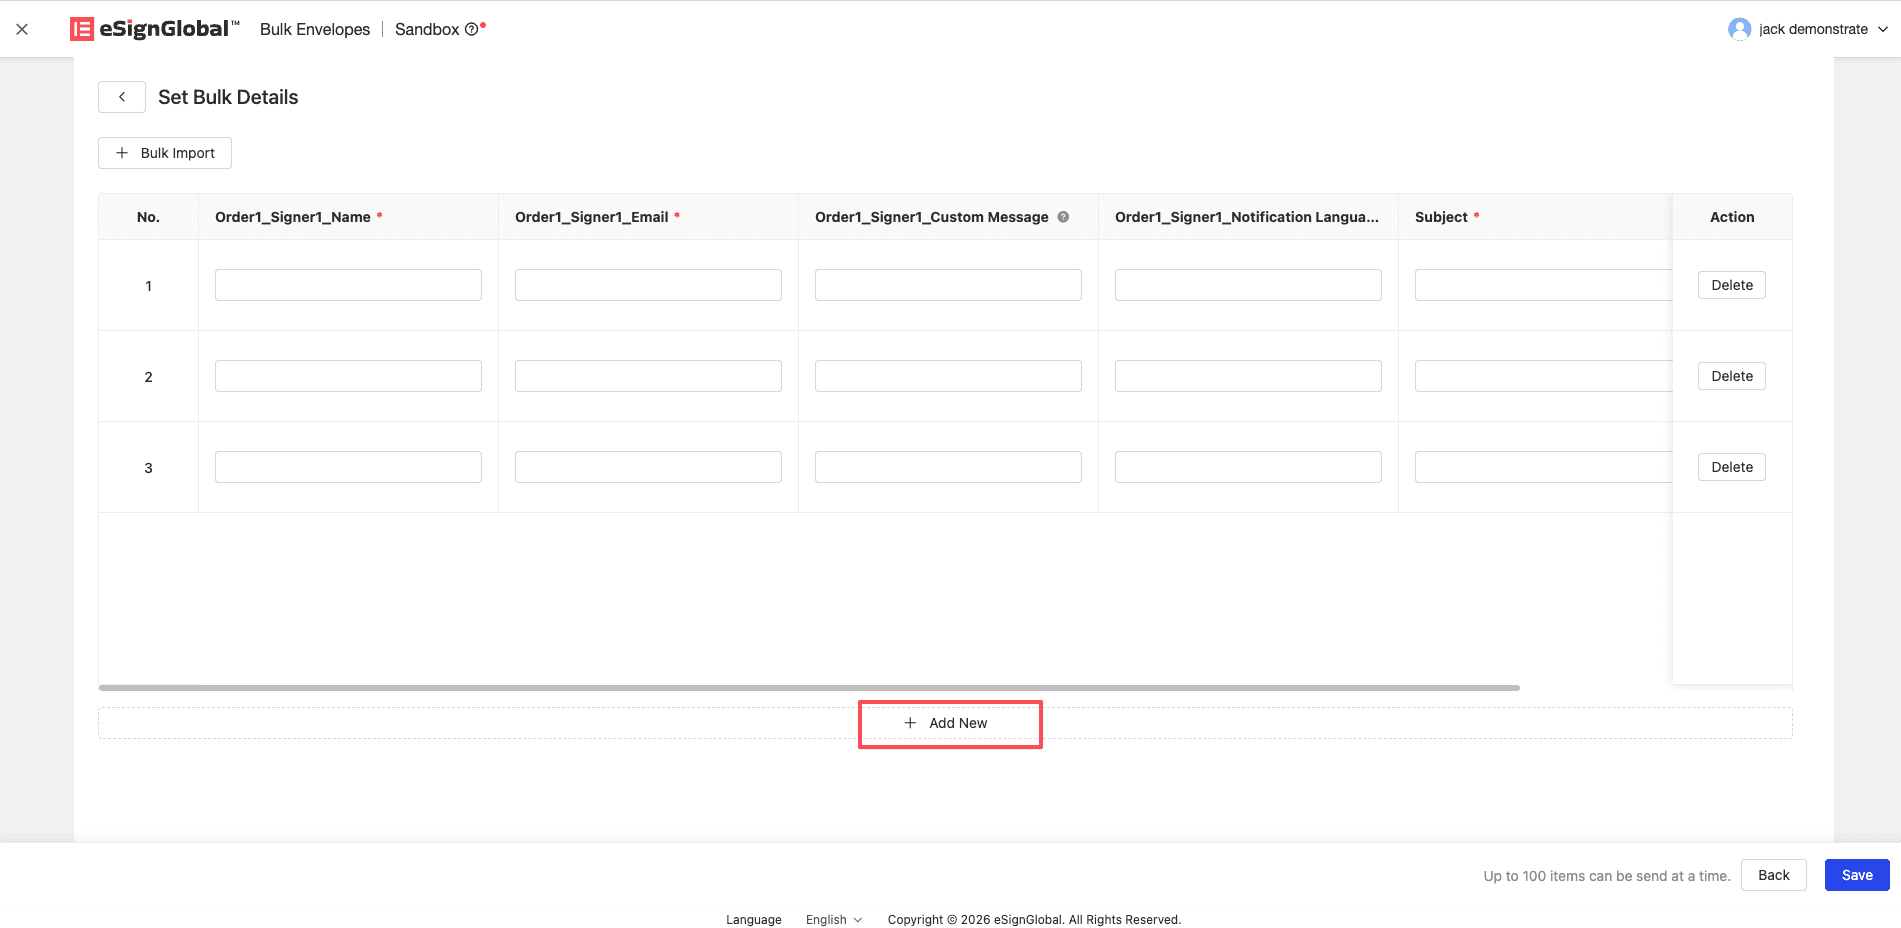
-
Enter data row by row in the cells according to the table header information (columns with asterisks are required). One row of data represents one envelope sent. The entered information in the table includes: signer information, CC information, and the initiator’s fill-in controls in the file template. When the content format does not meet the requirements (such as incorrect email format or exceeding the word limit), the text box corresponding to the exception will be highlighted in red immediately.
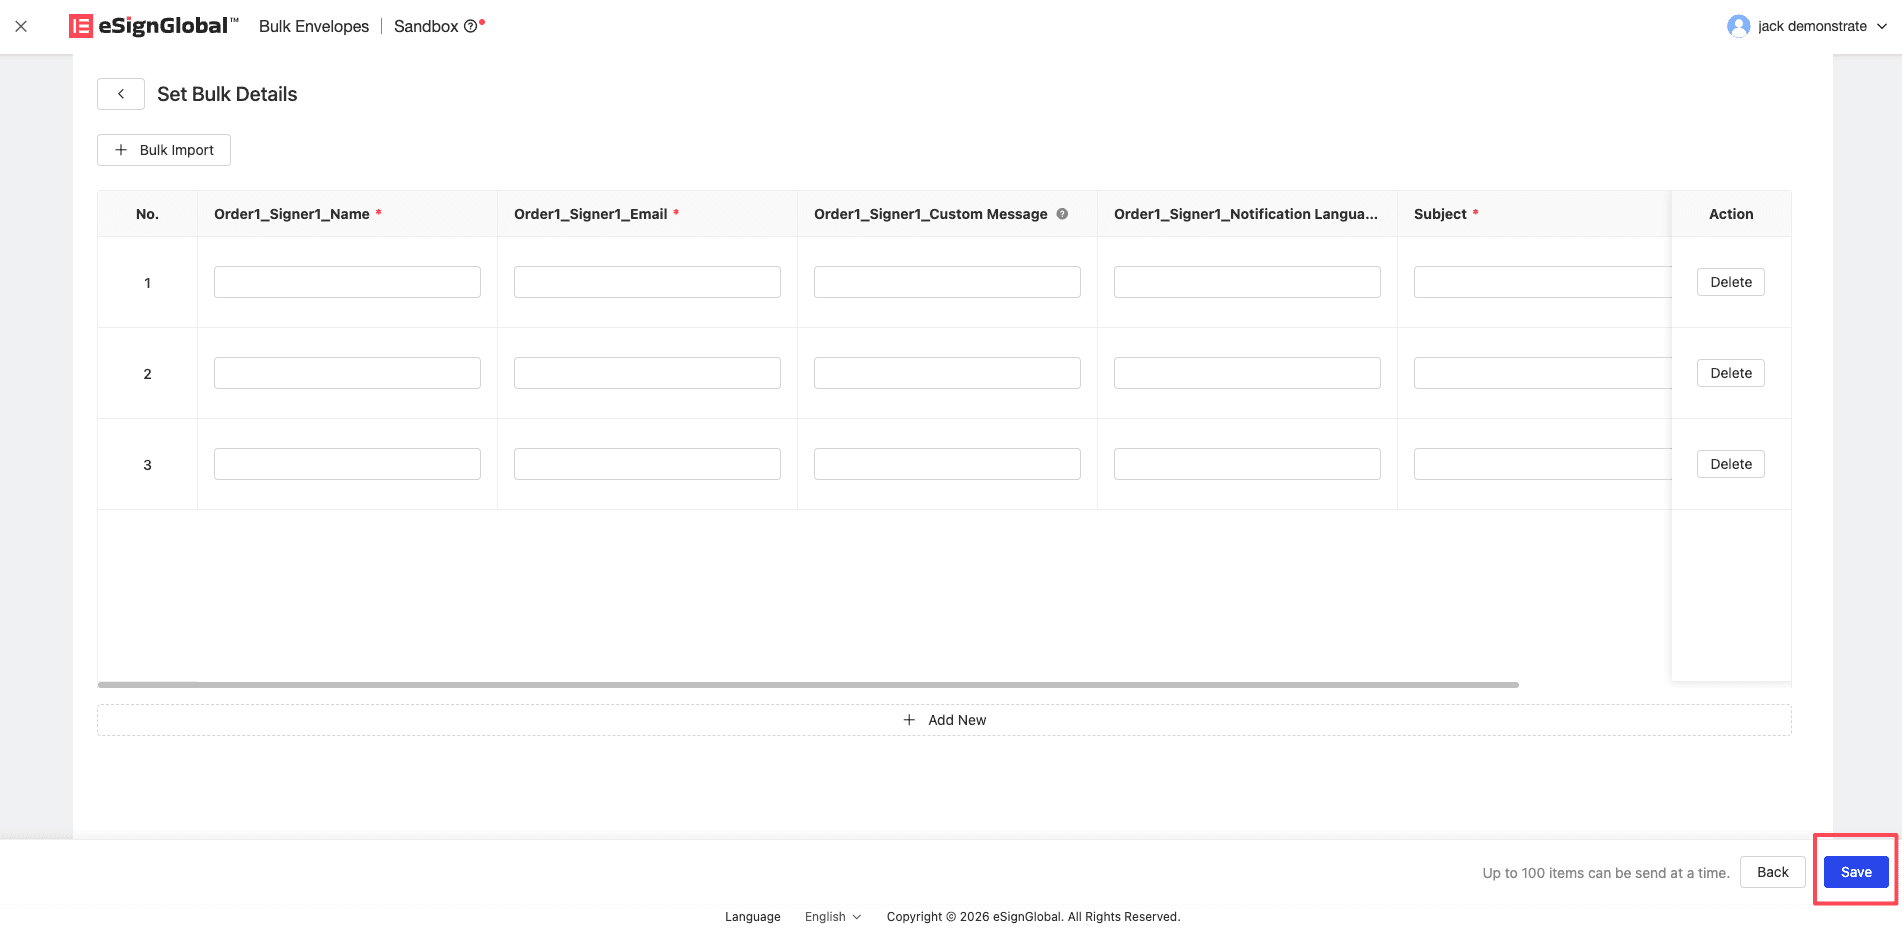
-
After confirming that all required data has been filled in and there are no red error messages, click the Save button below.
Step 4: Enter Data by Importing a CSV File
Note:
- Suitable for scenarios where a large number of envelopes need to be initiated.
- Each batch task only supports uploading one CSV file. Re-uploading a new CSV file will directly overwrite all existing data on the current system page.
-
On the batch task details page, click the Batch Import button.
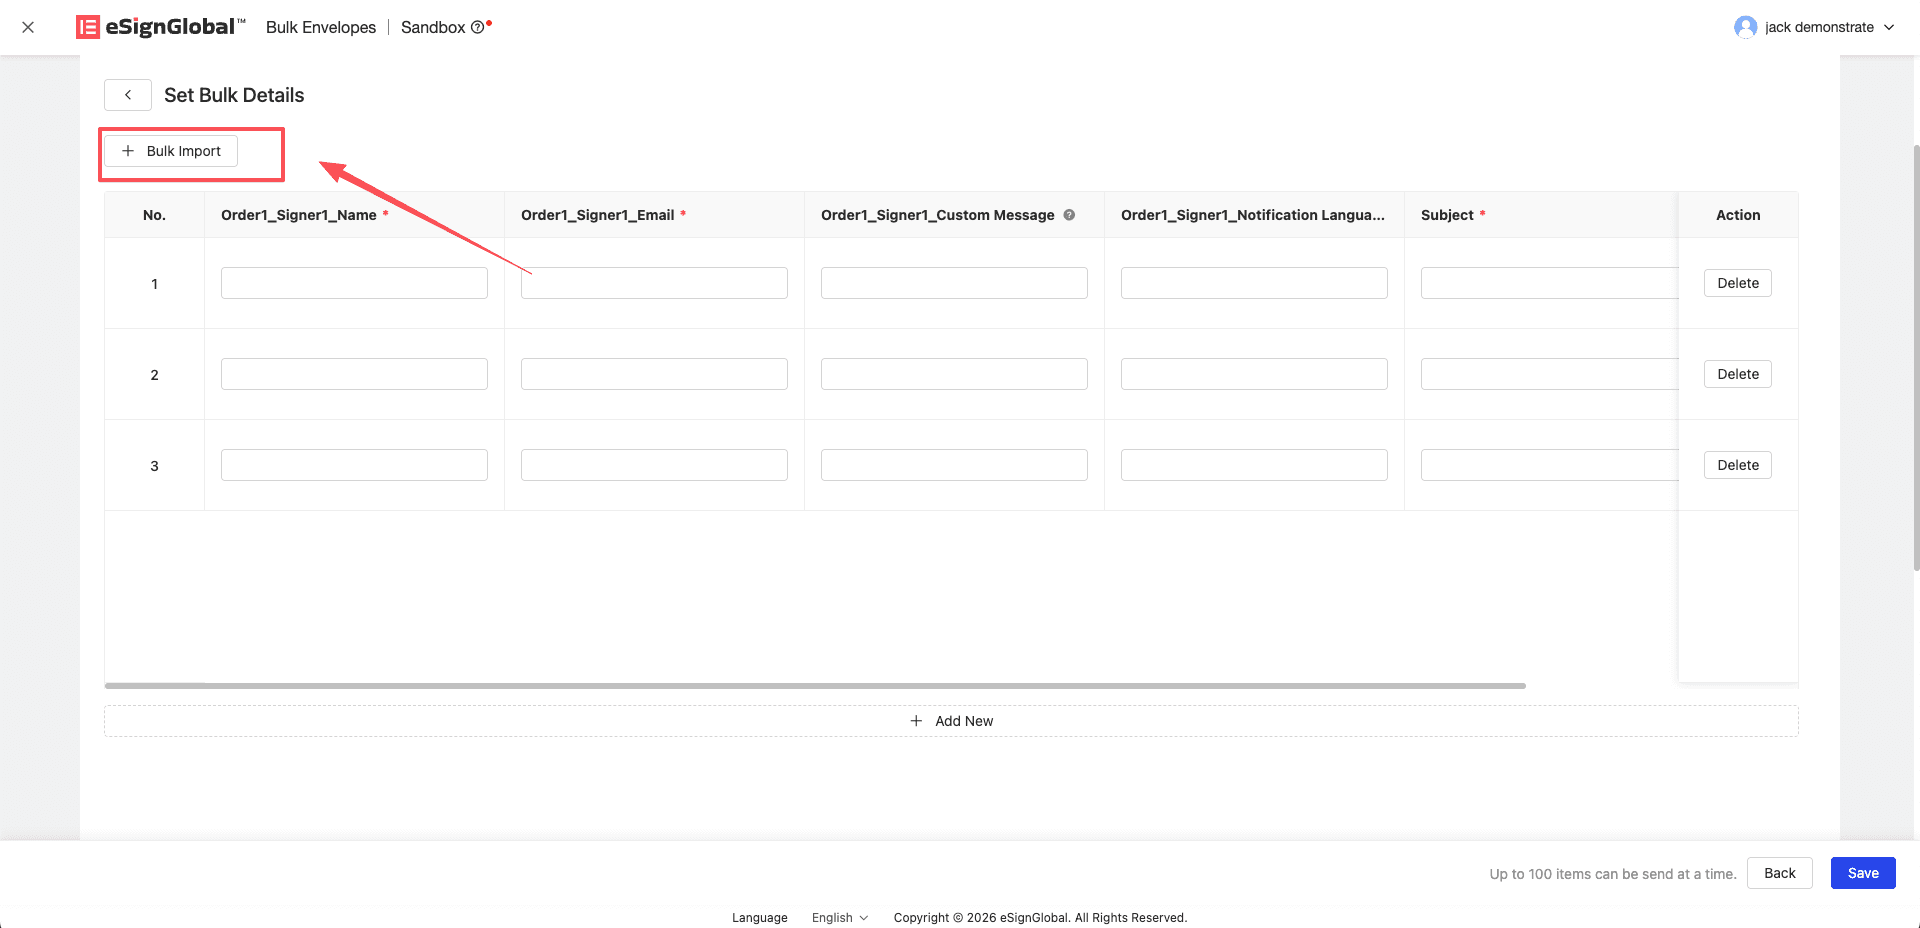
-
It is recommended that you first click the Download Sample CSV button to download the standard template file. The downloaded CSV data columns include: signer information, CC recipient information, and the originator’s fill-in controls in the file template, etc., and each row of data in the file corresponds to an envelope that is about to be sent. After completing the data locally as required, click Upload CSV to upload the file content.
-
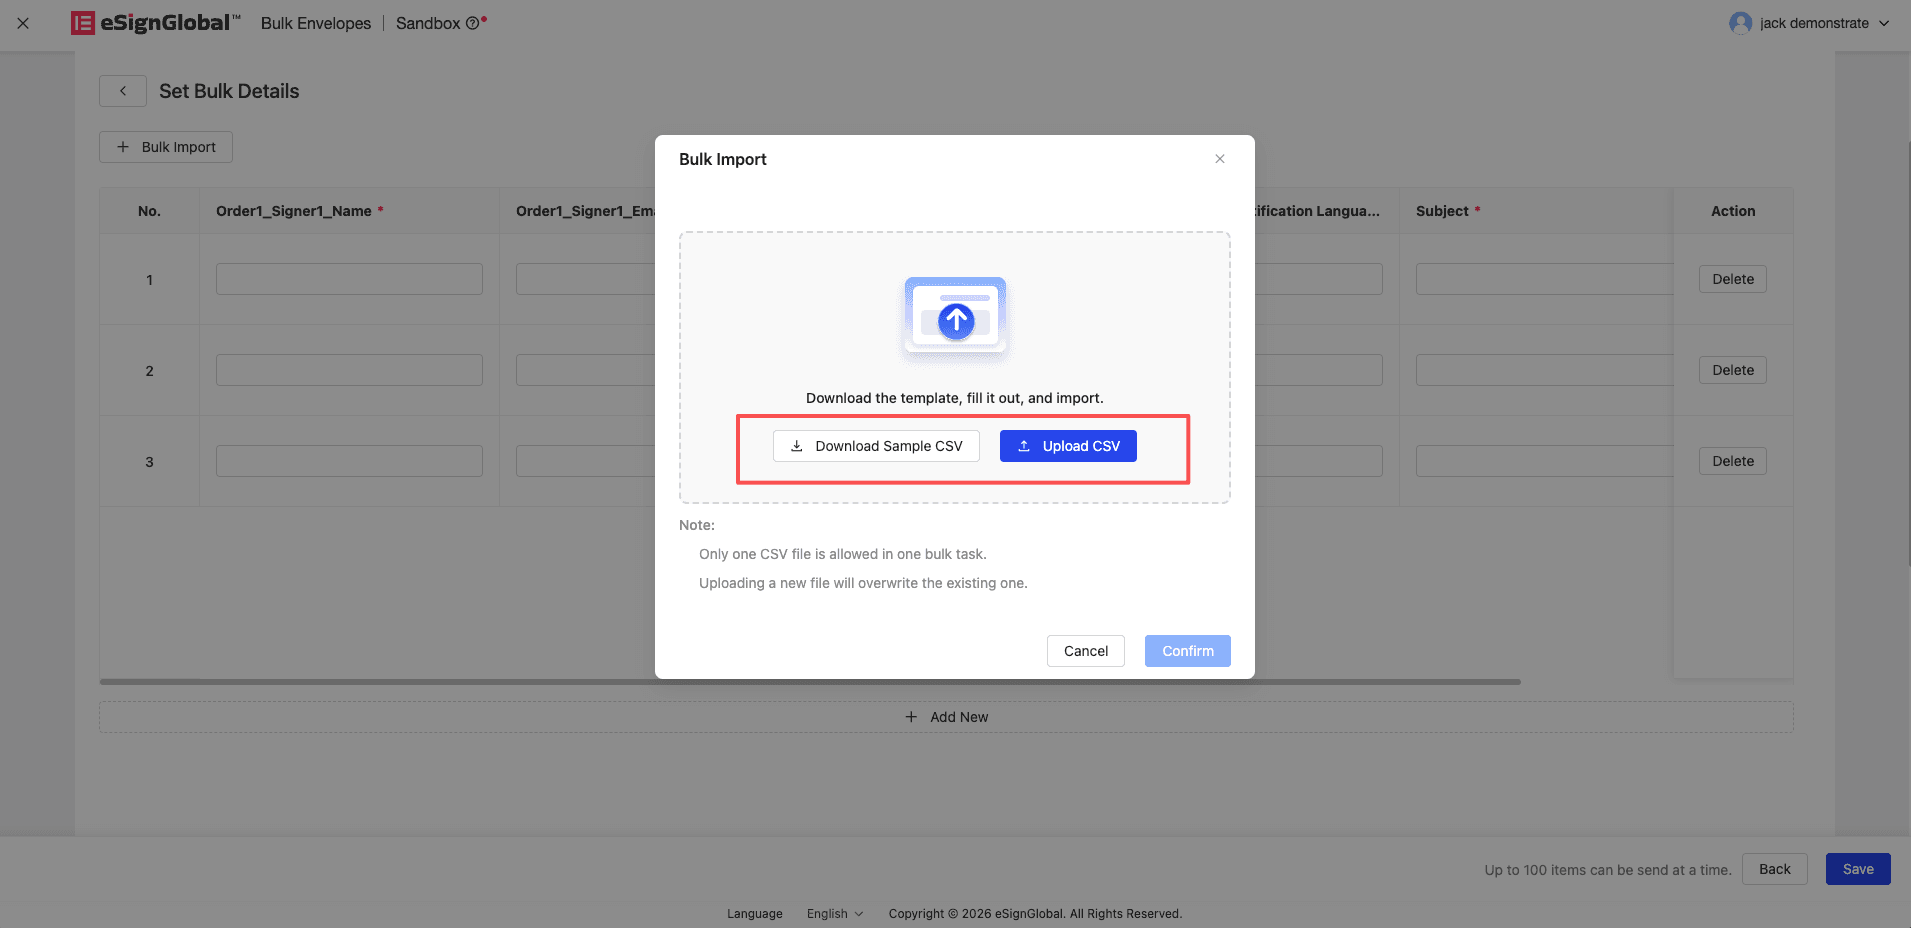
If the CSV header you uploaded does not match the name required by the system, the system will pop up an error window and display all unmatched header items at once, separated by commas. At this time, it is recommended to download the latest example, modify it, and re-upload it.
-
After successfully uploading the file and clicking Confirm in the pop-up window, the data will be loaded and displayed in the dynamic table. If some cells are marked in red due to format issues, you can directly rewrite them on the web page table, and finally click Save.
Step 5: Complete the sending area settings and send
-
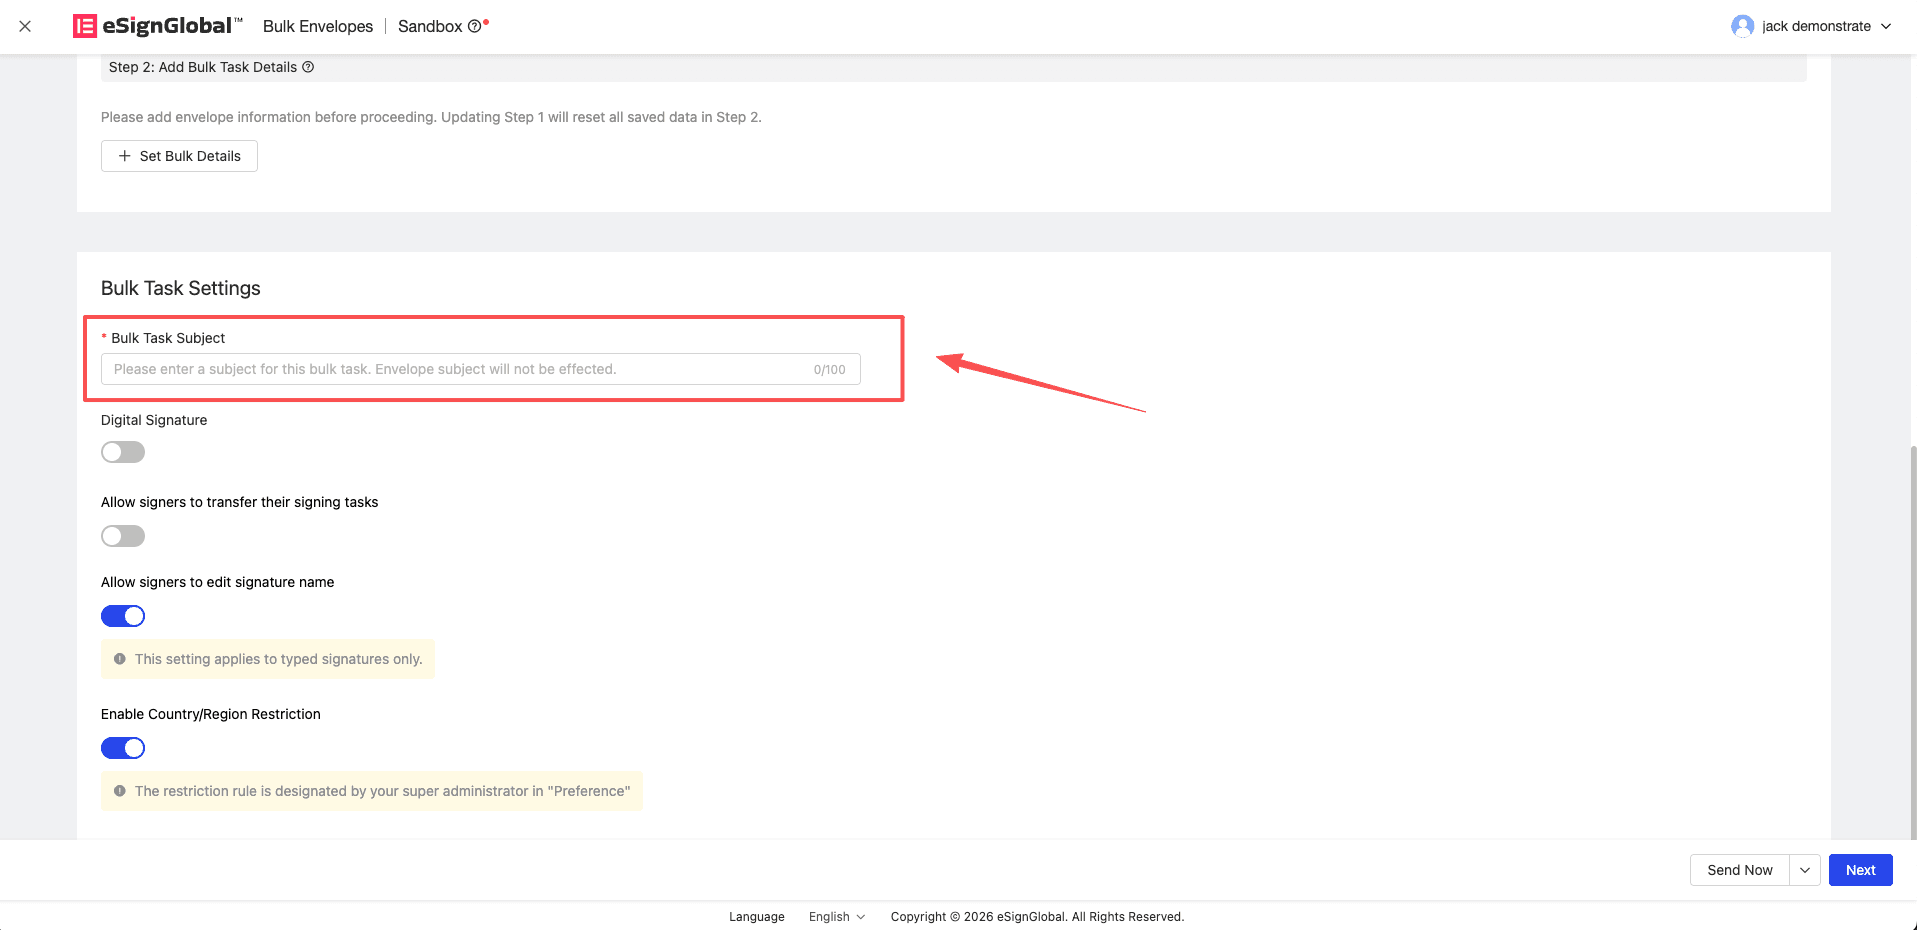
Enter the Batch Task Subject. This subject is used to quickly identify your batch of tasks in the system, and this setting will not affect the subject of each independently sent envelope.
-
After completing the saving of batch details data, click Next.
-
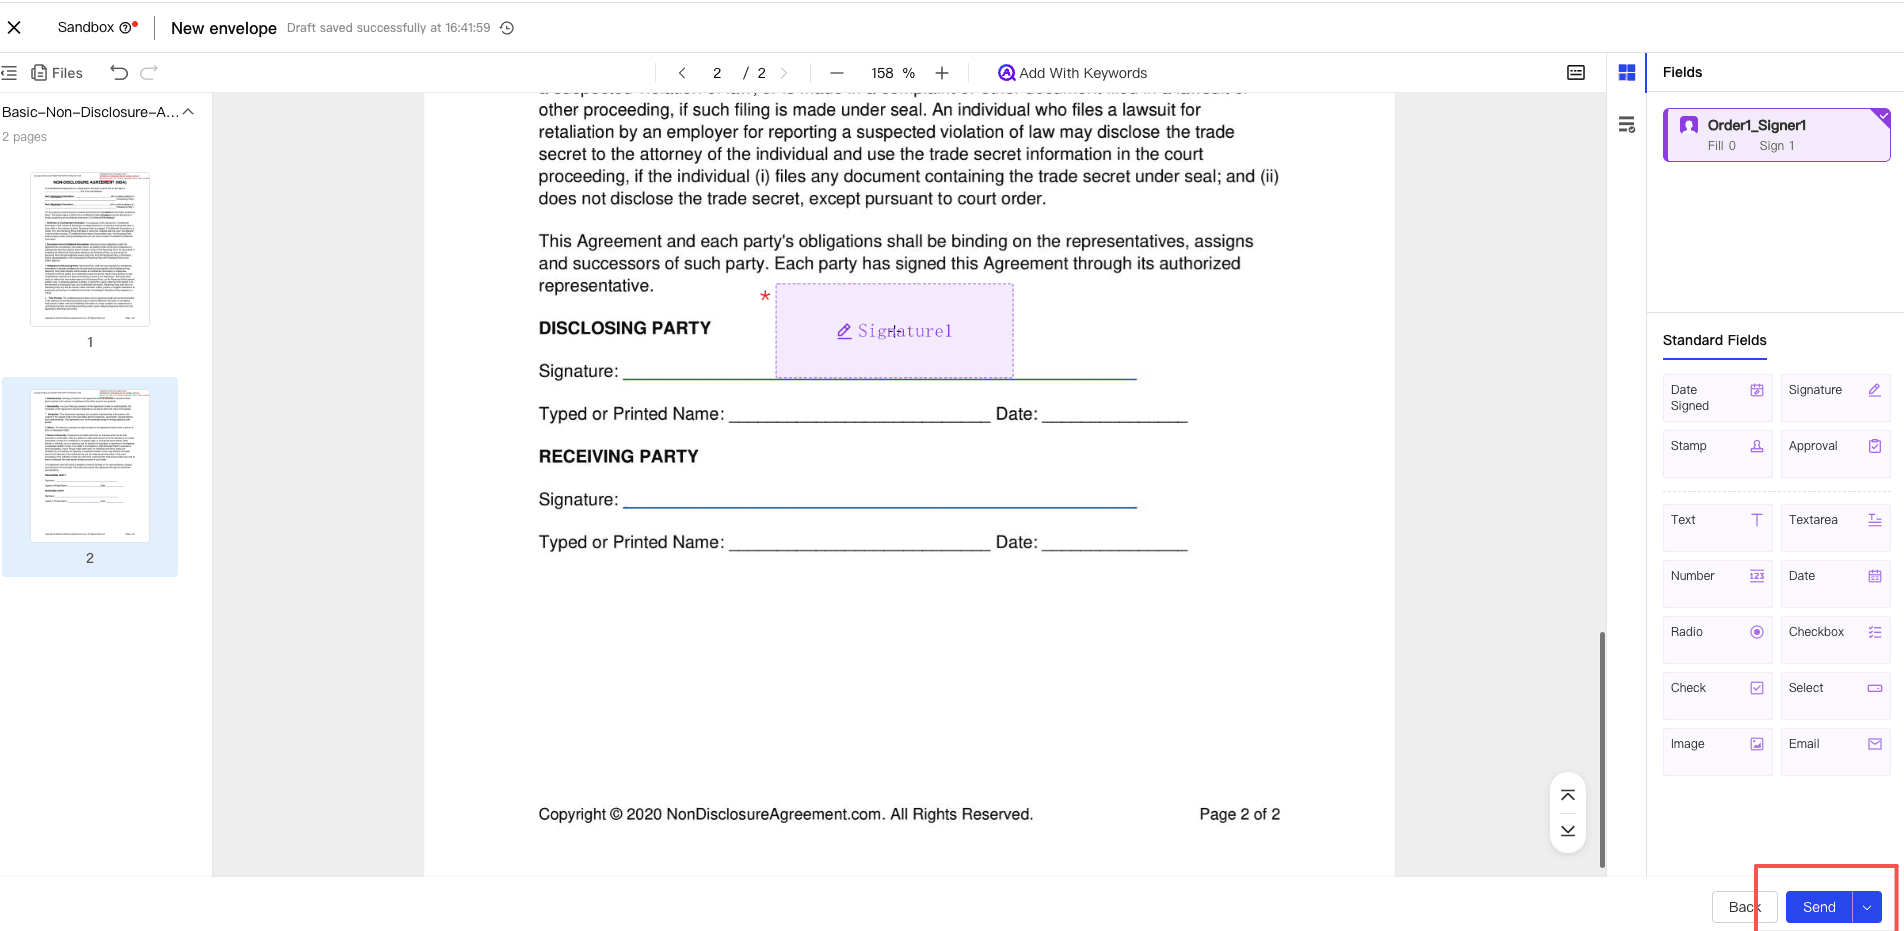
After setting the signing area for the signer, click Send Immediately to complete the batch initiation process.
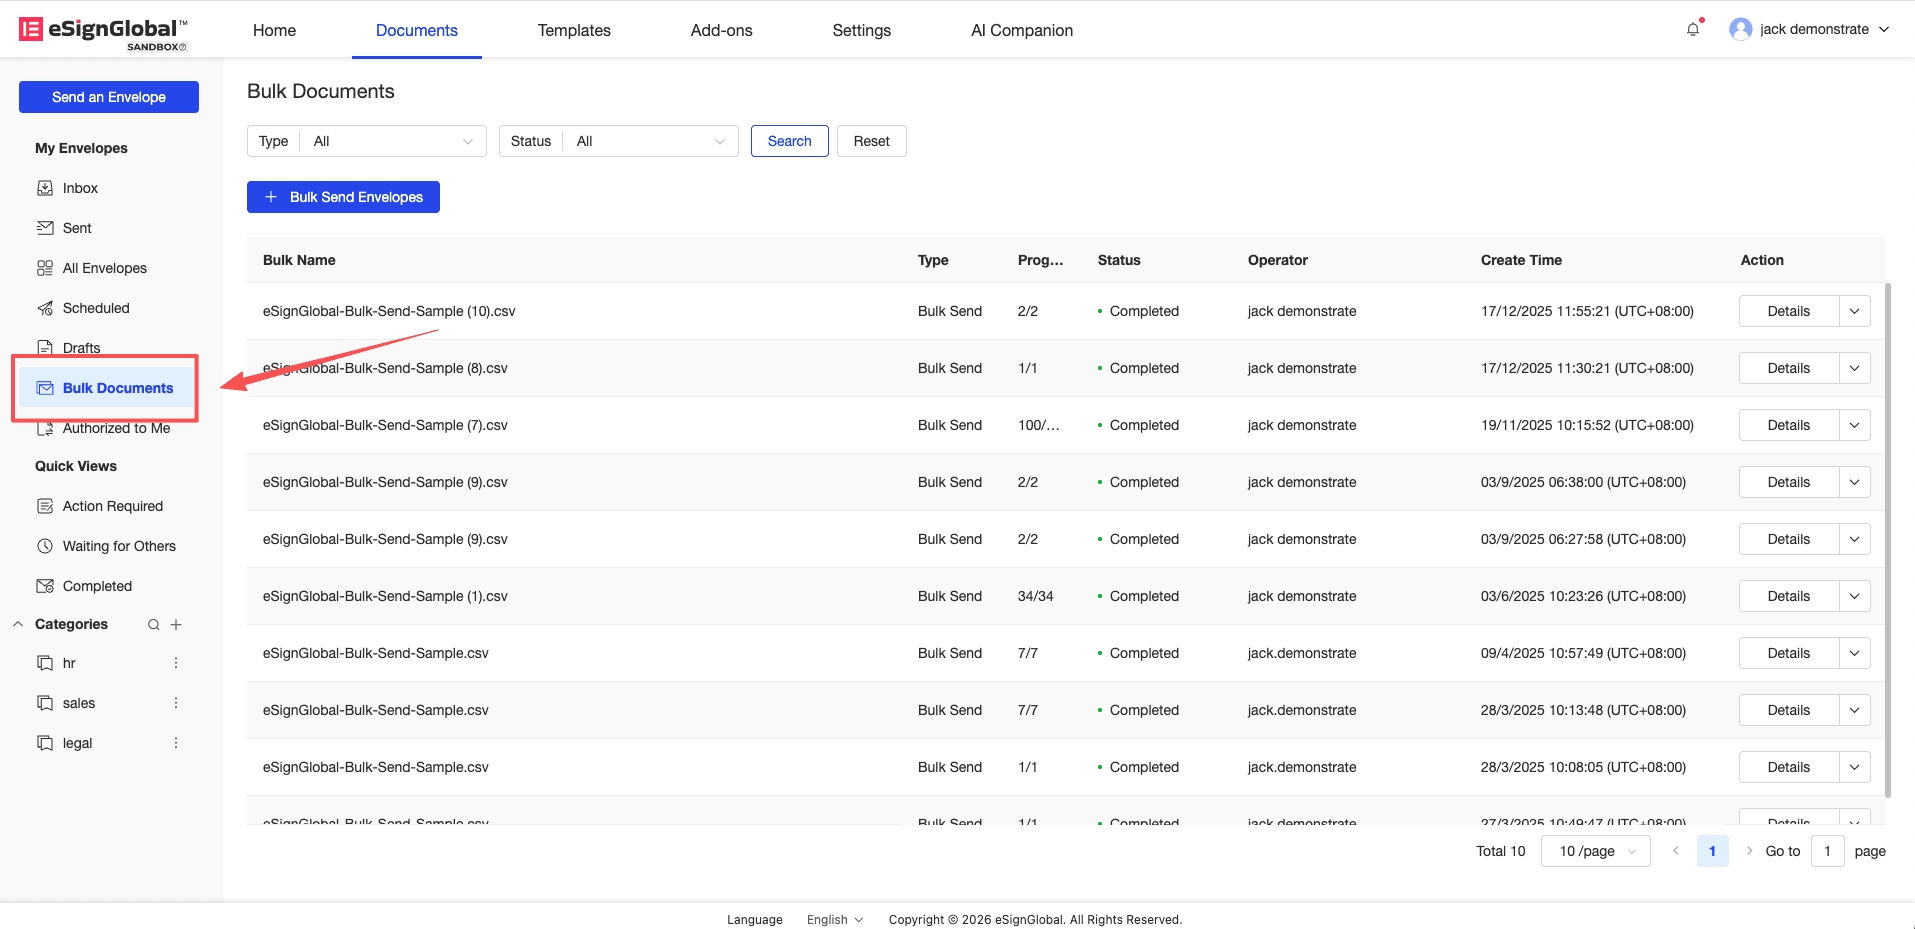
Step 6: View the sending progress and the reason for failure
-
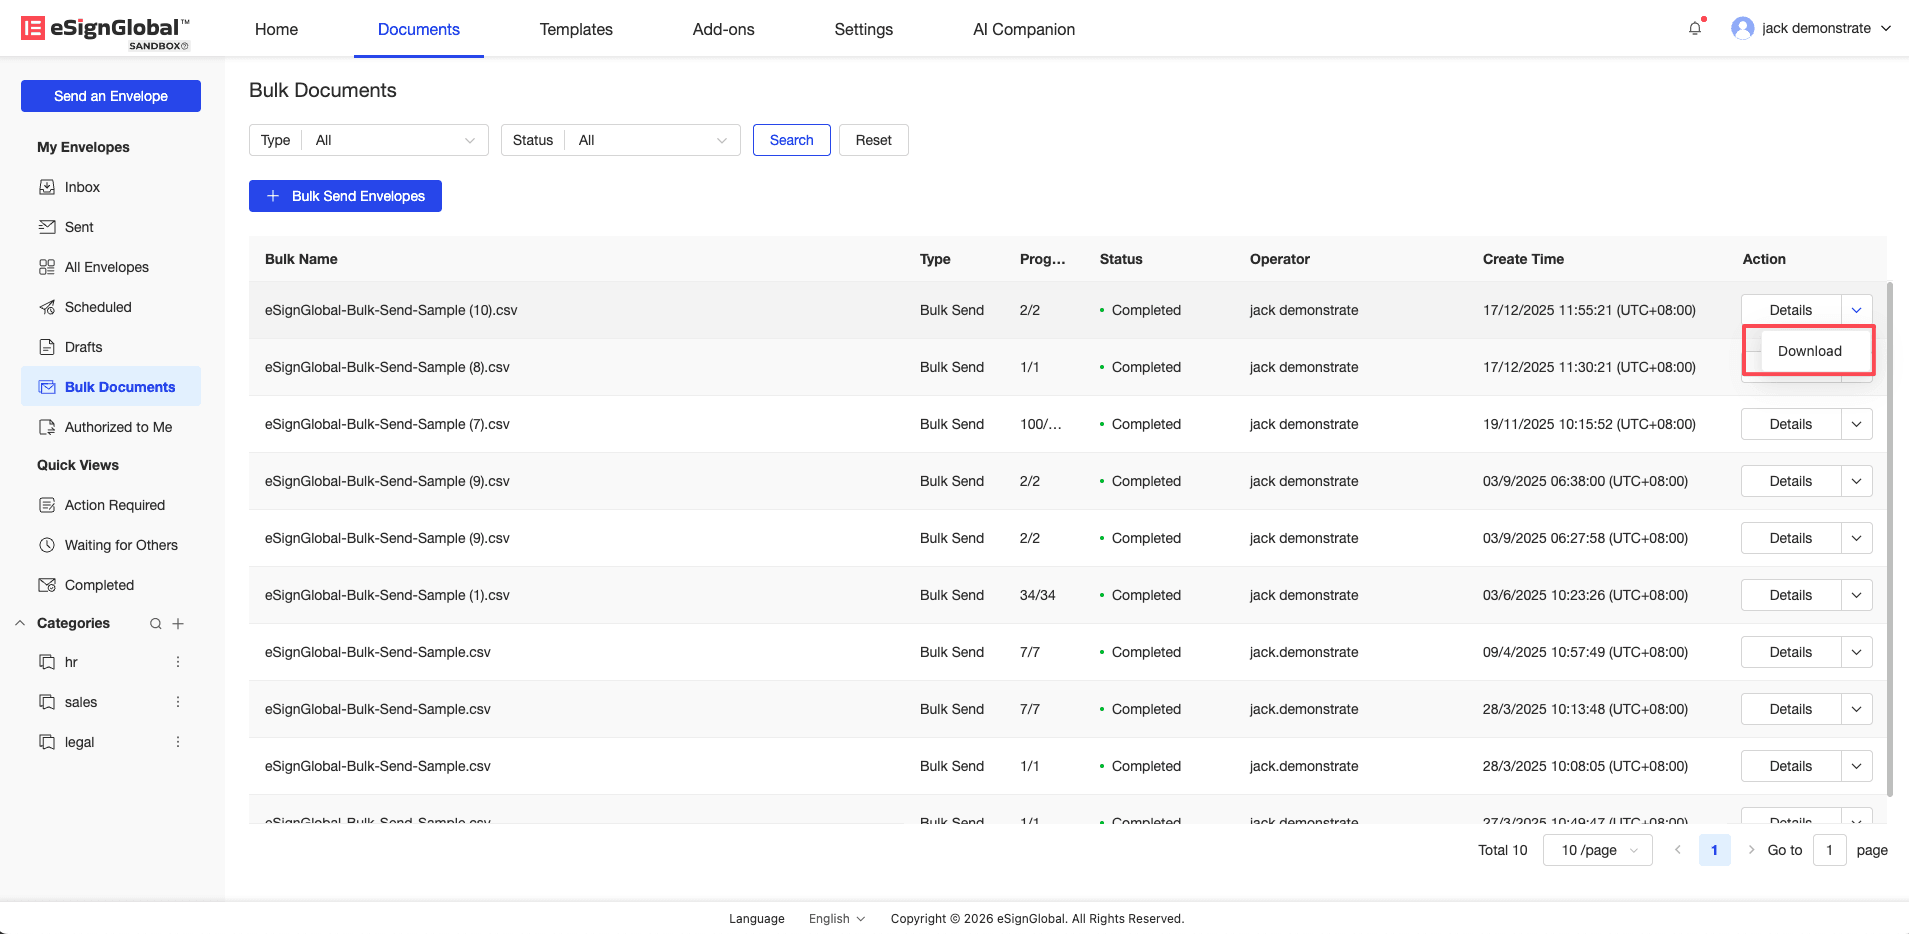
Users can view the sending progress status in the [Batch Files] menu (batch task list) in the left navigation bar.
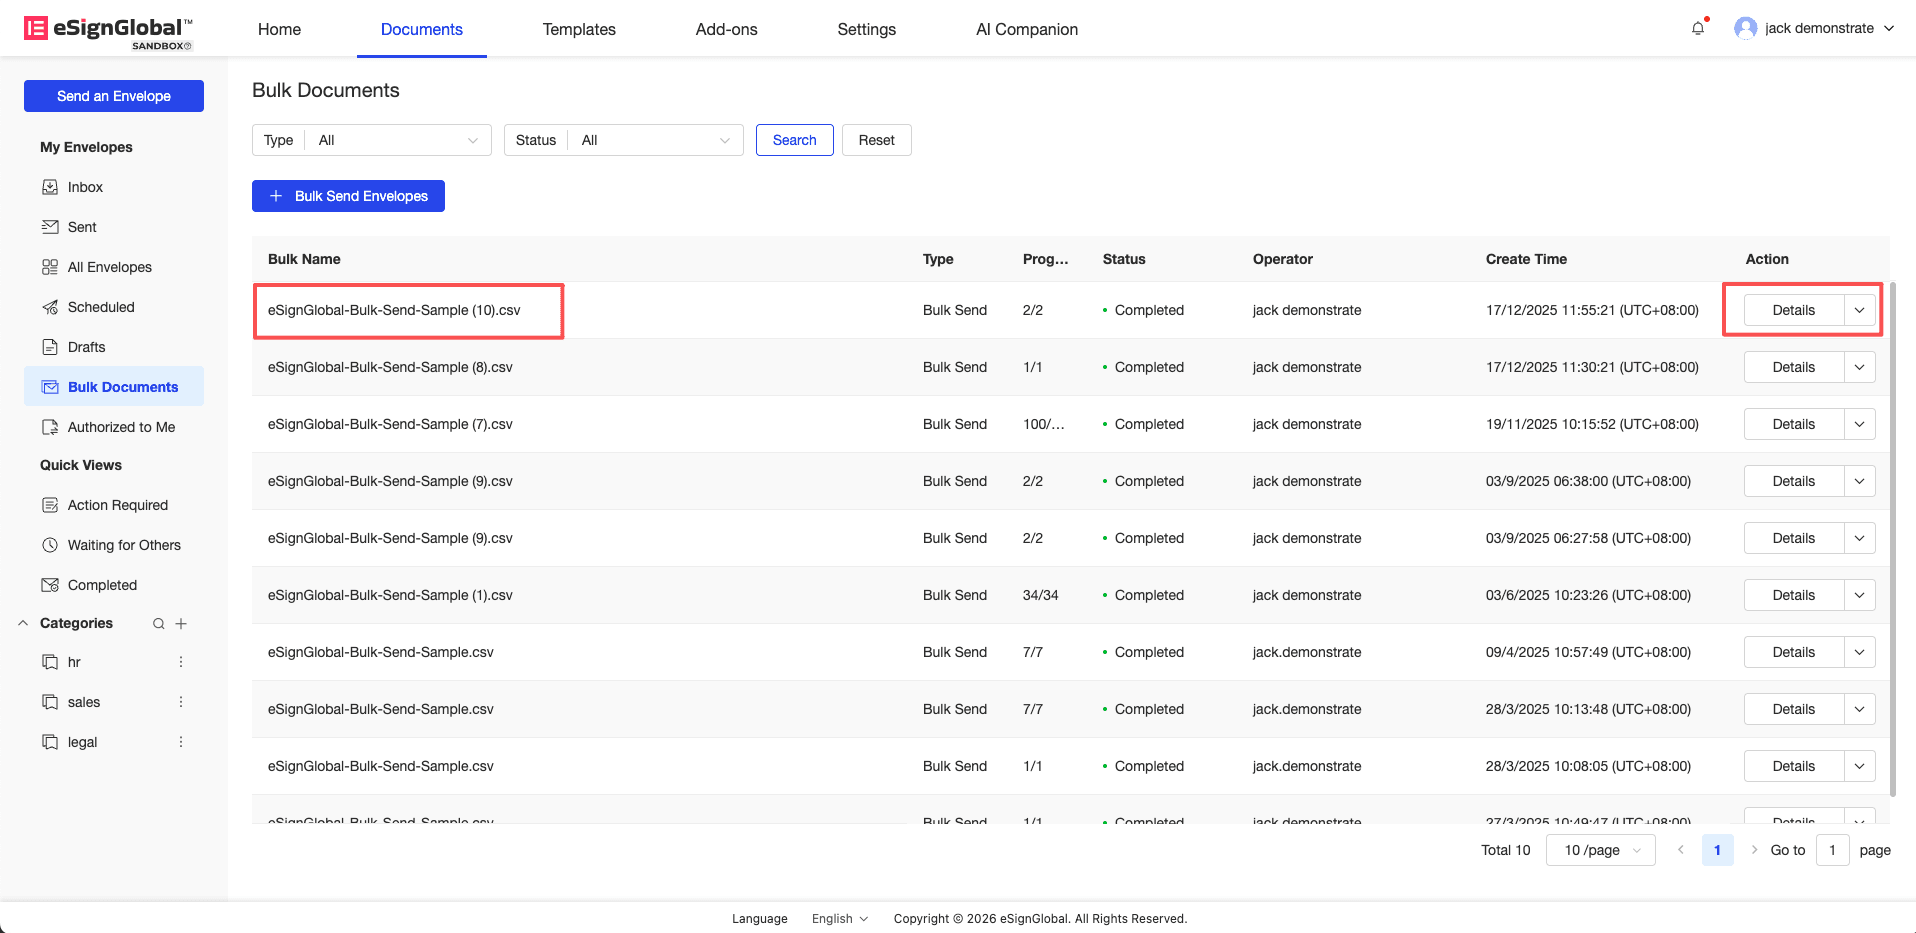
-
You can click the task name corresponding to the target batch, or click the Details button in the operation column to enter the details list page.
-
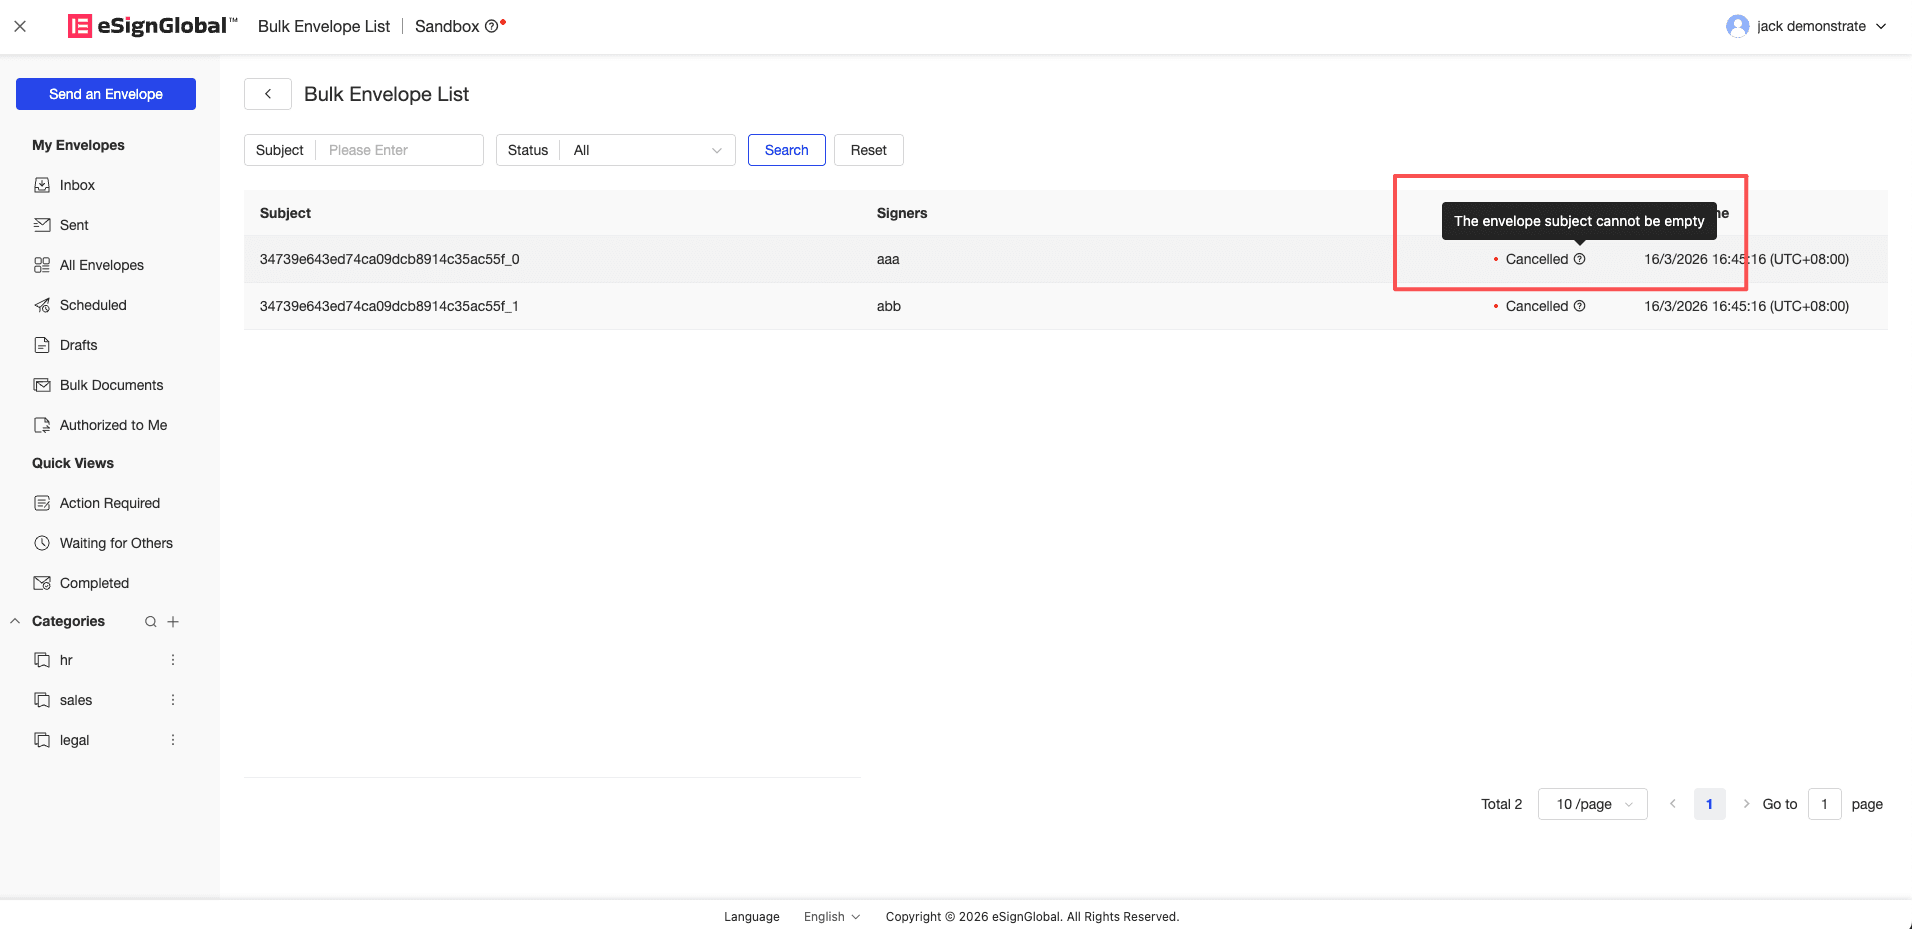
If the status of the envelope is displayed as Cancelled, you can hover the mouse over the prompt icon on the right side of the failed status, and the system will display the specific reason for the failure through a pop-up window.
-
You can also download the CSV file corresponding to the execution result in the batch file. The Message column in the file will list all the detailed error descriptions that have been triggered by the row at one time.