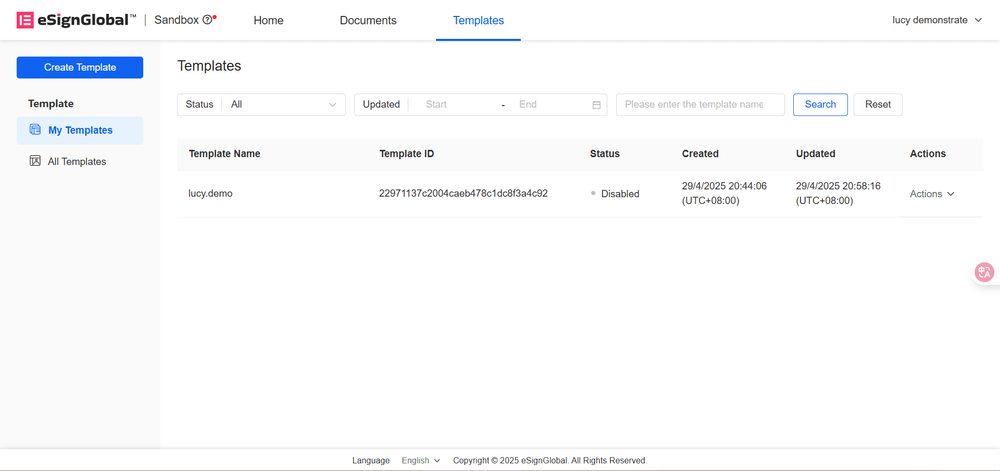
Service Center
New Template
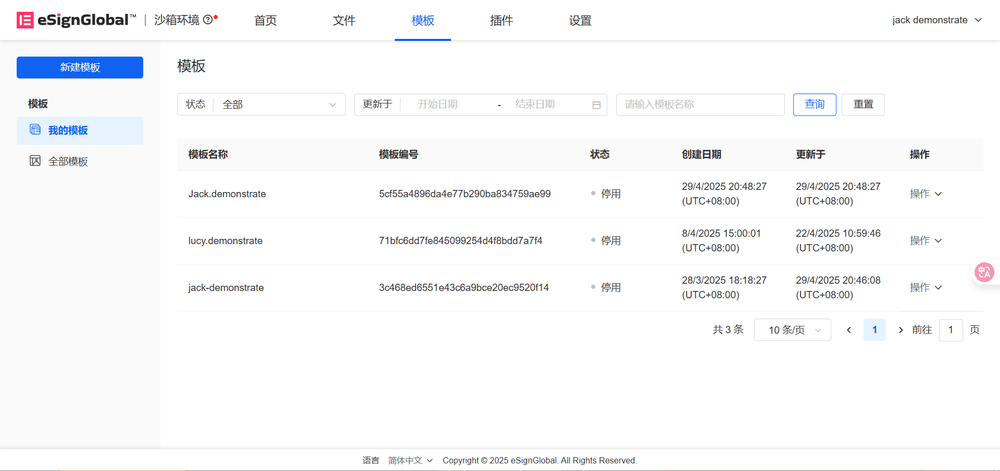
Before using the functions in this user manual, you need to understand the template quantity limit corresponding to different versions:
- Trial Version: 1 template
- Basic Version: 5 templates
- Professional Version: 100 templates
-
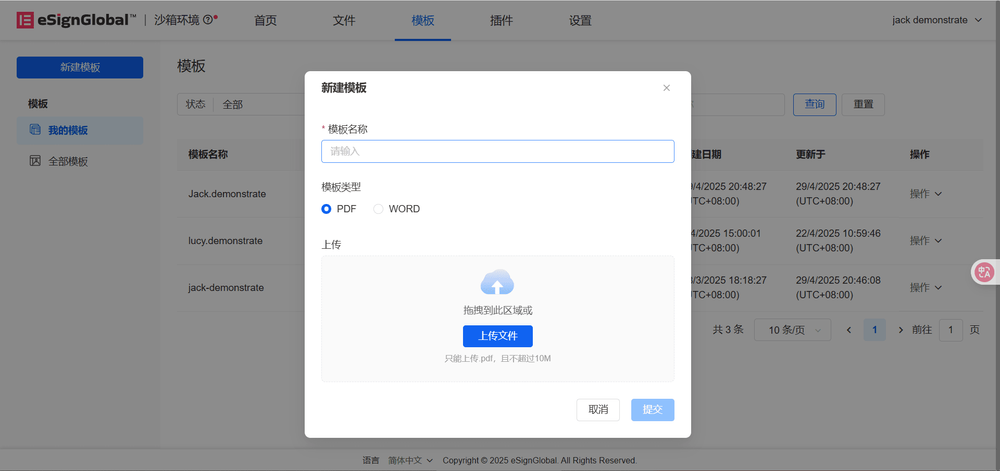
Enter the workspace: Select [Template] and click [New Template].
-
Enter the template name, select the template type, and upload the file.
Note:
-
PDF Template: Supports.pdf,.doc,.docx,.xls,.xlsx,.jpg,.jpeg,.png files.
-
Word Template: Supports.doc and.docx files.
-
Drag and drop the required controls onto the template.
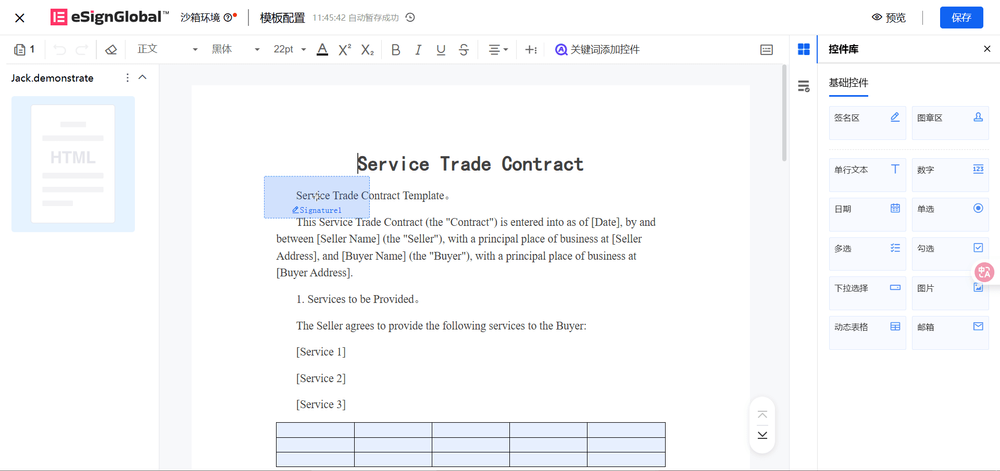
a. Signature Area: Supports setting control name, signature area application page, and stamping rules.
b. Stamp Area: Supports setting control name, stamp area application page, and stamping rules.
Note:
- Stamping Rules: Stamp according to the actual size of the stamp, customize the width and height of the stamp area
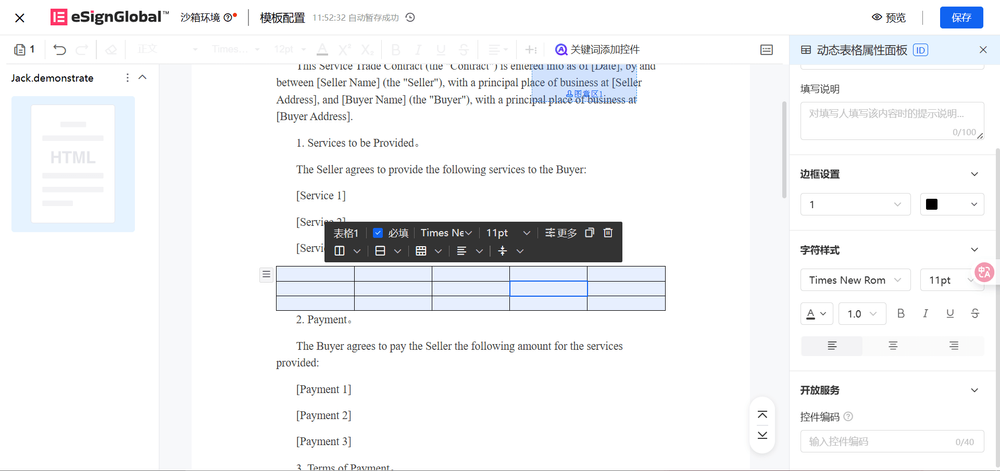
c. Table: After dragging and dropping onto the template, you can configure the following settings:
i. Basic Settings: Set field validation rules and field names.
ii. Border Settings: Set custom border styles, including color values, thickness, etc.
iii. Character Styles: Configure font, font size, alignment, and other layout parameters.
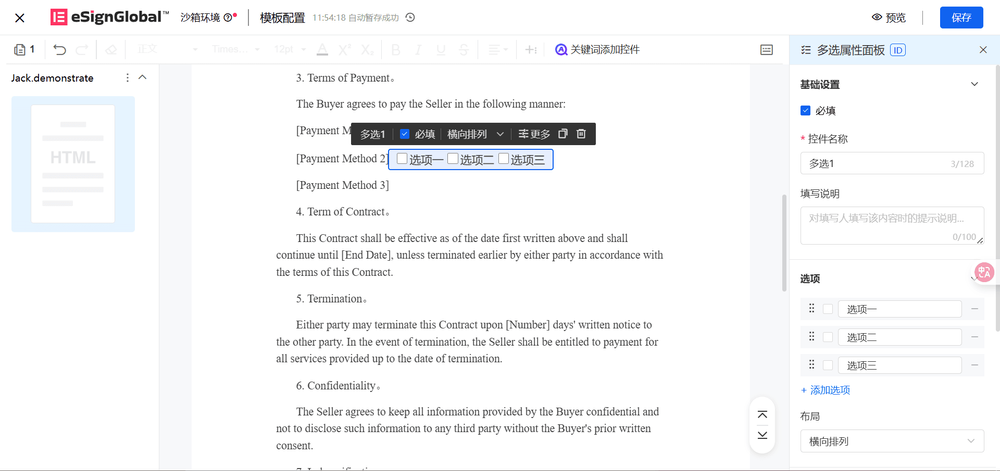
d. Multiple Choice: After dragging and dropping onto the template, you can configure the following settings:
i. Basic Settings: Set field validation rules and field names.
ii. Option Settings: Set options and layout.
iii. Character Styles: Configure font, font size, alignment, and other layout parameters.
Note:
-
Word Document: Dragging and dropping controls (such as images, table fields) may cause content to wrap.
-
PDF Document: Please reserve field positions in advance to ensure stable layout.
- After completing the configuration, click [Save] to save the template to [My Templates].