Service Center
Billing Account
Learn how to view your billing account basic information in the workspace, and authorize available service resources to other workspaces for sharing, to achieve centralized resource management and efficient collaboration between multiple organizations.
Note:
- Applicable roles: Only super administrators of the workspace can use this function.
- Configuration requirements: The shared account function is currently open to advanced workspaces and has a valid self-purchased order service.
- Multi-space authorization: The authorized party must be another workspace associated with the super administrator.
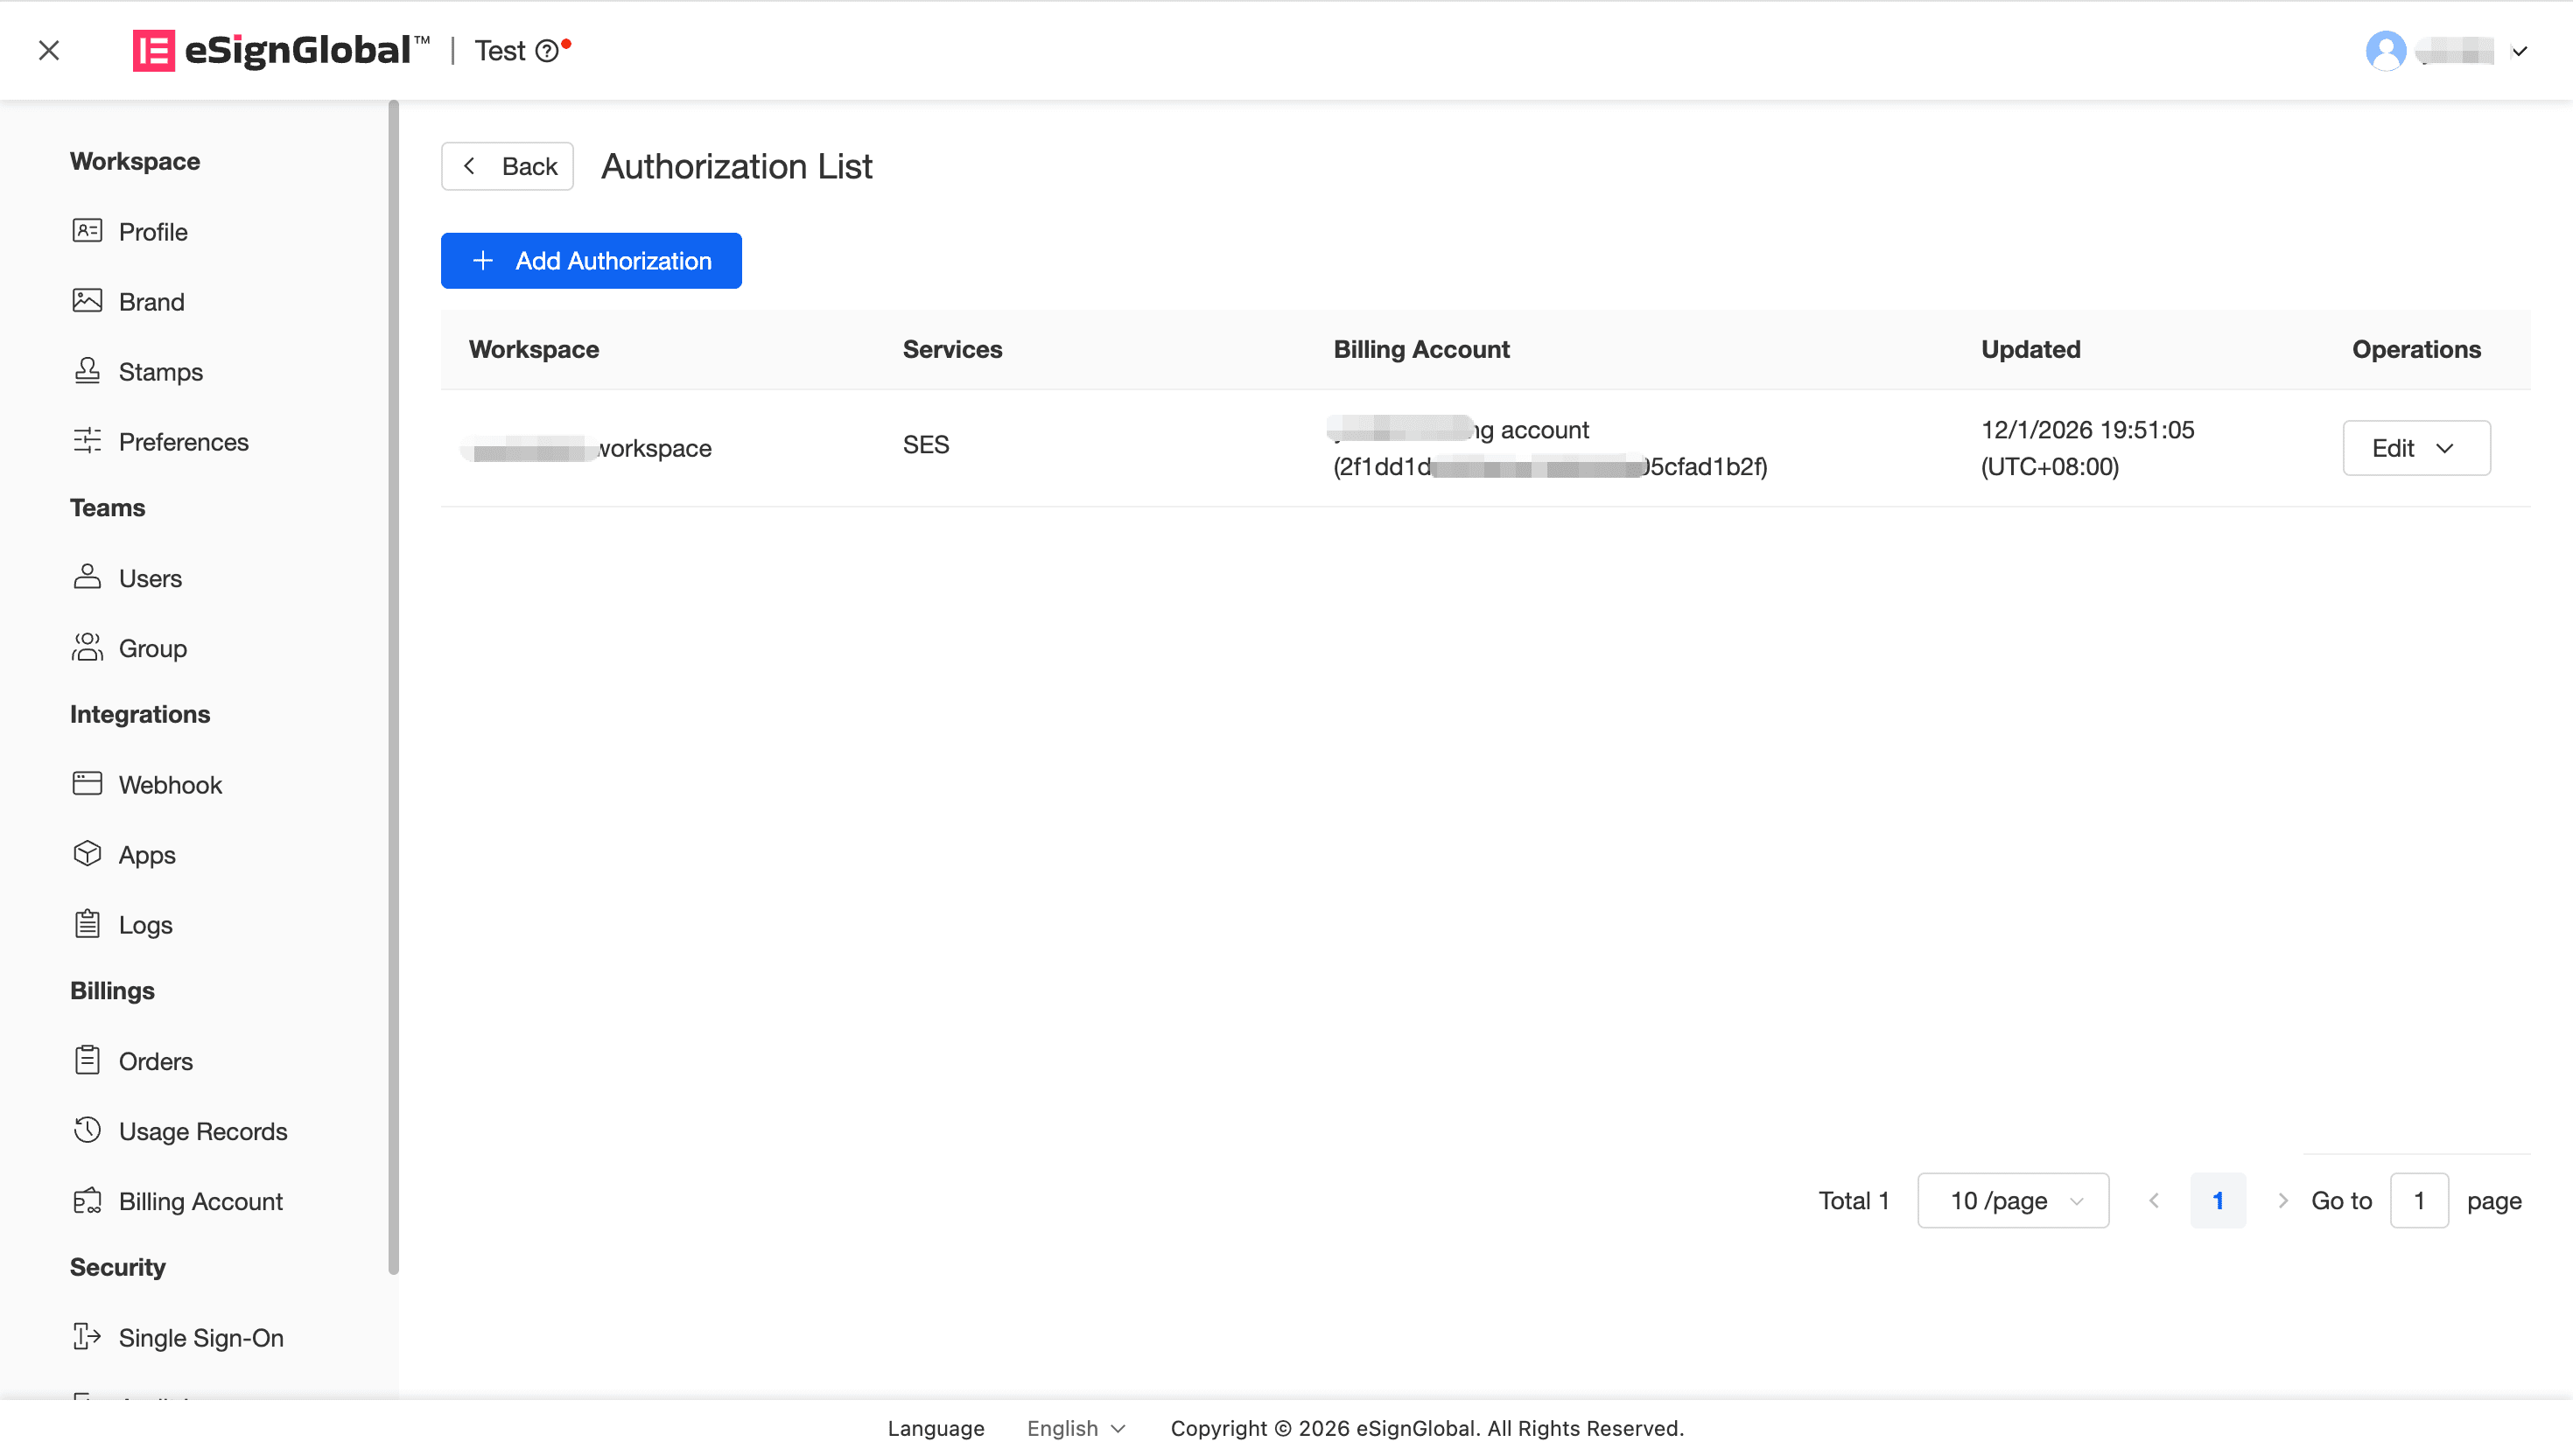
View basic billing account information
Note:
- Here you can understand the billing account status of all creations and authorizations in the current workspace.
- Whether it is your own resources or resources shared with you by others, you can visually view the details in the list.
-
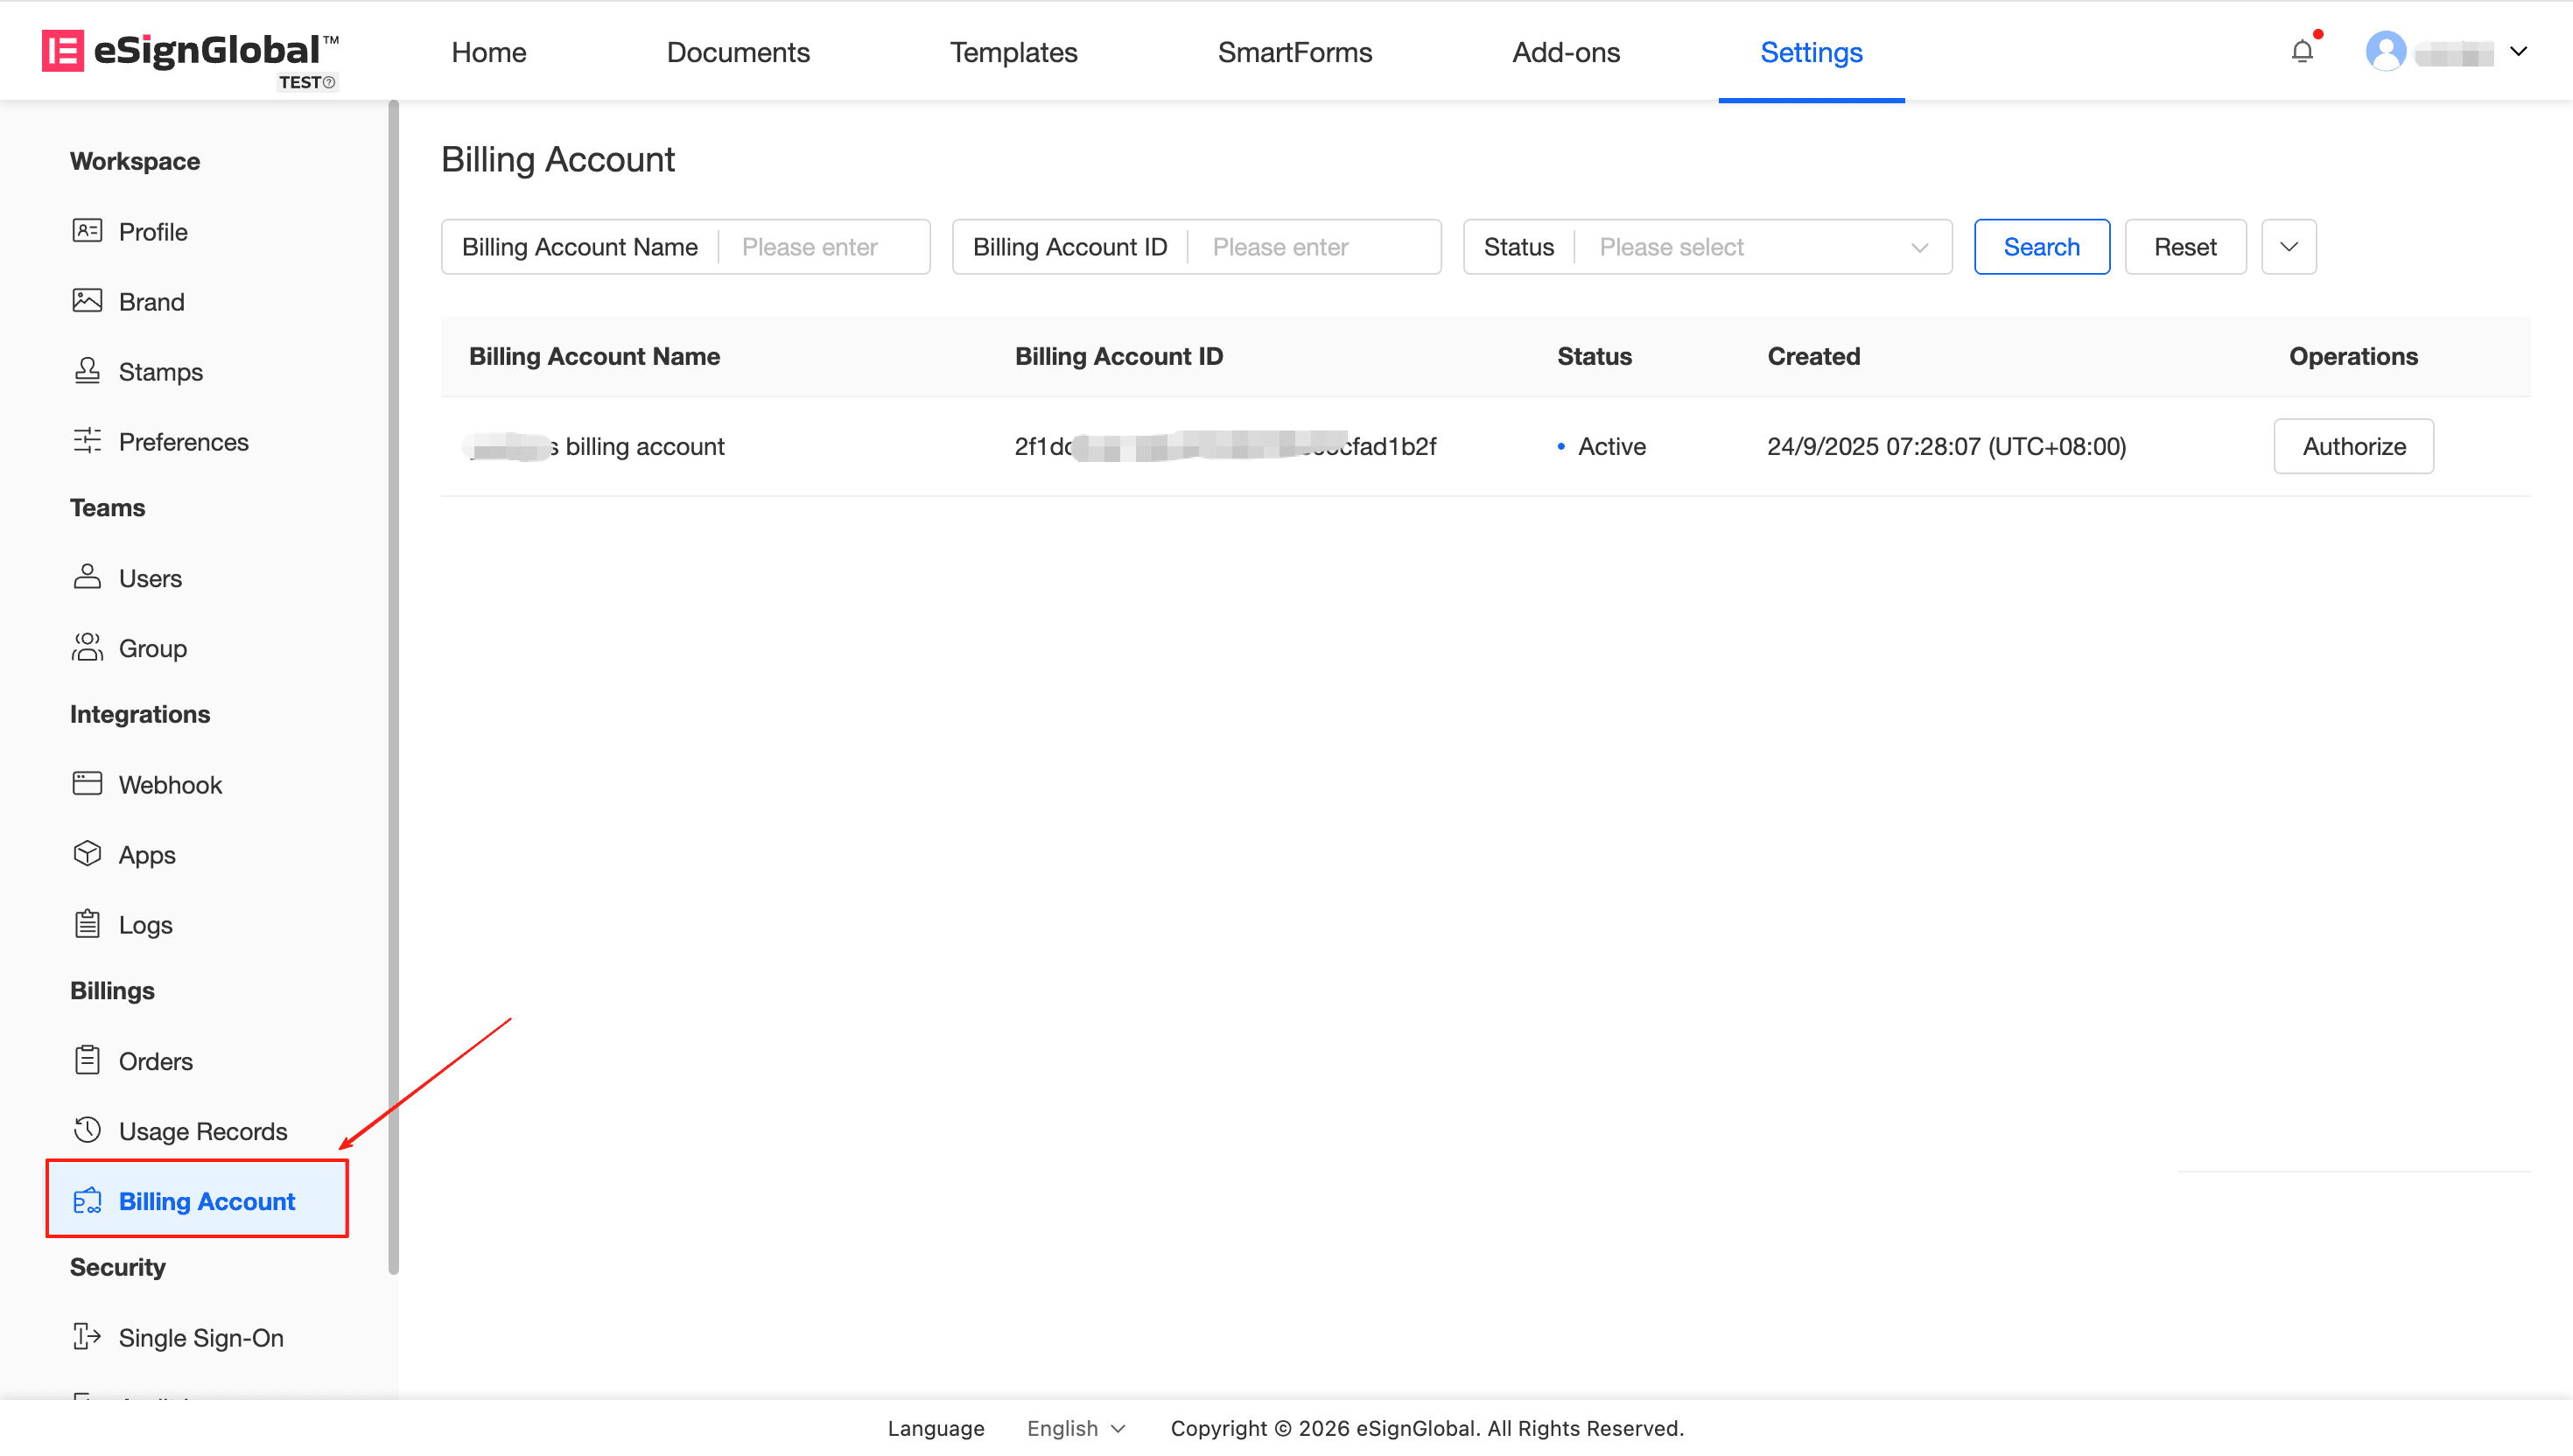
In “Settings” - “Billing Account”, click to enter the billing account list.
-
The list will default to displaying billing accounts that are in the active state first:
-
For accounts you own: If the status is Active, you can click the “Authorize” button in the operation column to jump to and manage the authorization list under this account.
-
If you are the authorized party: The list will add a separate mark for the billing account (authorized). At this time, click “Details” in the operation column to view the specific services you are authorized (such as SES, SMS balance/limit, etc.).
-
Add a new billing account authorization binding relationship
Note:
- The authorizing party can freely allocate the service and usage limits under its own account.
Description: In order to manage resources in a unified manner, the super administrator can share the currently active order-related services to other workspaces they have joined.
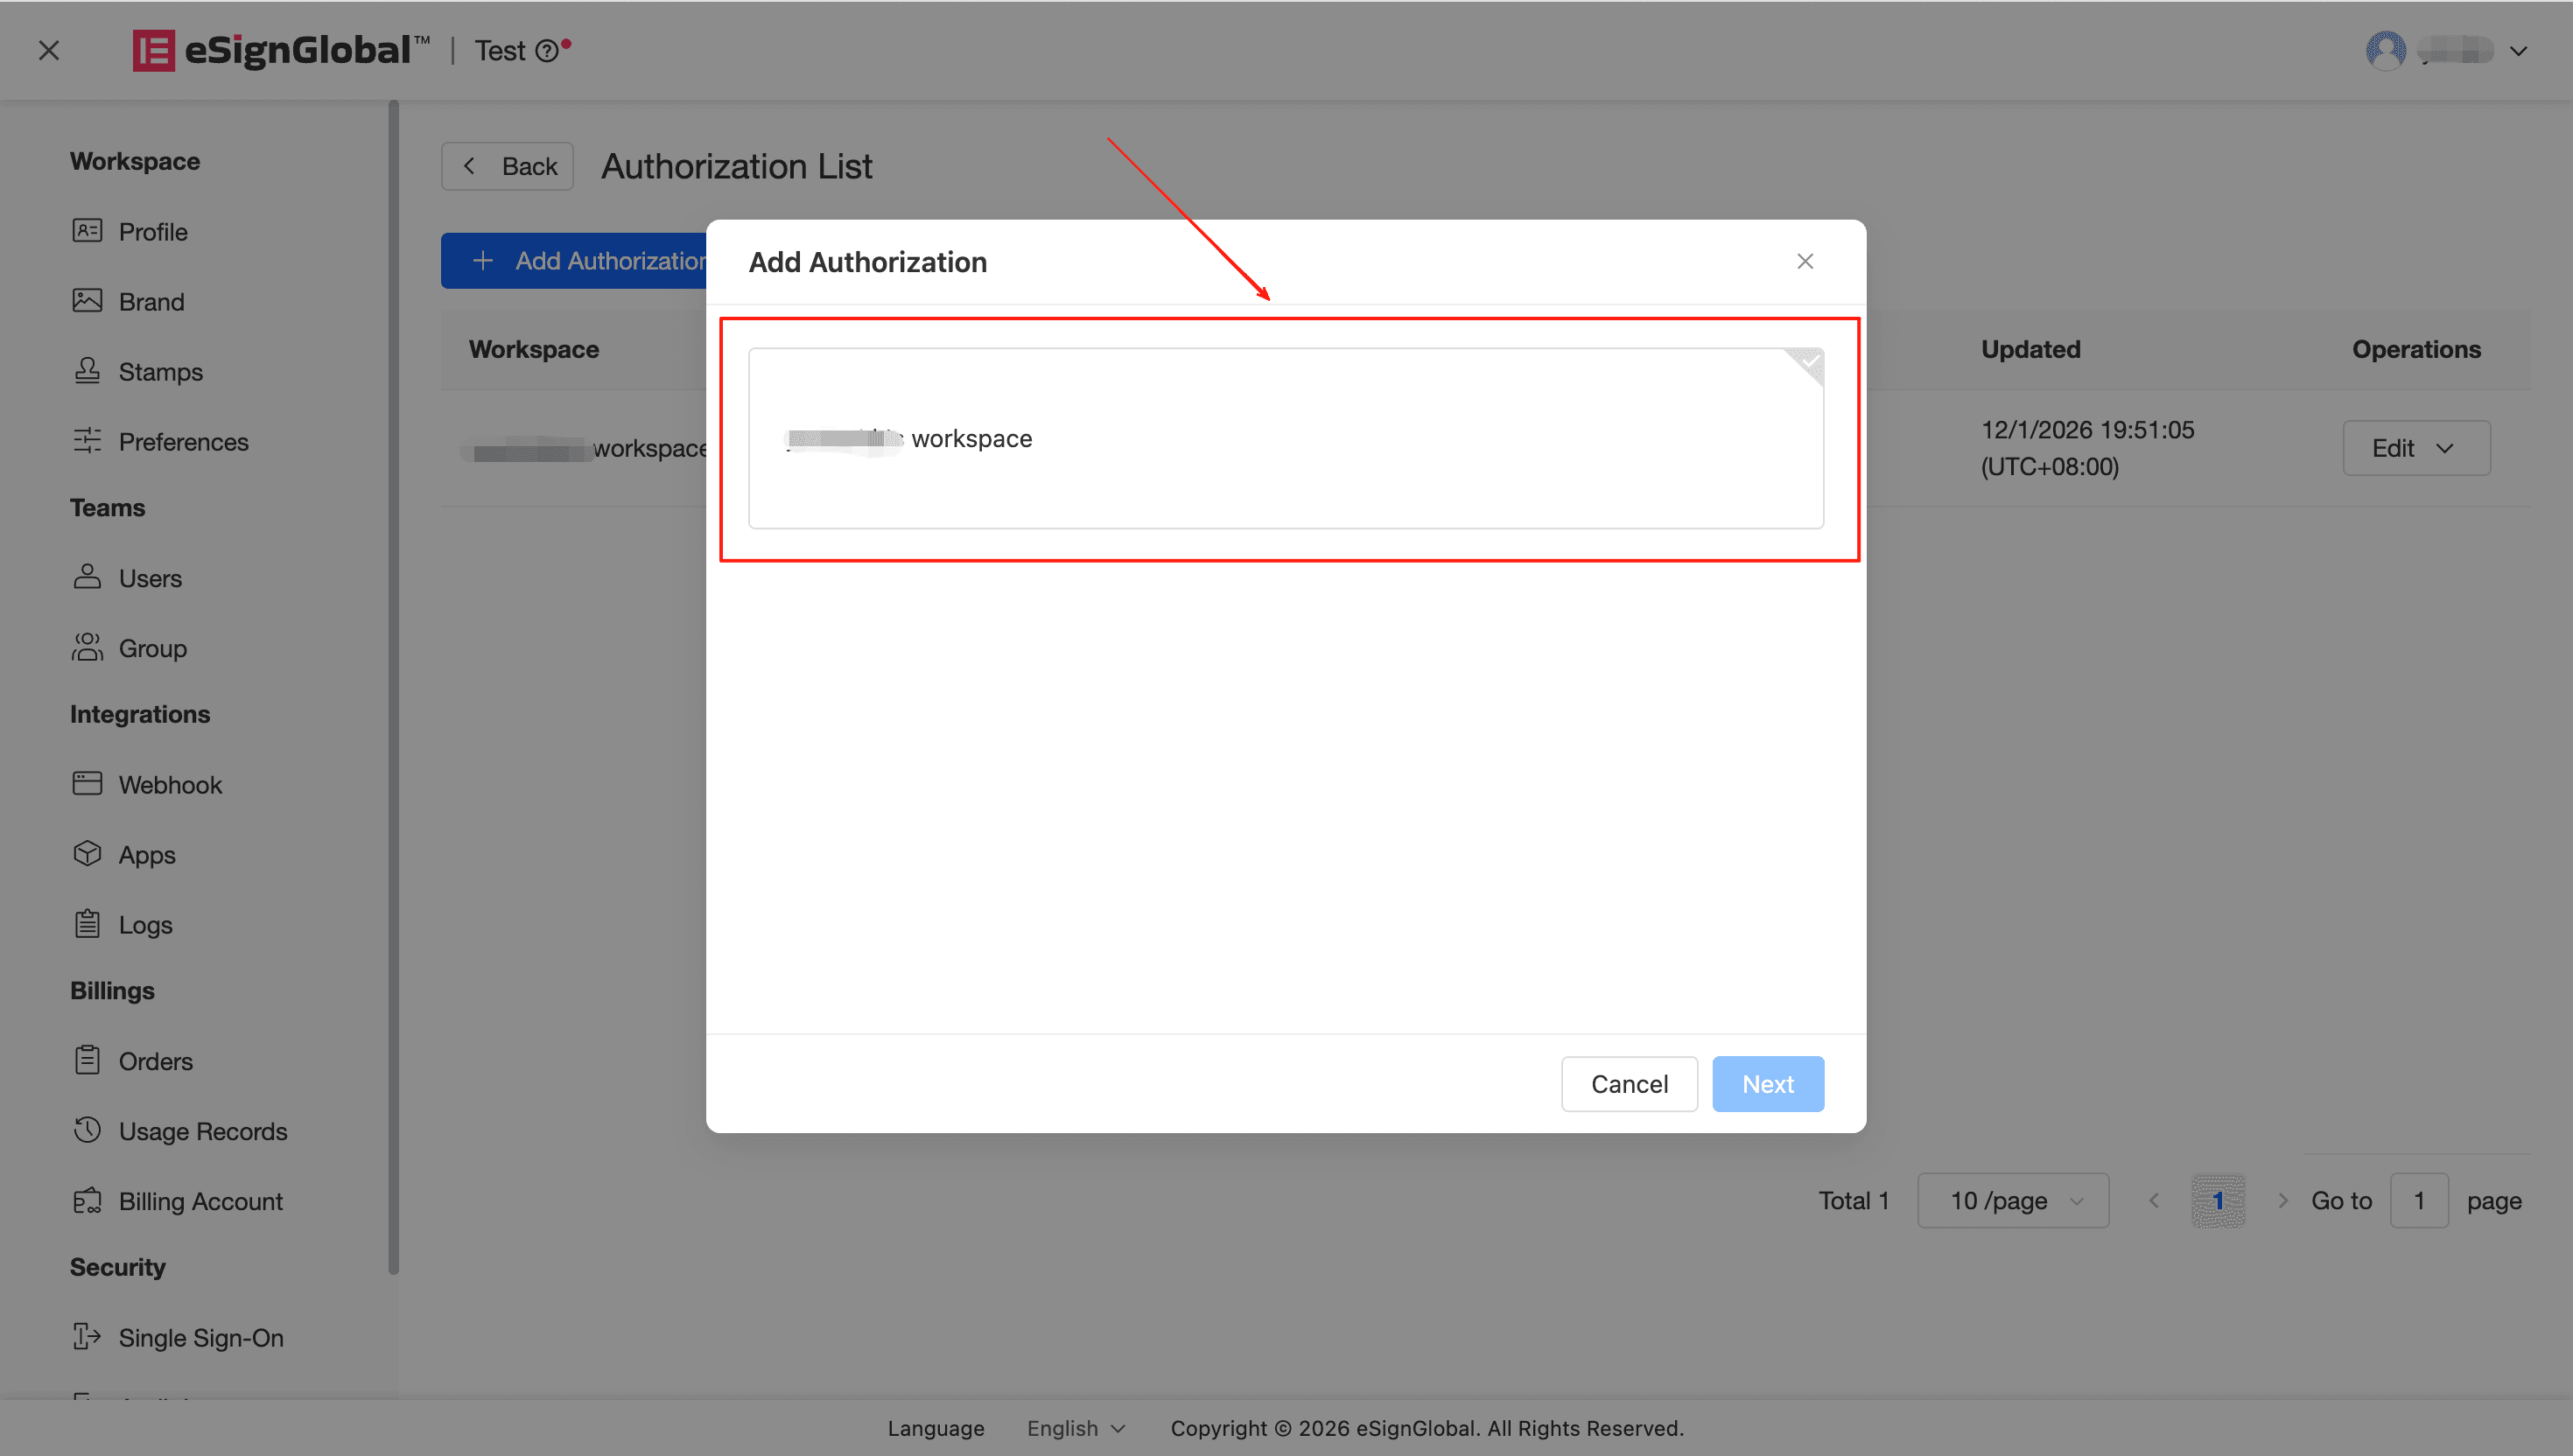
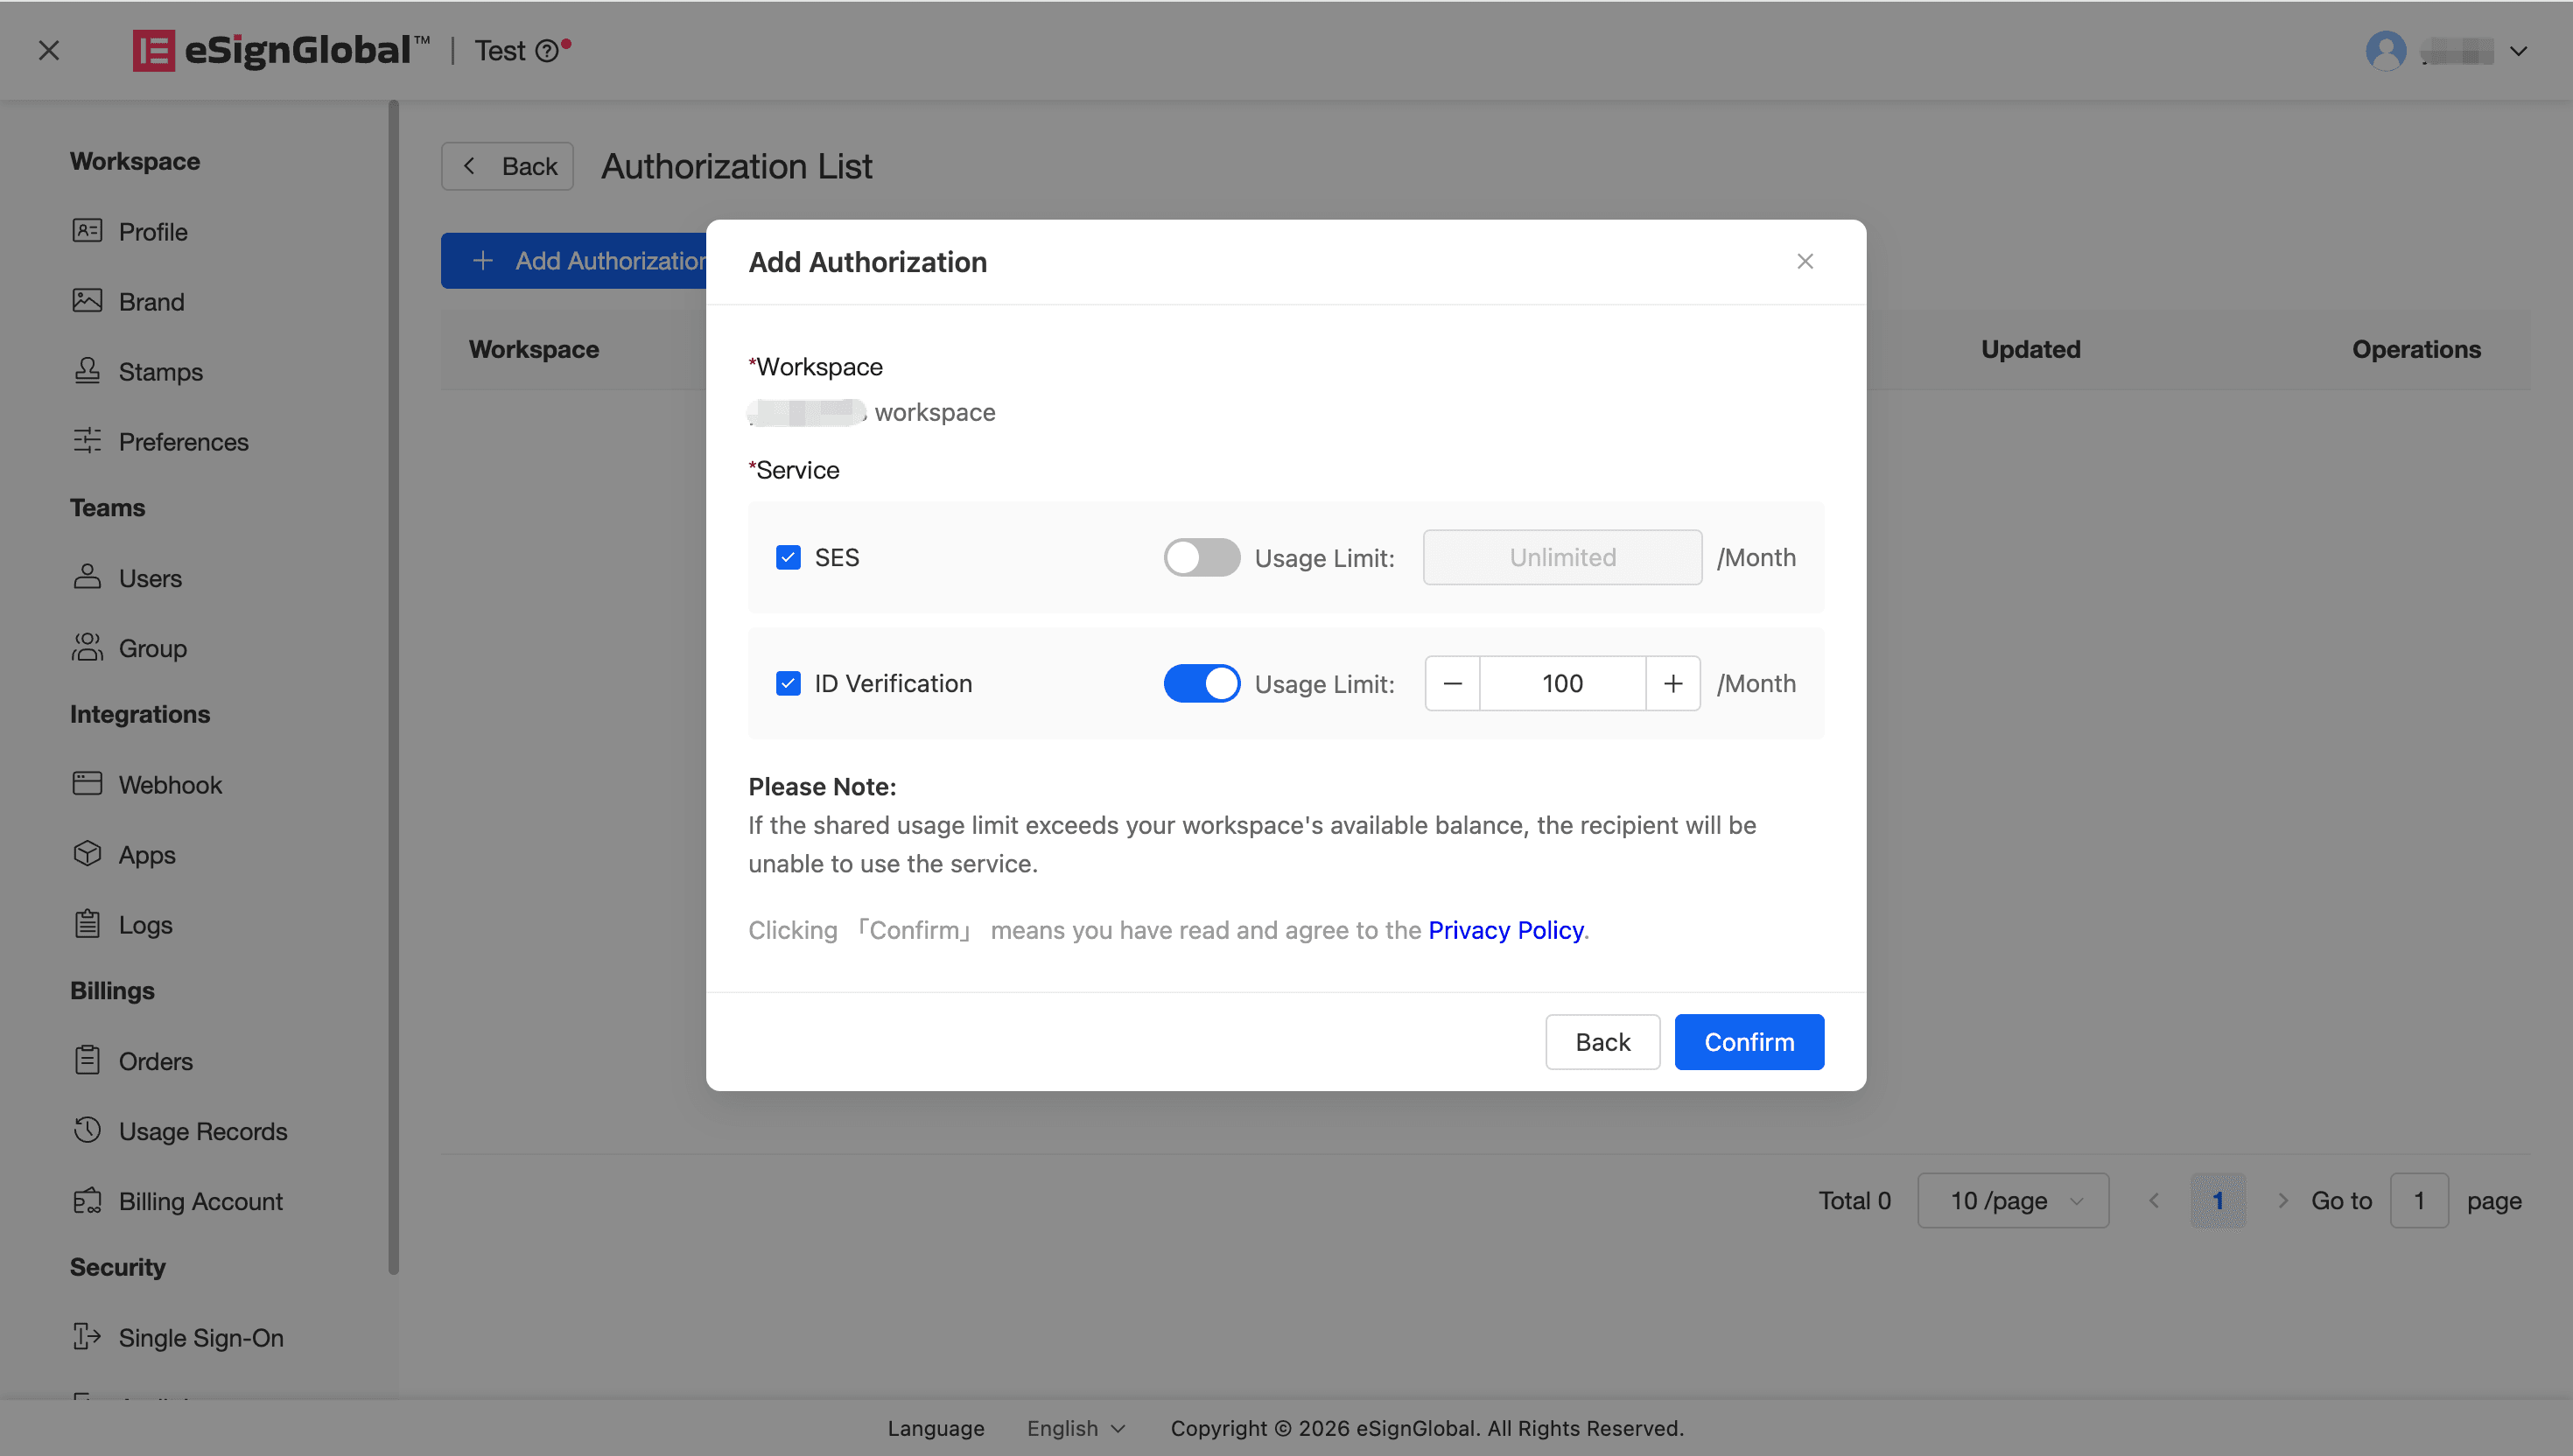
- Enter the “Authorization List” billing account authorization list page and click the “Create/Add Authorization” button.
- In the new authorization, first select the target workspace you want to associate with.
Warning:
- You need to select the corresponding space that has not been shared by other billing accounts to avoid restrictions (prompt: “This workspace has been shared by other billing accounts and cannot be shared repeatedly”).
- In the “Service” section, click “Add Service” to allocate the service resources owned by this account to the corresponding space as needed (such as SES, SMS, or ID Verification). You can flexibly choose the quota type: support setting the monthly “Maximum Usage” or selecting “Unlimited/Month”.
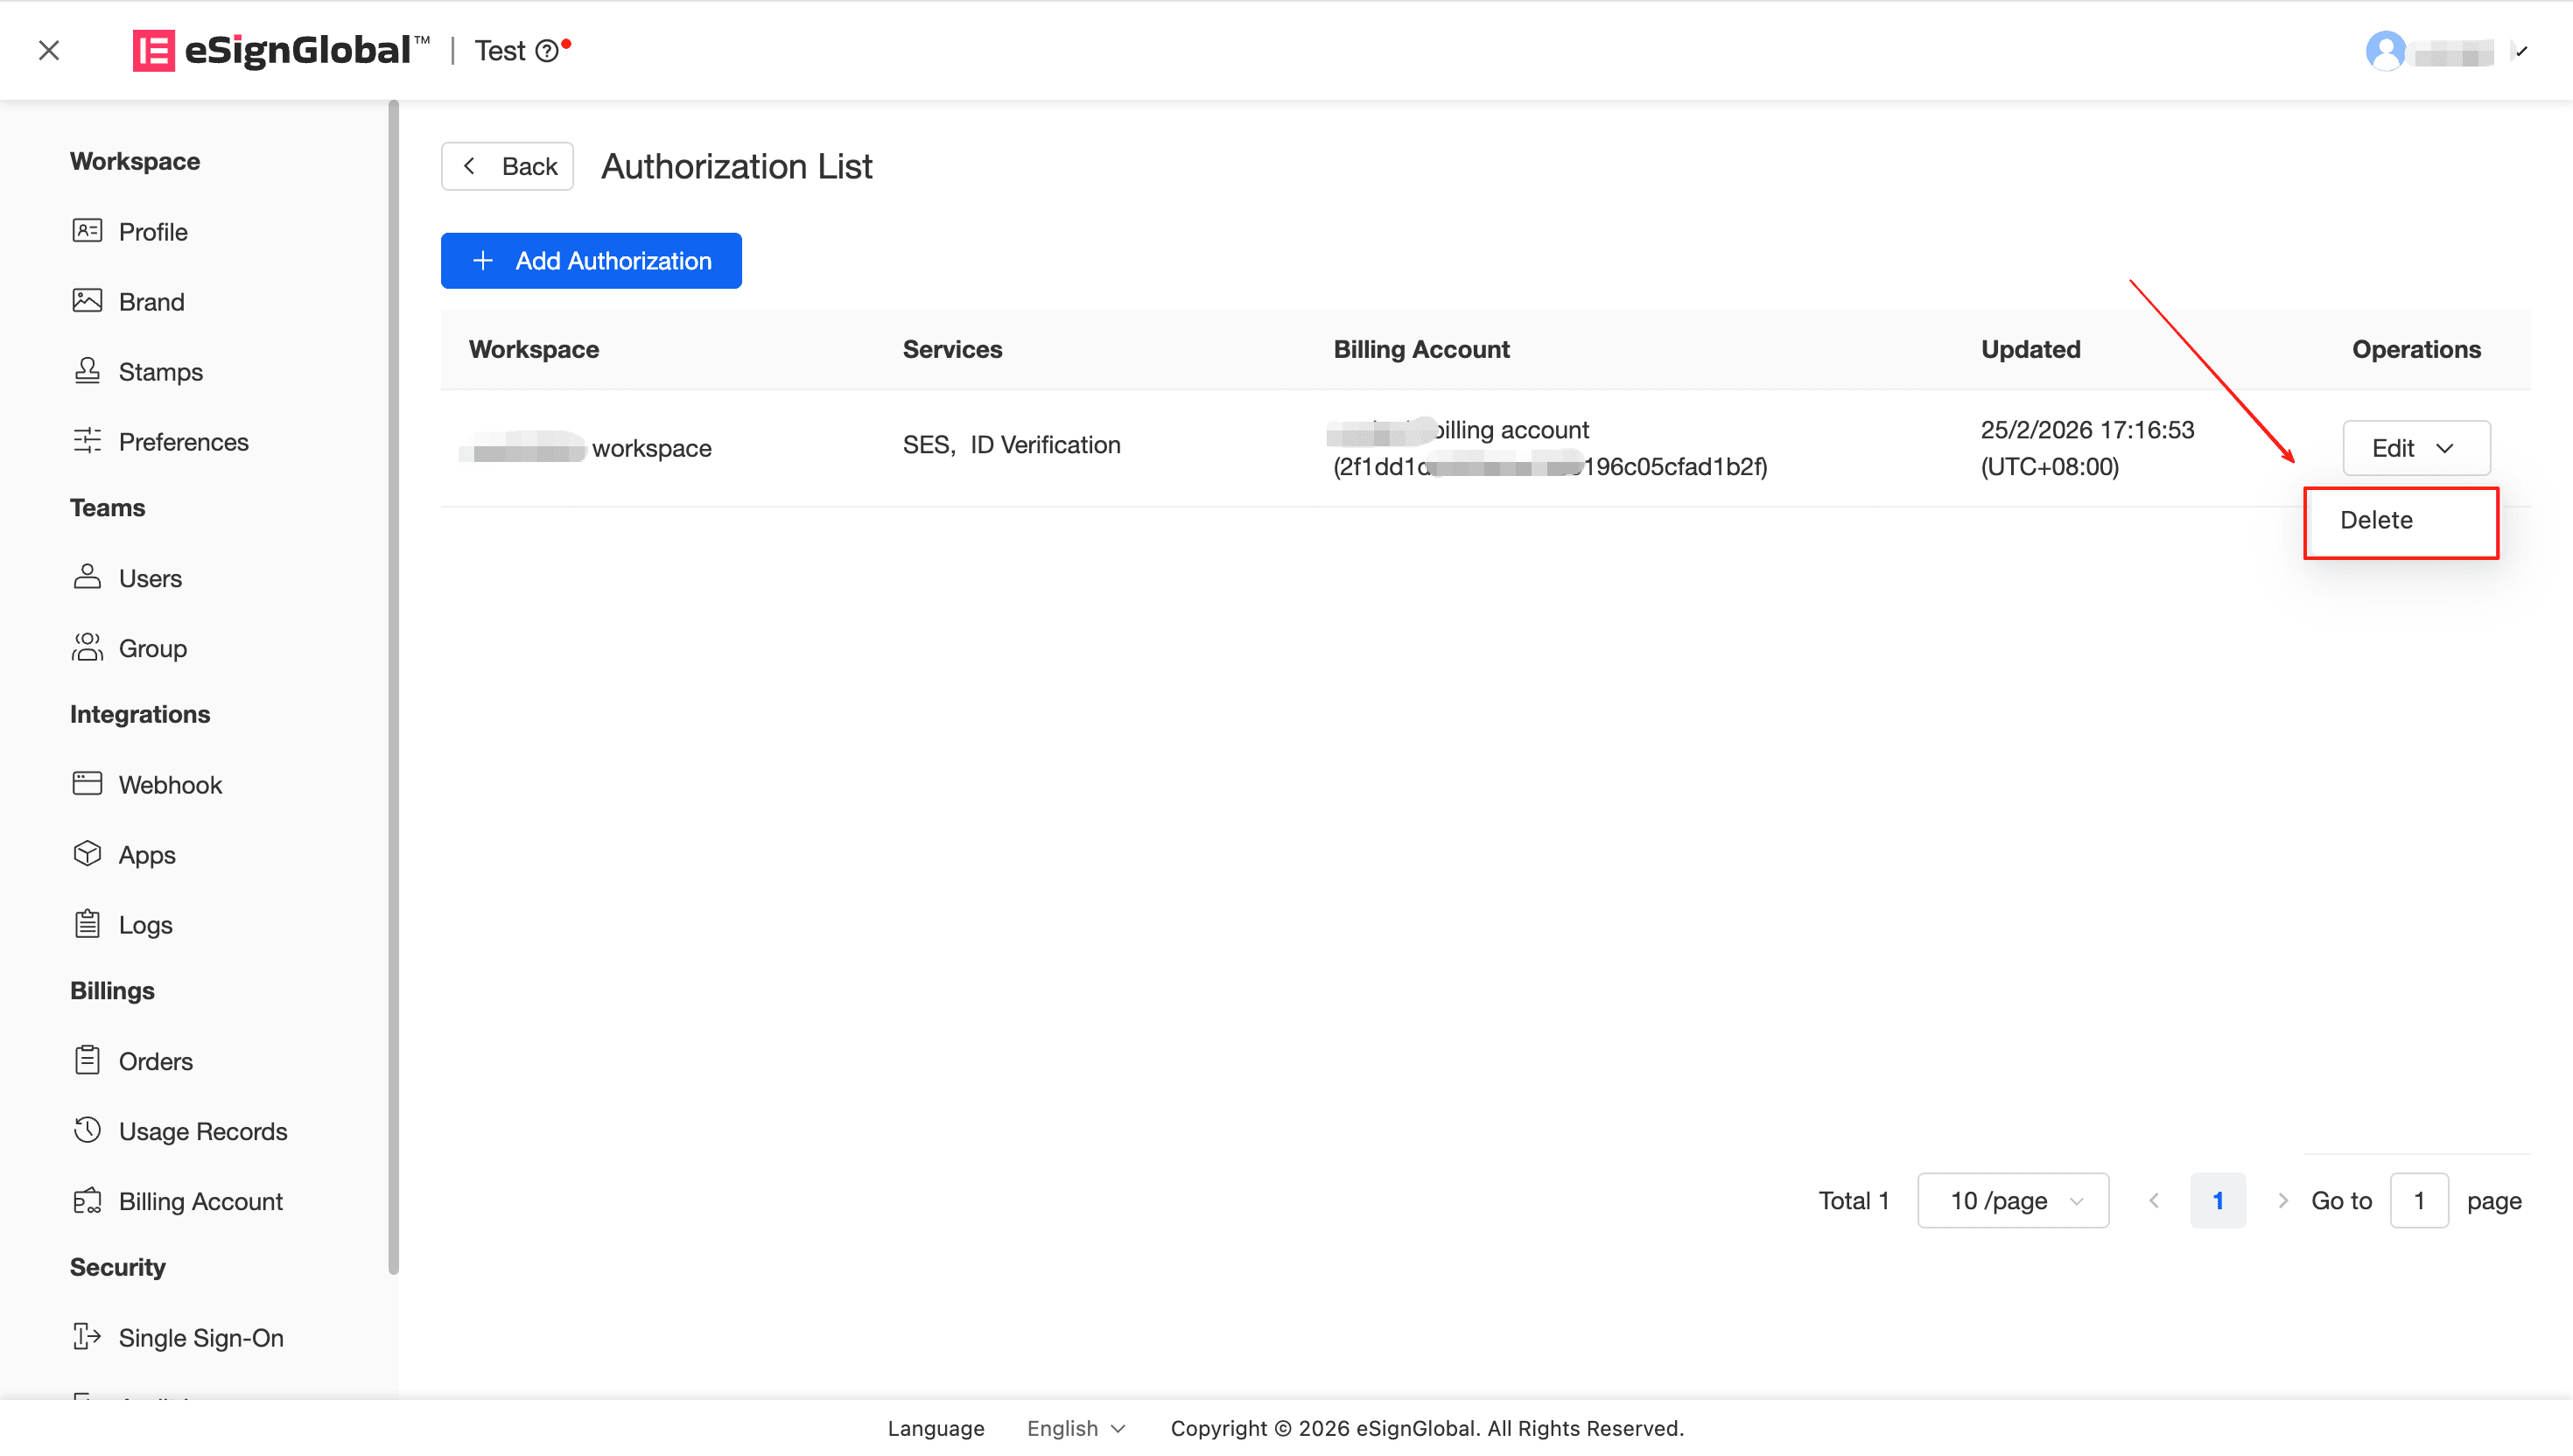
Edit and delete billing account authorization
Warning:
- You are about to permanently delete the authorization relationship with “a workspace”. This operation cannot be undone. The space will immediately lose all permissions to the services you provide; however, historical consumption records related to this authorization relationship will be retained.
Description: When a business or organization undergoes changes, you can flexibly reclaim or adjust the quota and billing binding relationship that has been released to the authorized party.
- Edit Authorization Find the specified authorized space in the “Authorization List” and click “Edit”. Since the authorized Workspace cannot be modified, please directly reallocate the Service usage and metrics below, and it will take effect immediately after saving.
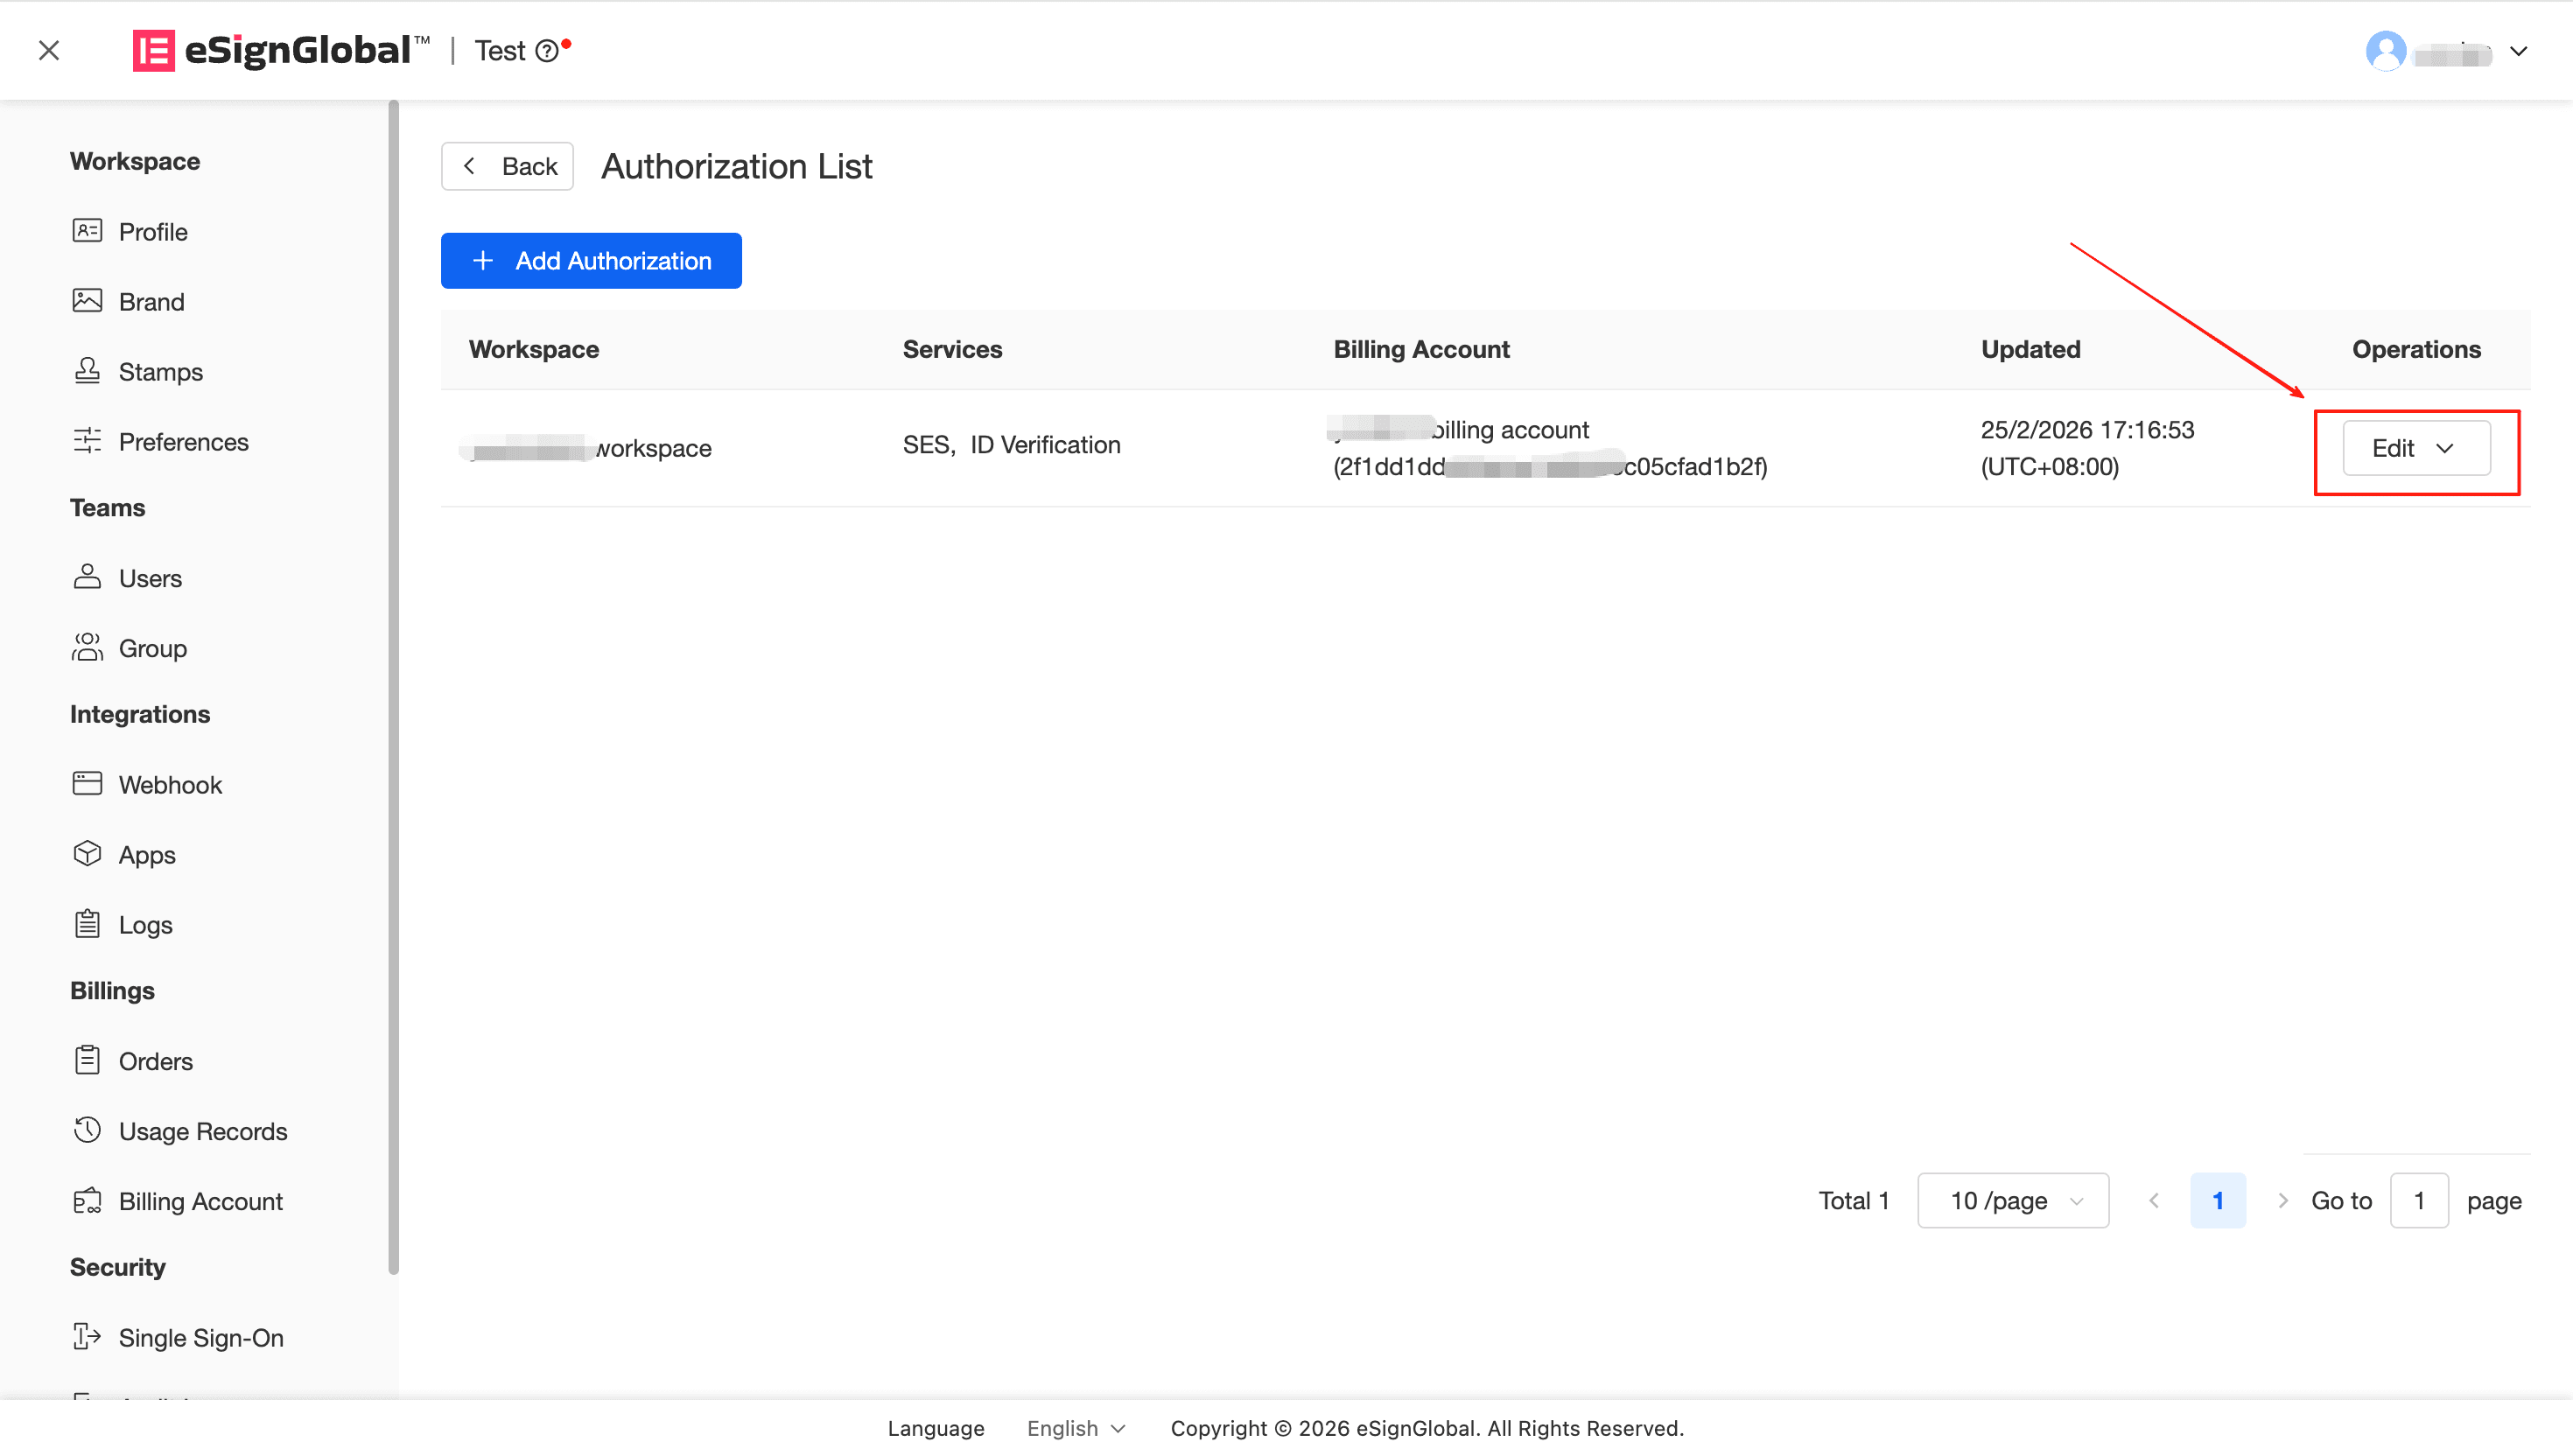
- Delete Authorization If you want to reclaim all sharing rights of this workspace, click “Delete” and confirm again in the pop-up window. After deletion, not only will the authorized party be unable to use the shared balance, but also neither party’s backend will display this sharing record.