

 Service Center
OKTA - SAML2.0
eSignGlobal supports federated authentication based on SAML 2.0. You can integrate OKTA with eSignGlobal through SAML 2.0 federated authentication to achieve single sign-on for OKTA accounts to eSignGlobal without having to create separate accounts for each user in the enterprise or organization.
Creating an OKTA Application
-
Log in to the OKTA developer backend.
-
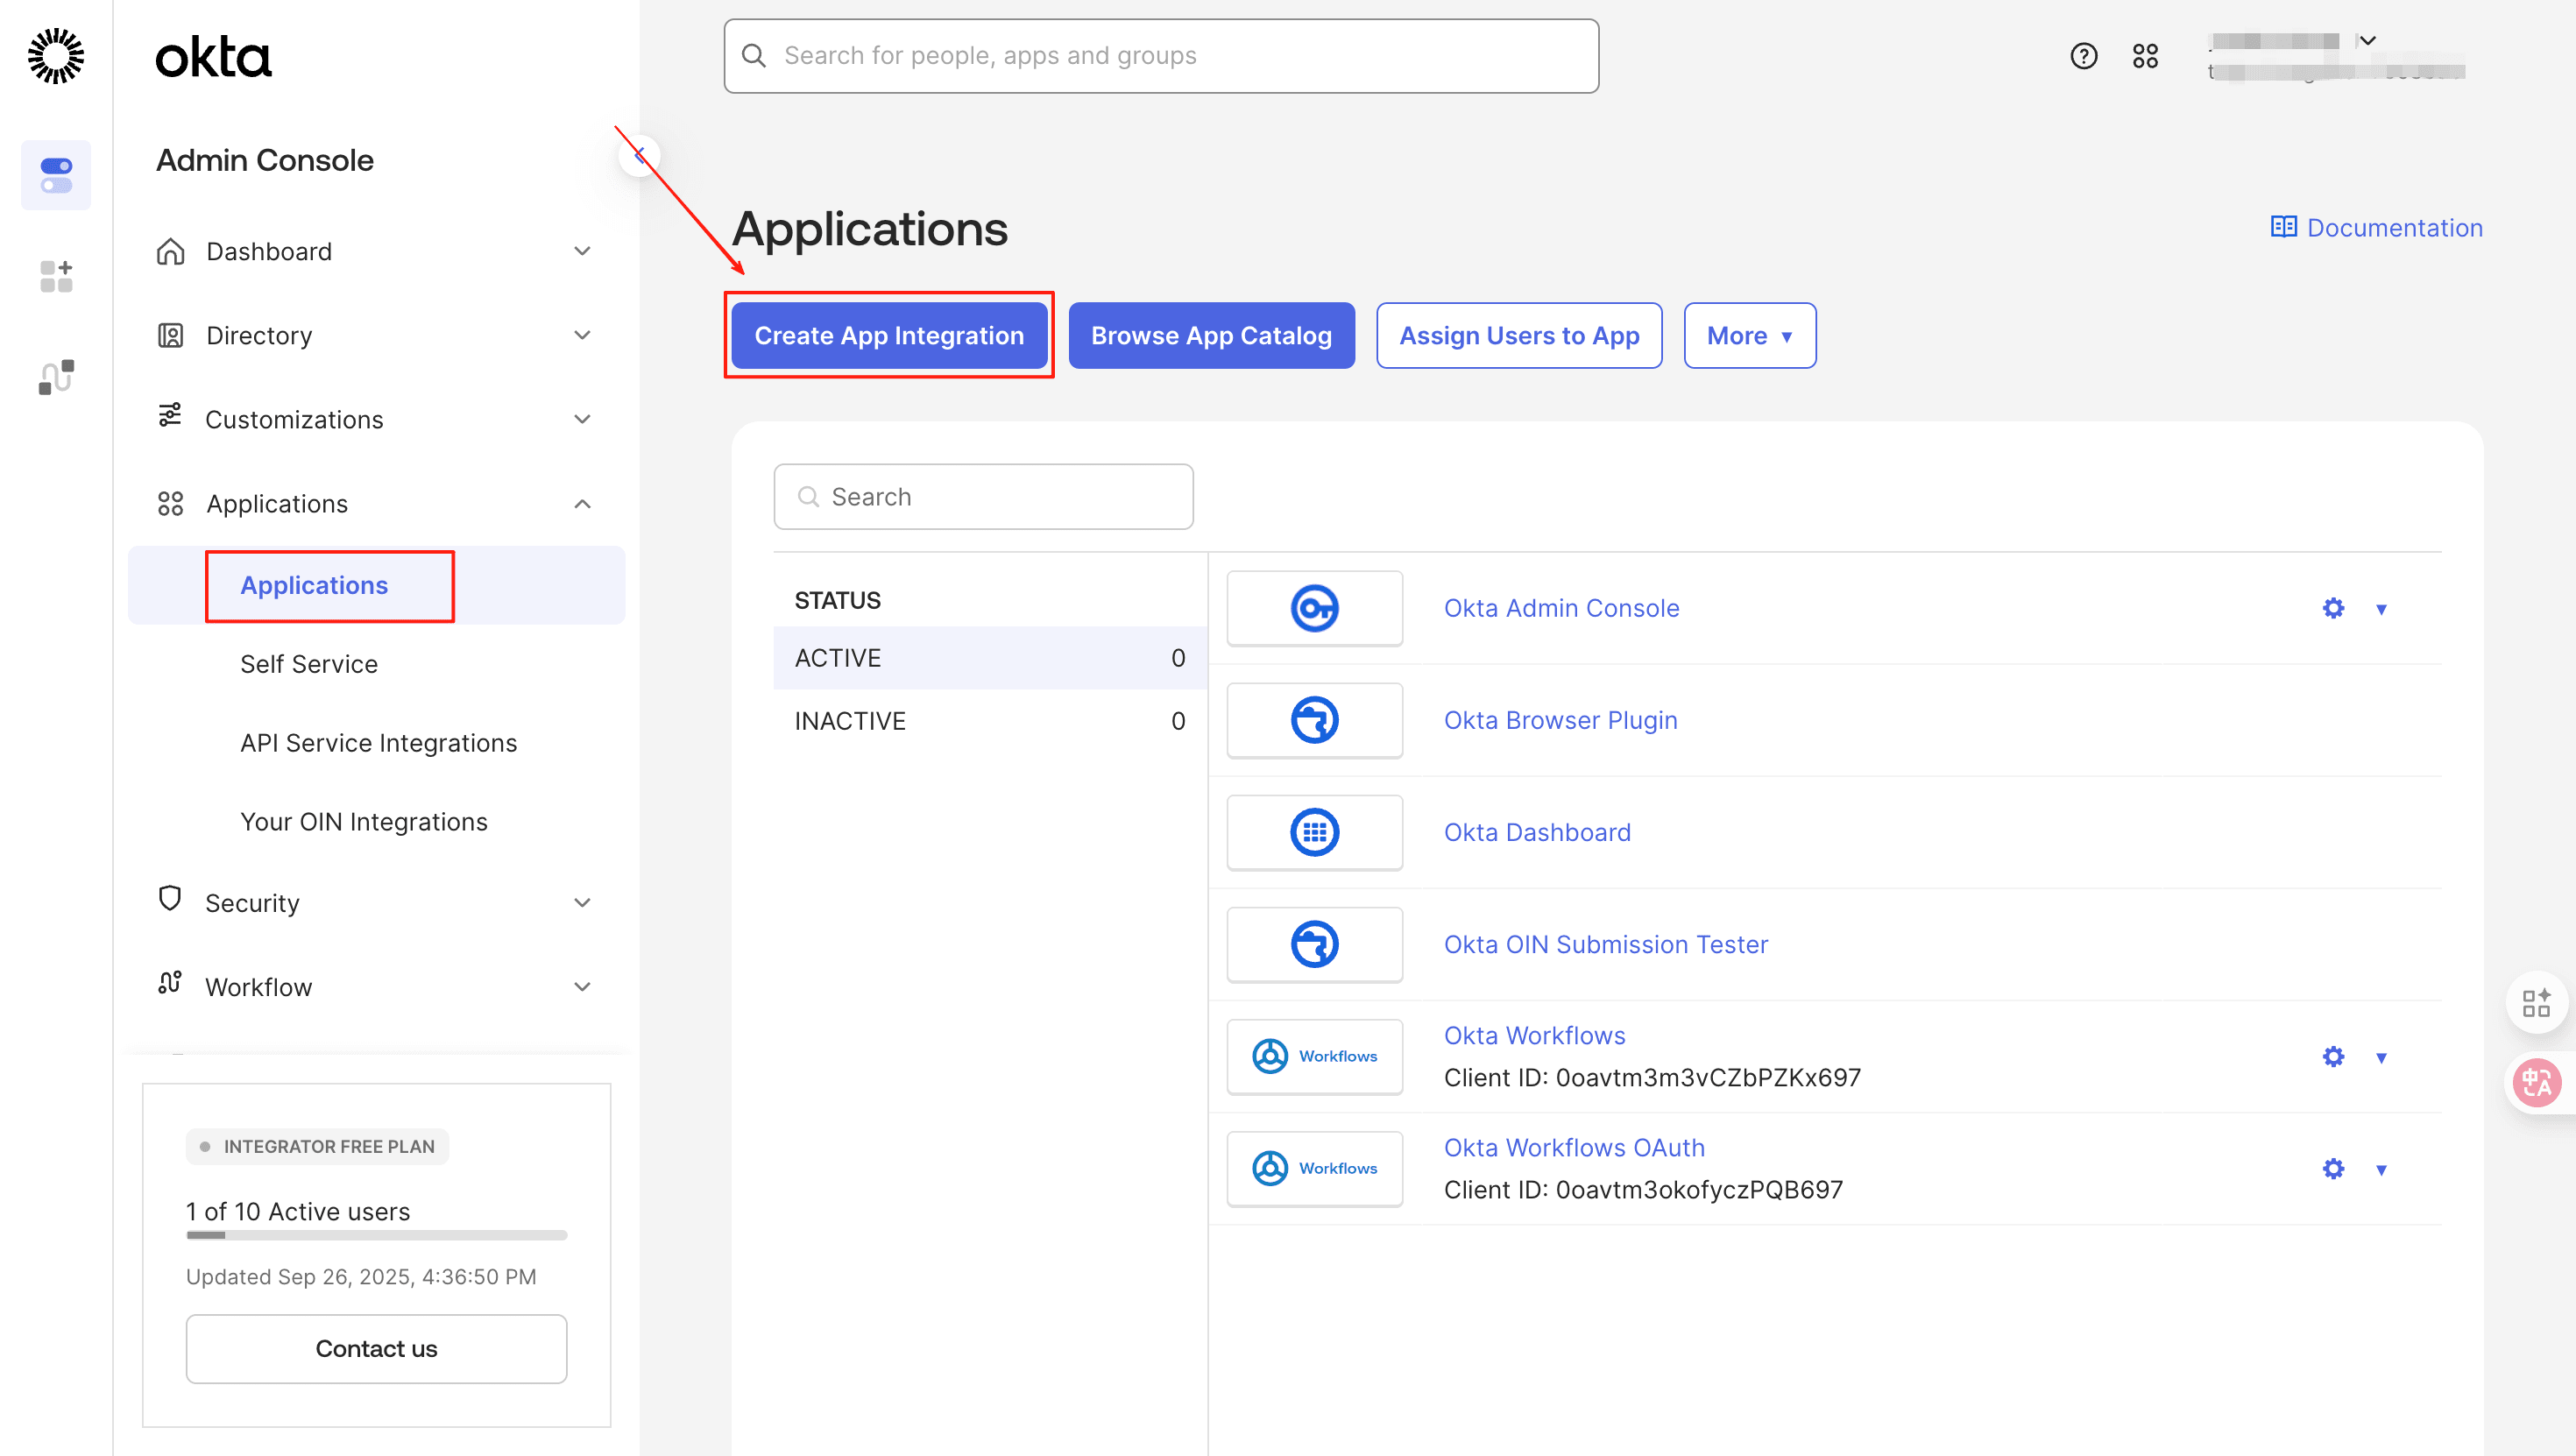
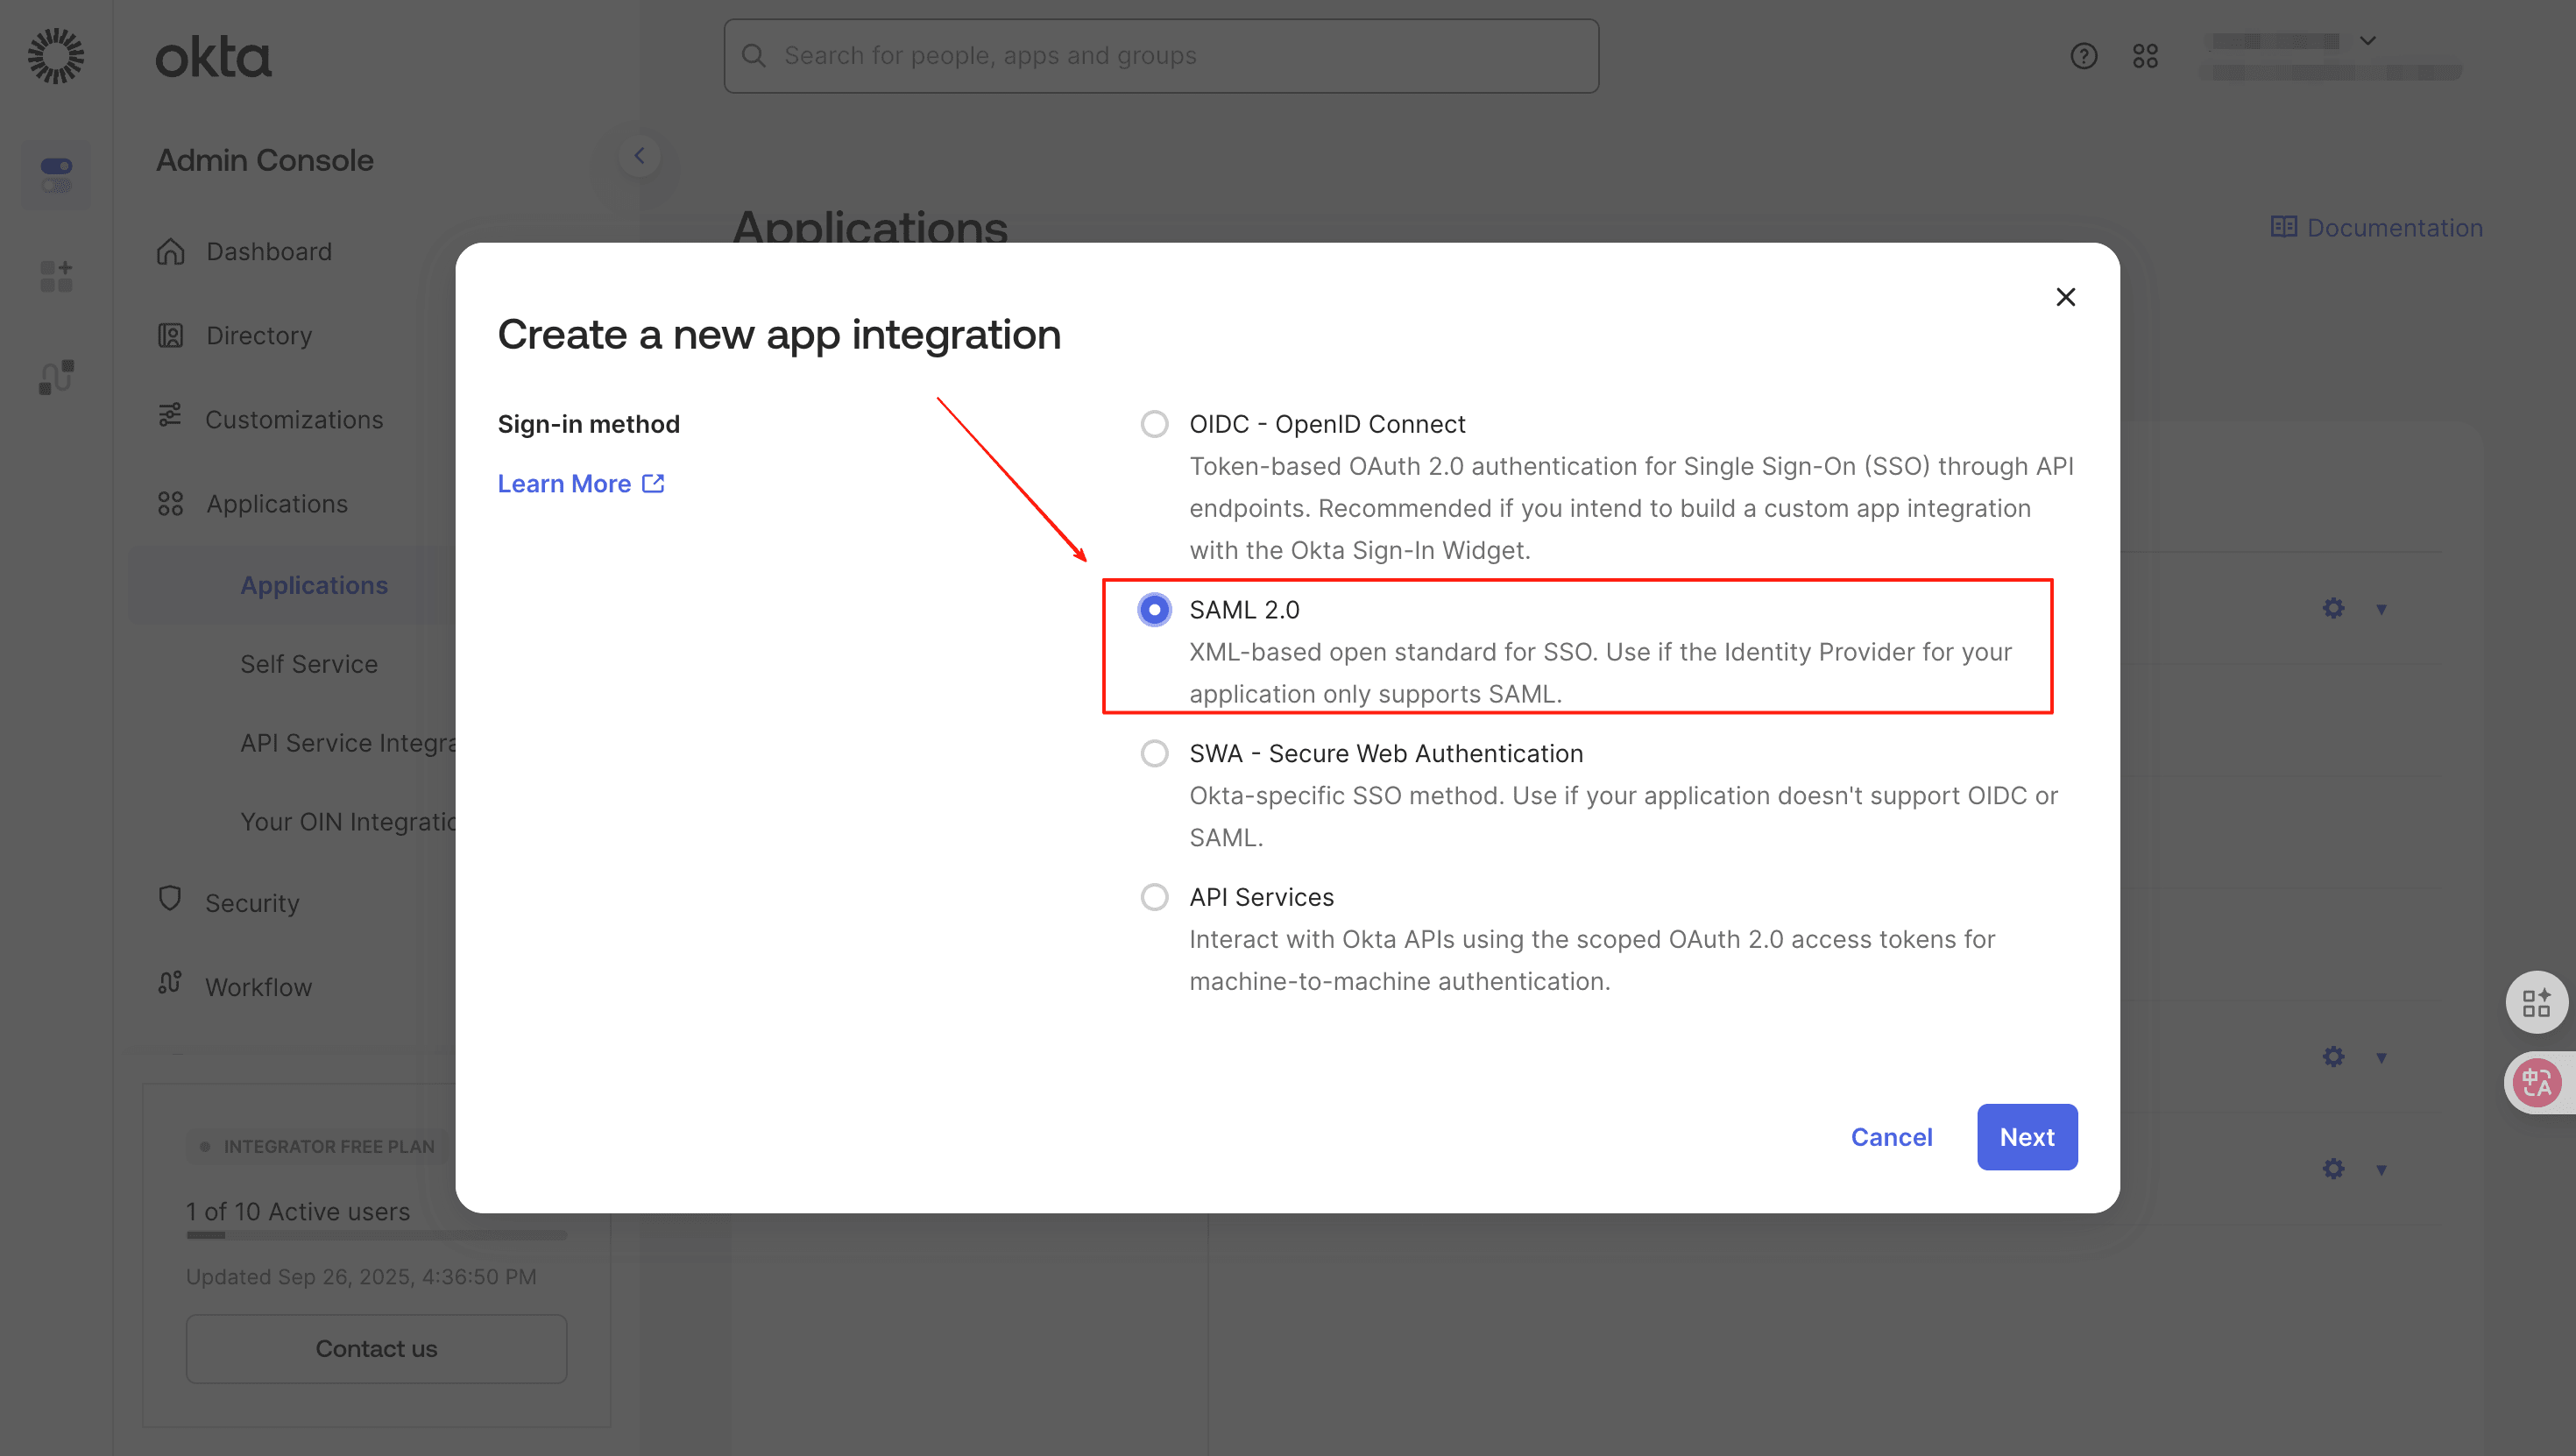
After successful login, click on [Application - Create App Integration] to create an application and select [SAML 2.0]
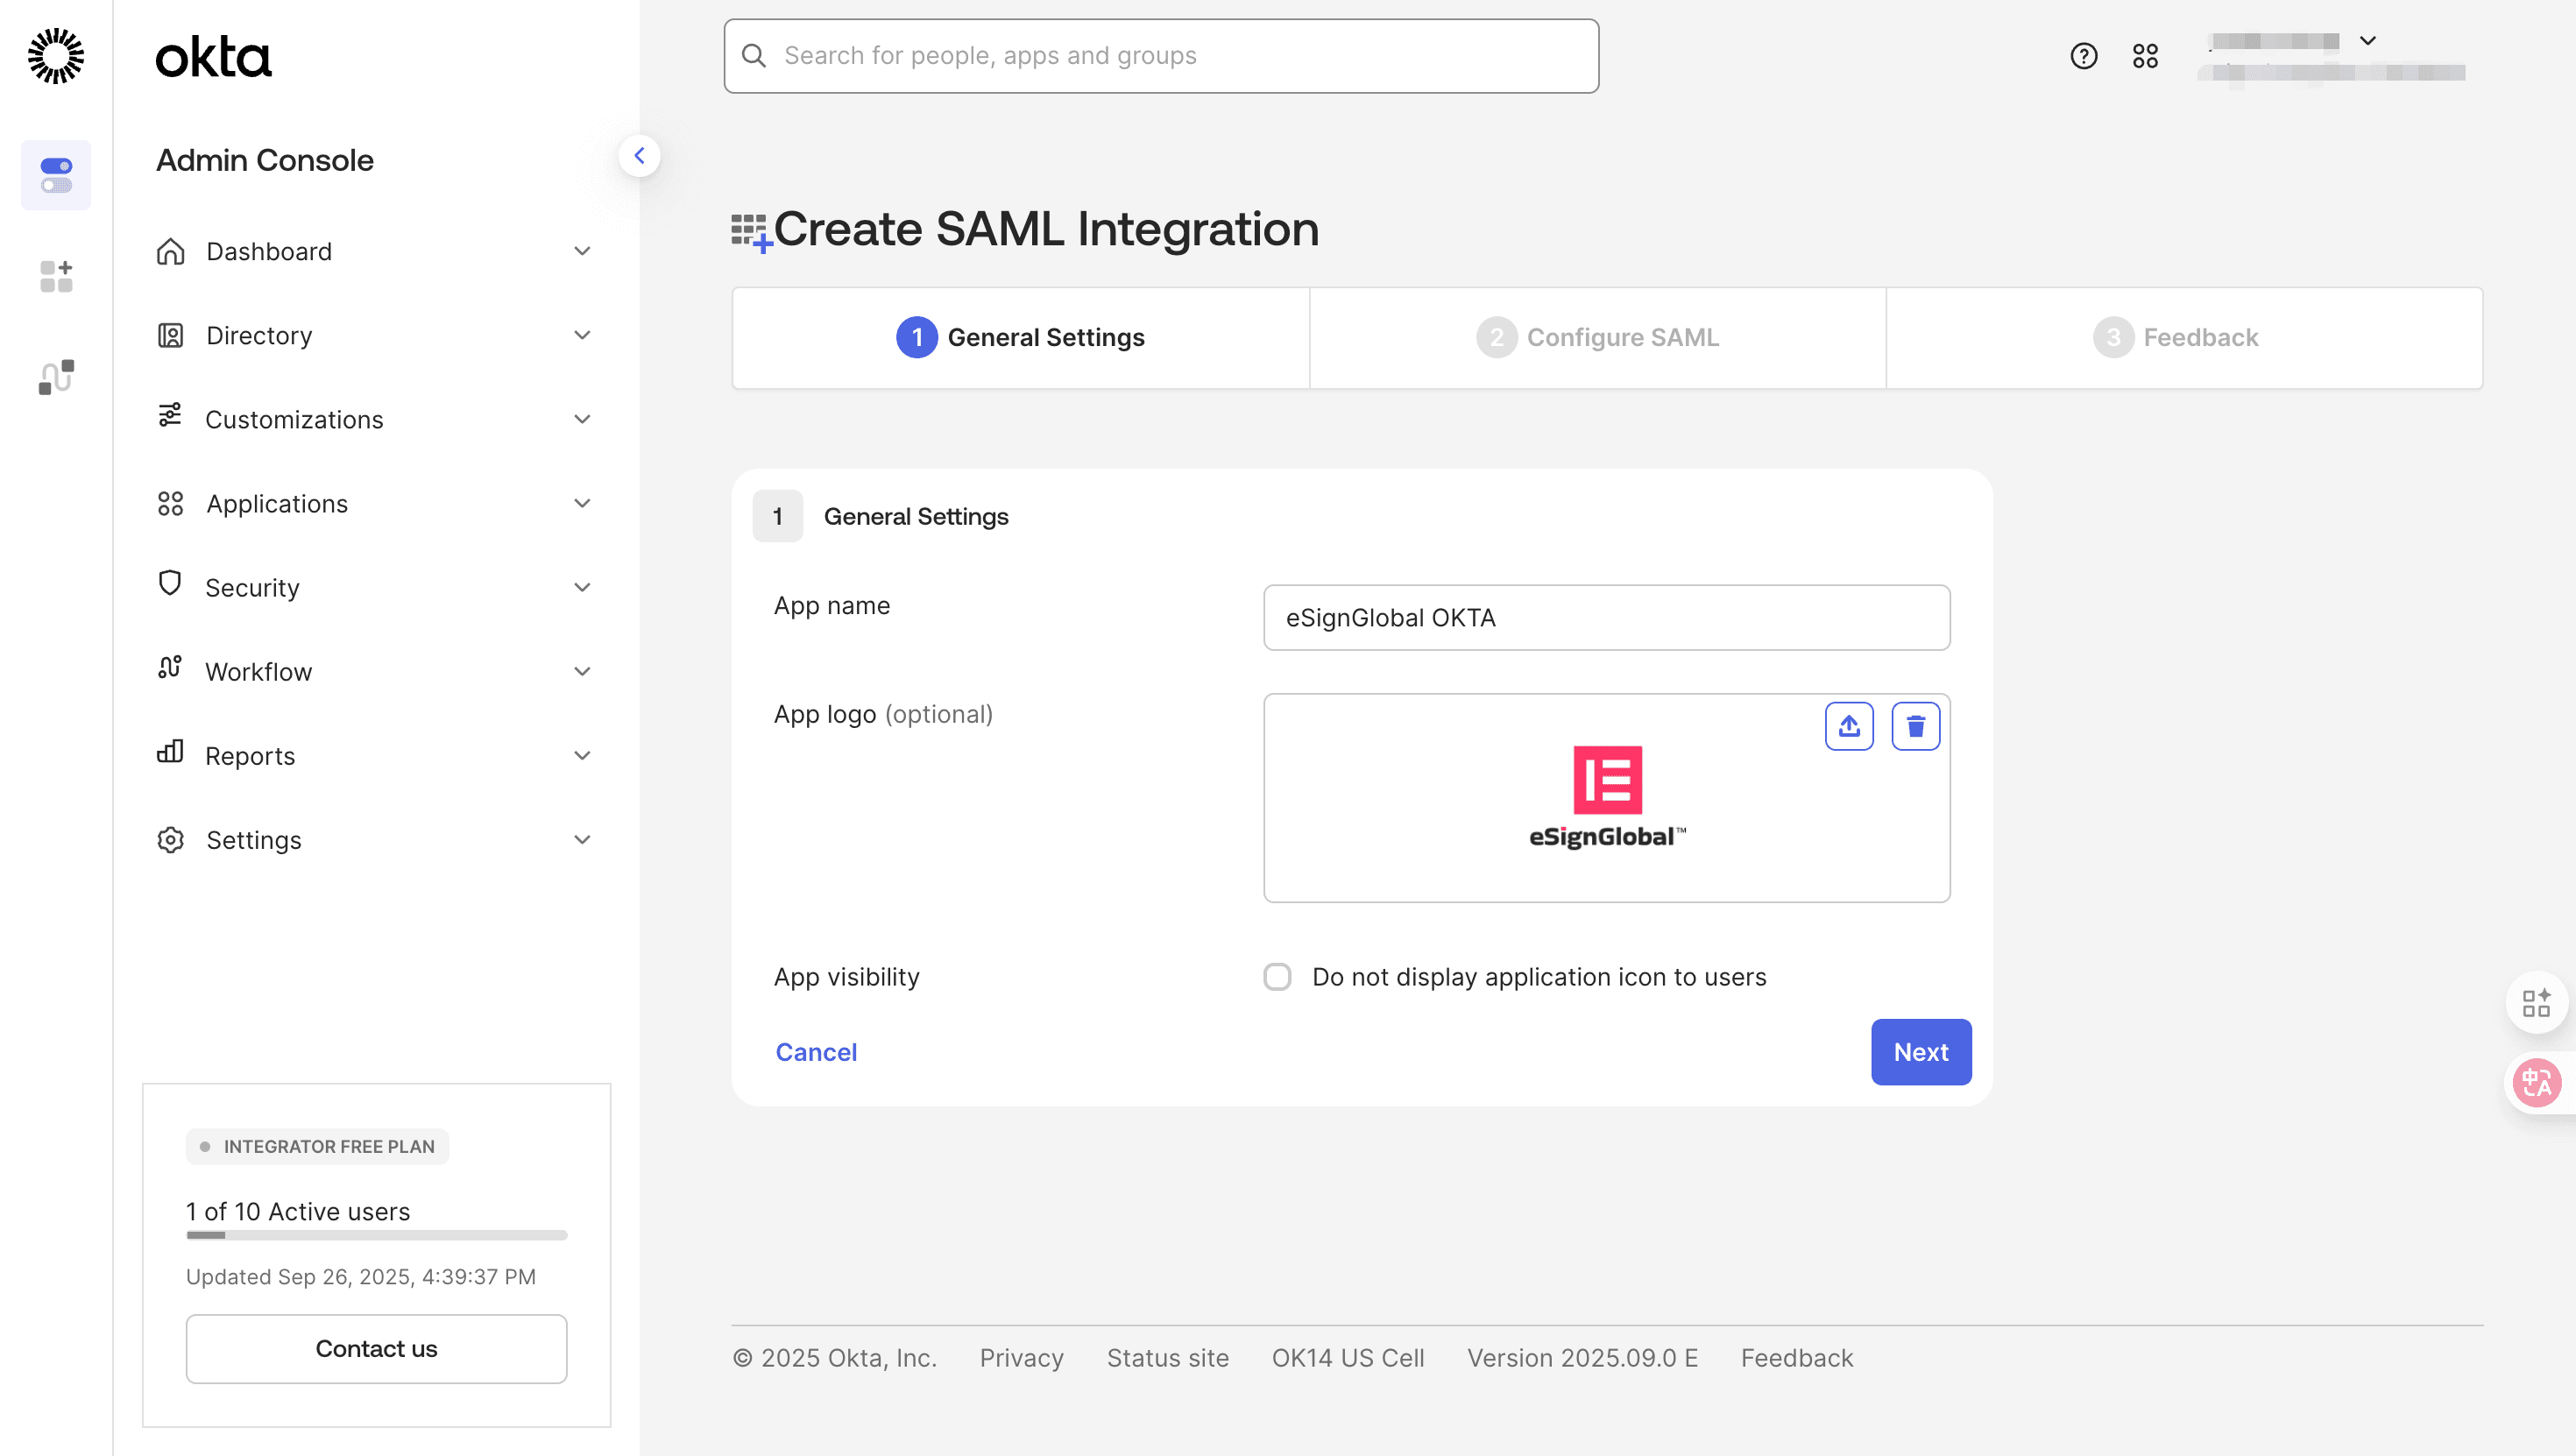
- Fill in the App name and upload the App logo as needed.
Setting Up Single Sign-On
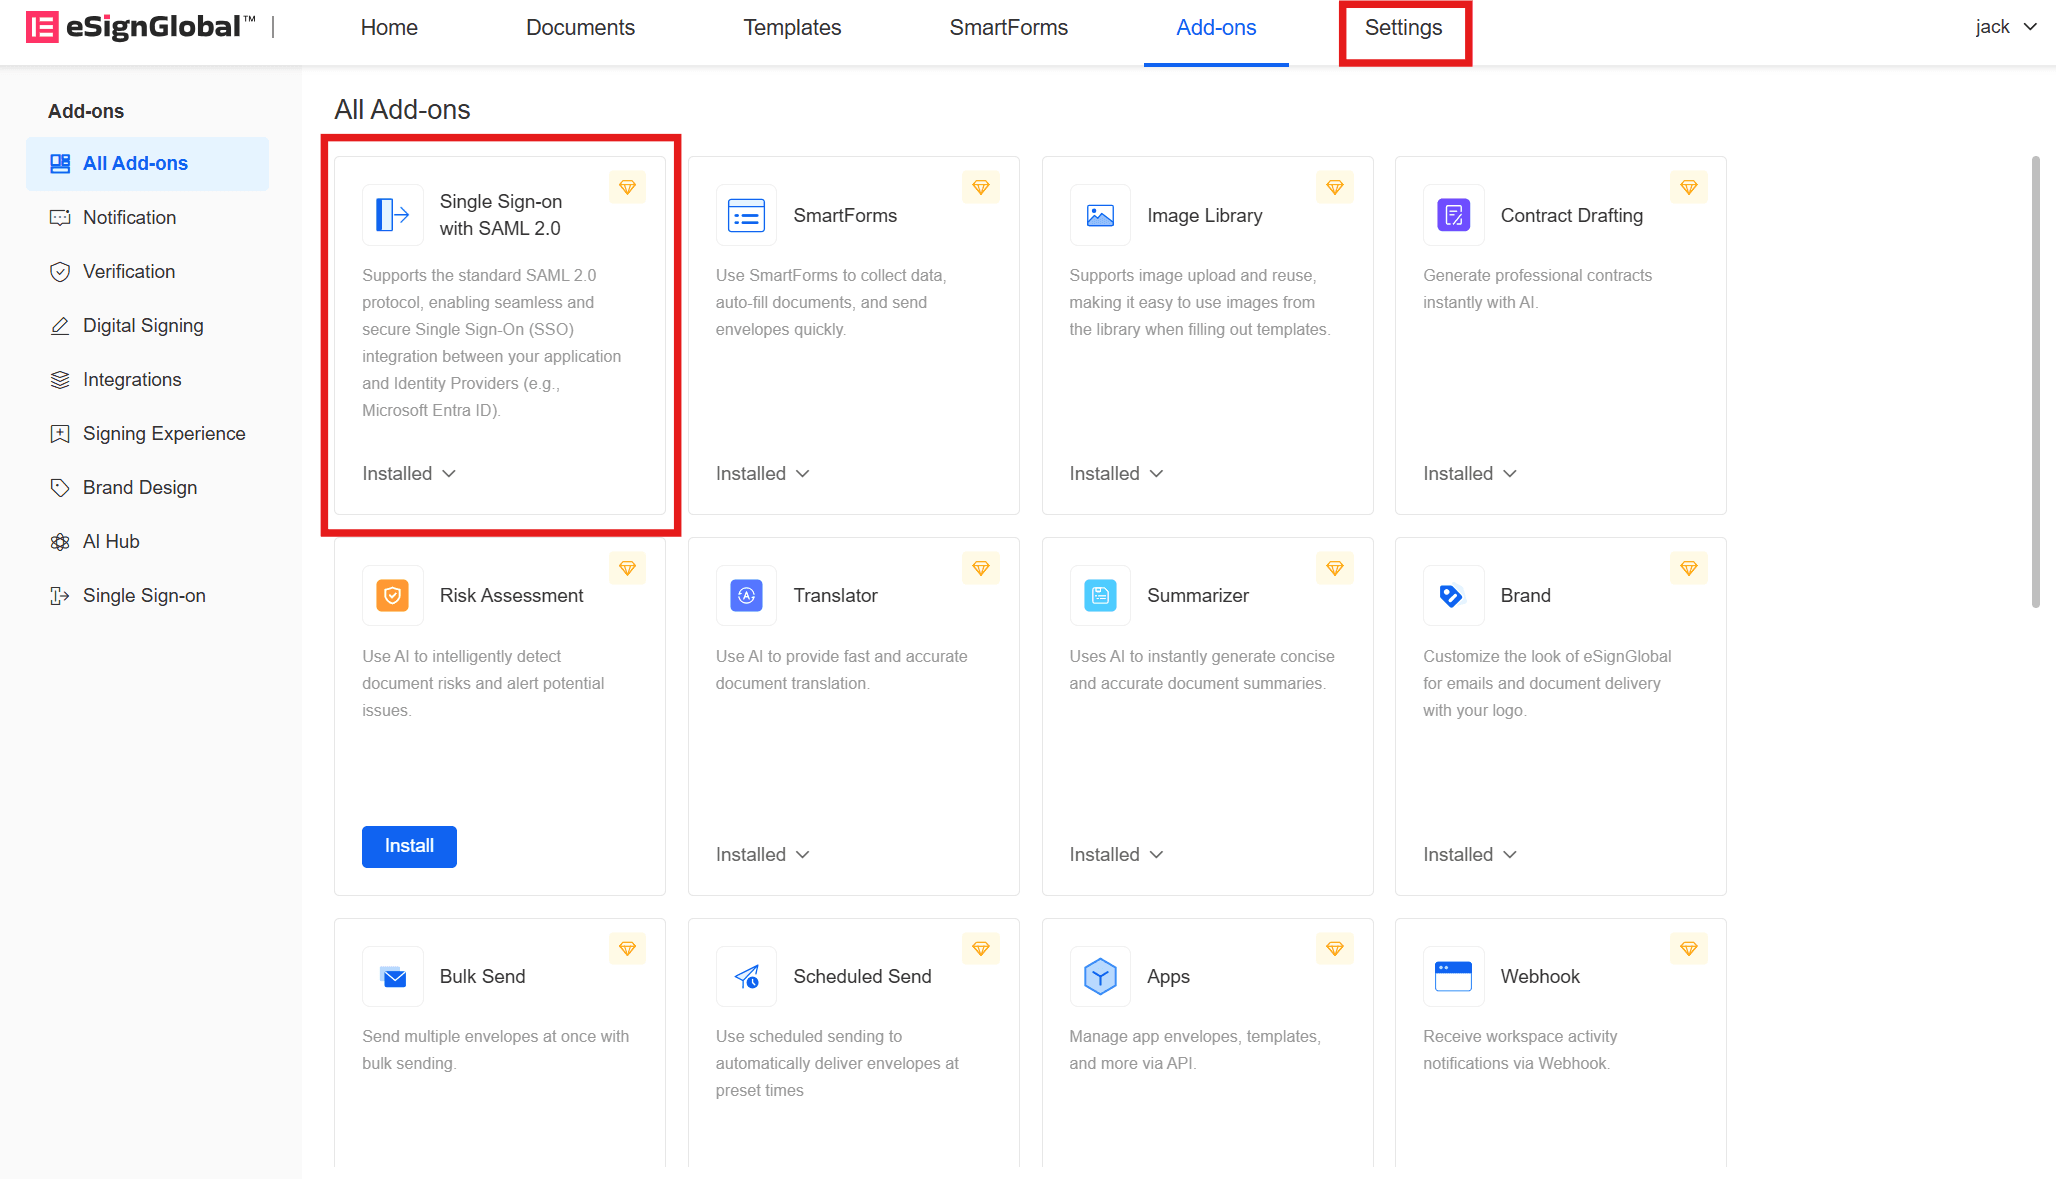
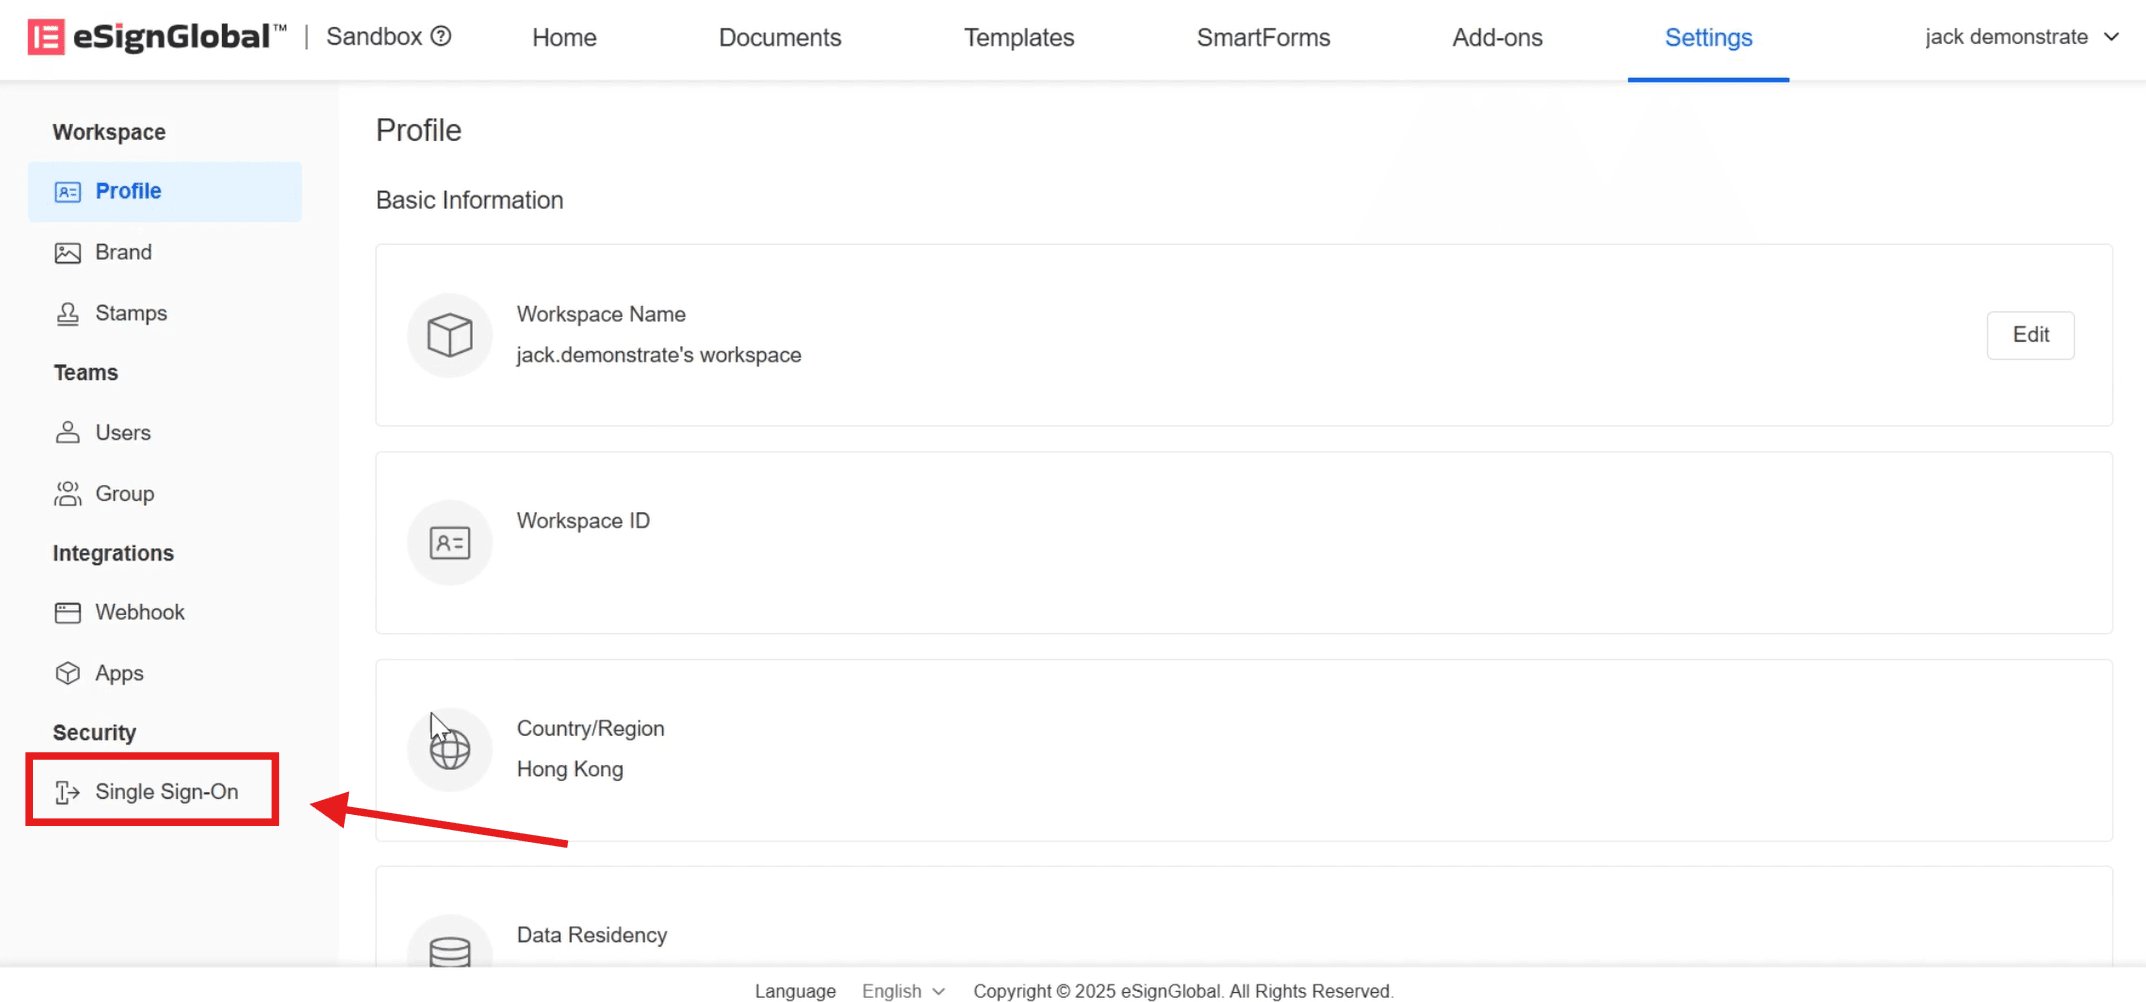
- Return to the eSignGlobal portal, log in and install the [Single Sign-On SAML2.0 Protocol] plugin, then click on [Settings] in the top menu bar.
- Click on [Single Sign-On] under the [Security] directory on the left.
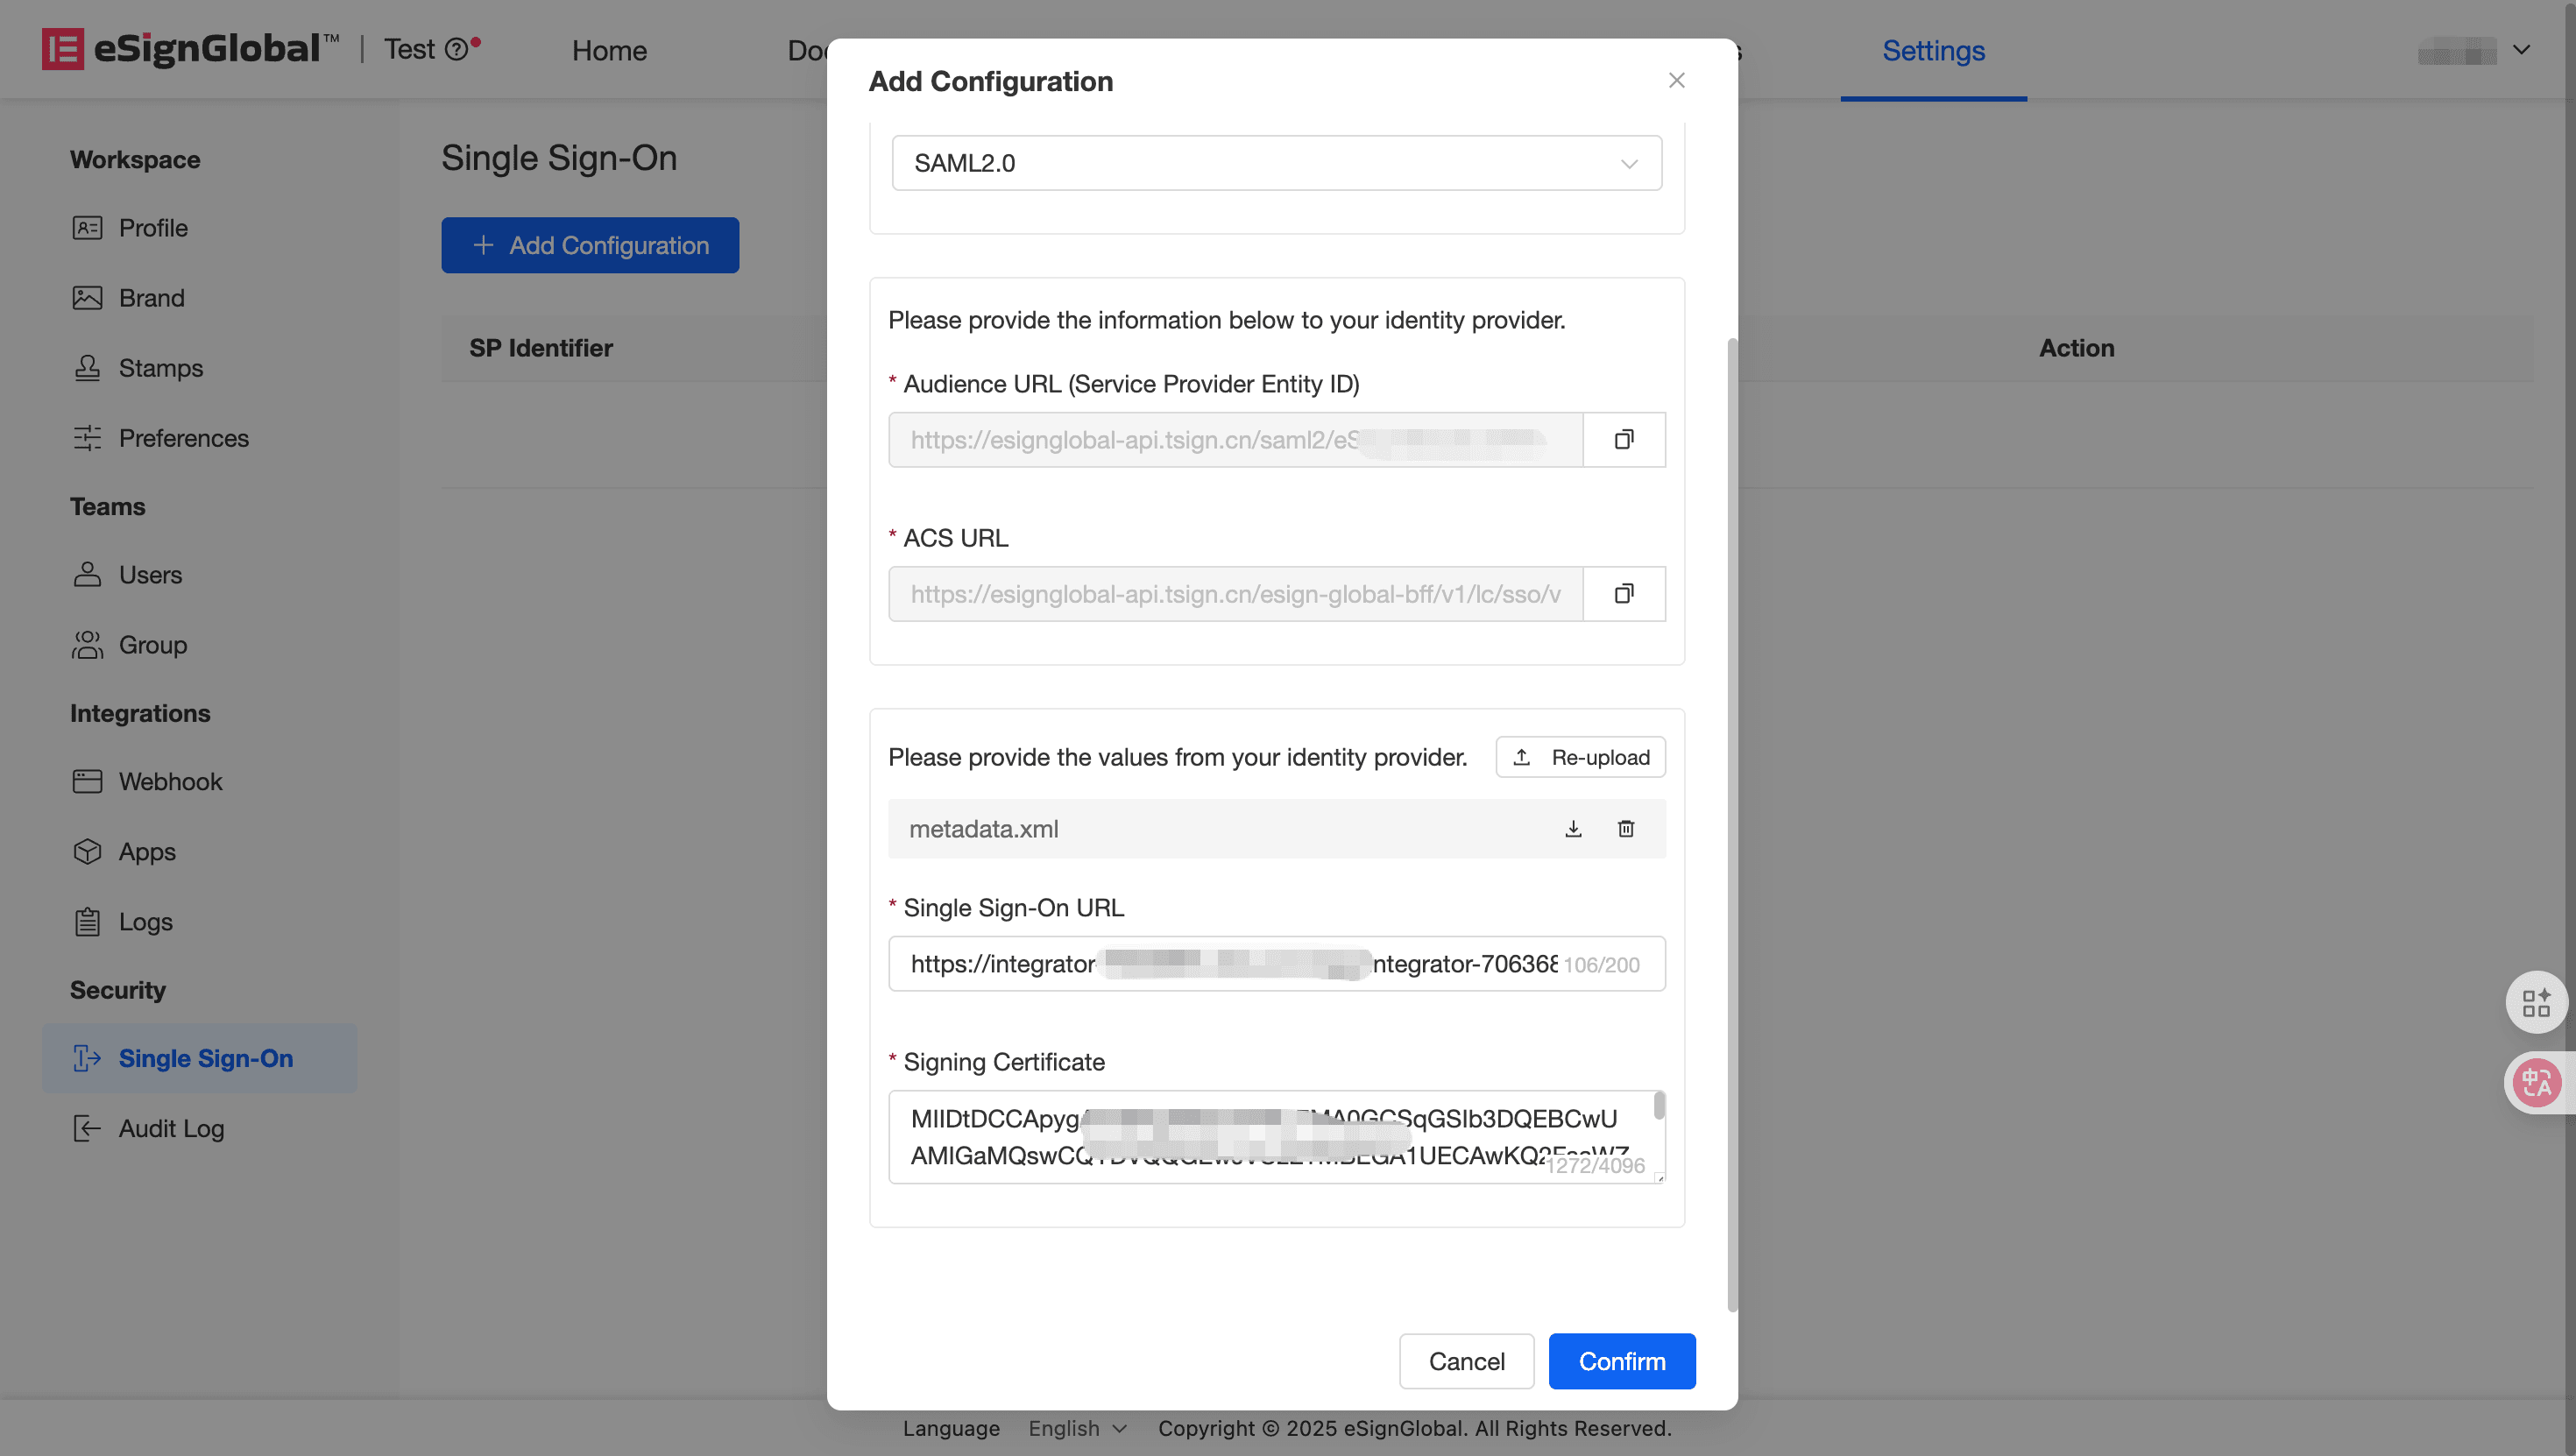
- Click on [Add Configuration], enter the [Service Provider Identity Identifier], and select [Single Sign-On Protocol] as SAML2.0.
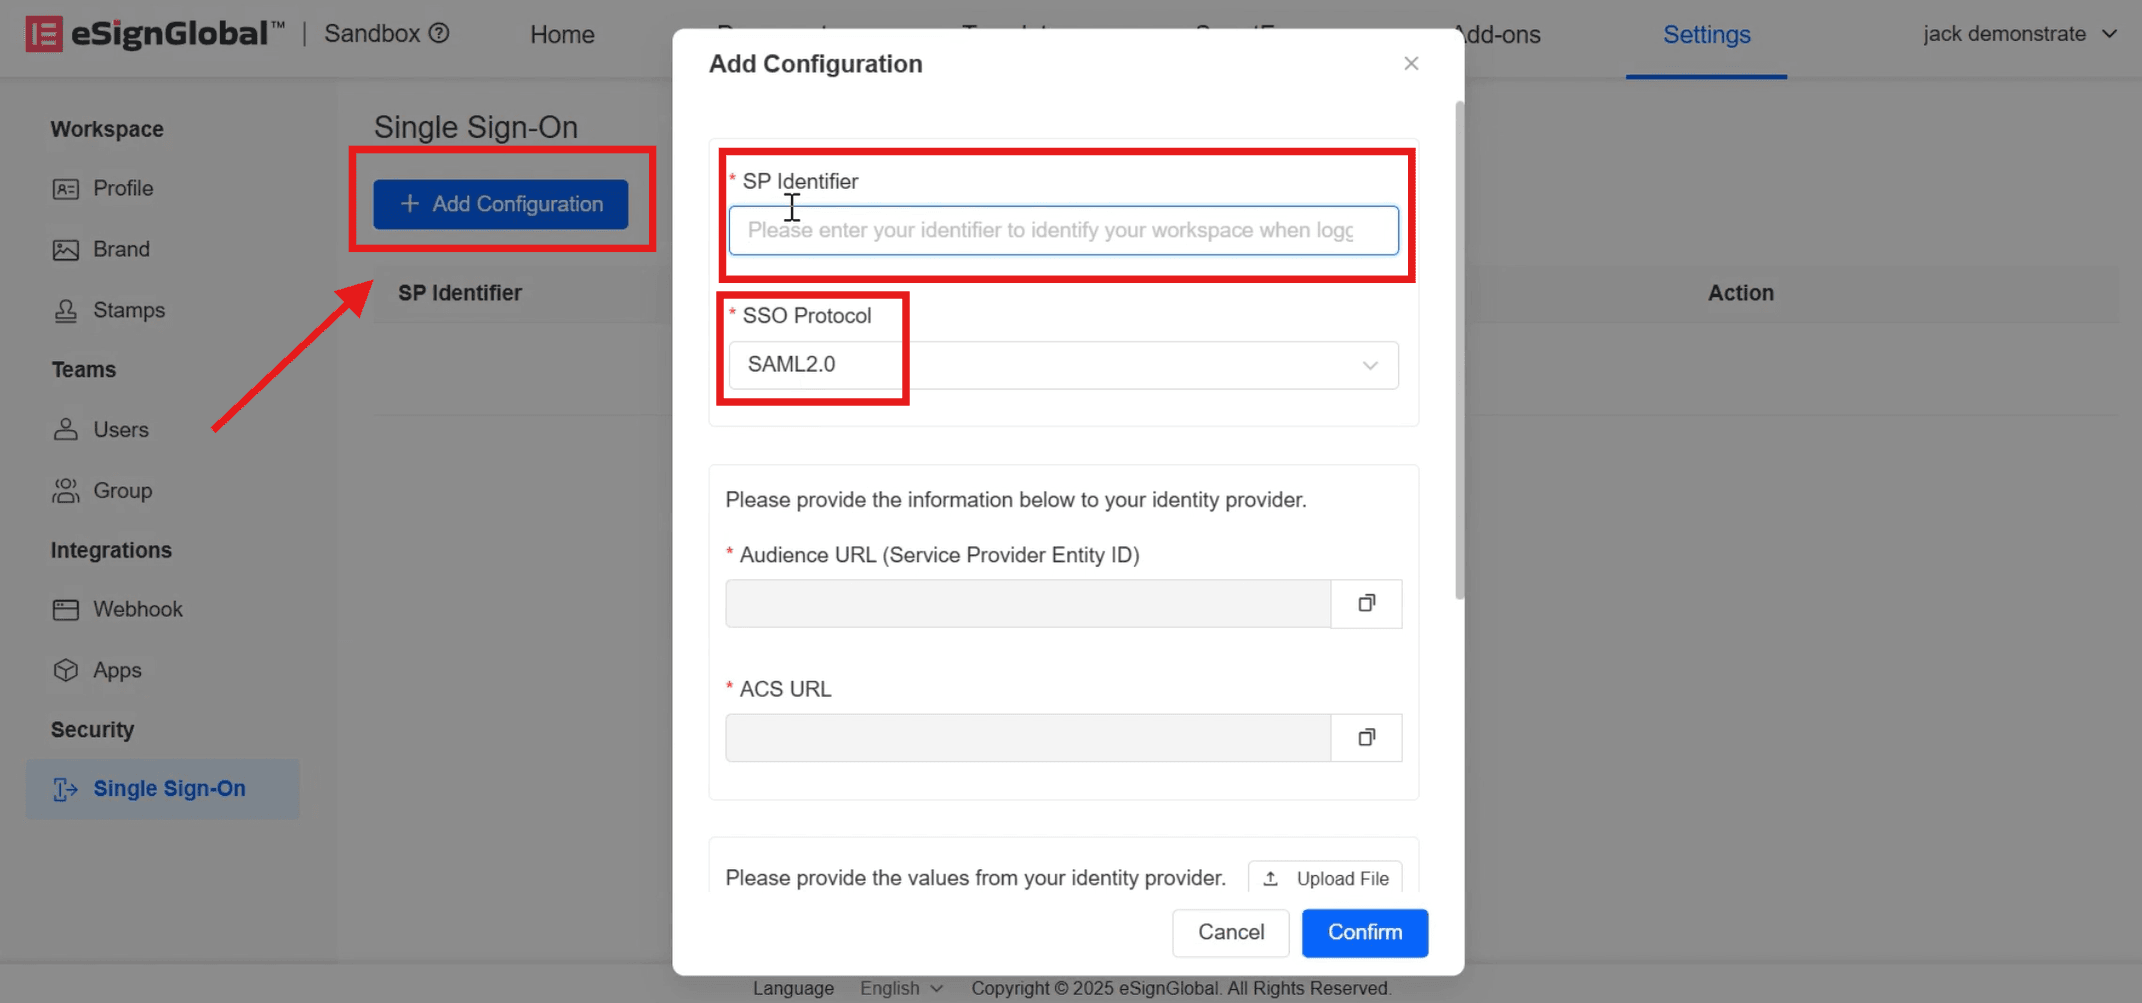
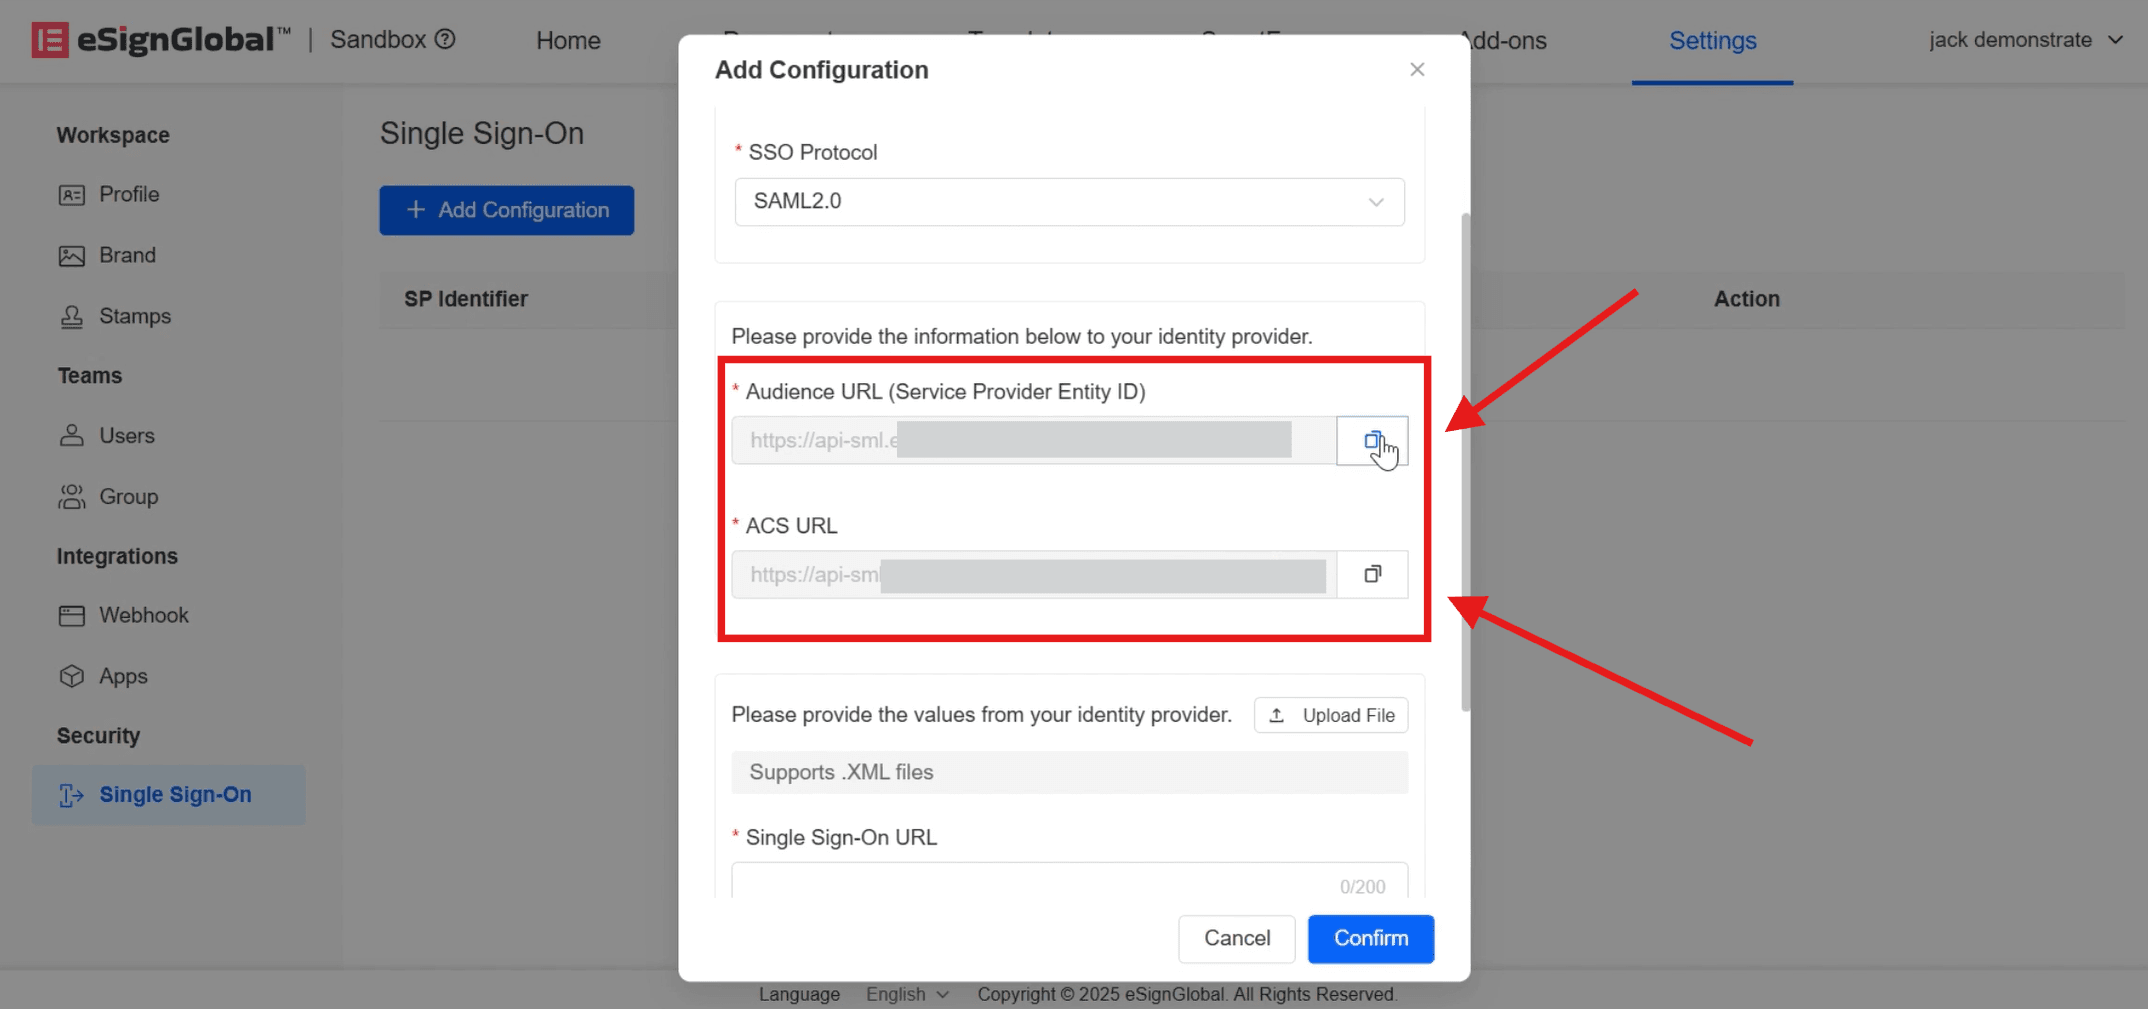
- After entering the information, the [Audience URL] (Service Provider Entity ID) and [ACS URL] will be automatically generated below. Click on the right side to copy them to the OKTA page.
- Return to the OKTA page.
Note:
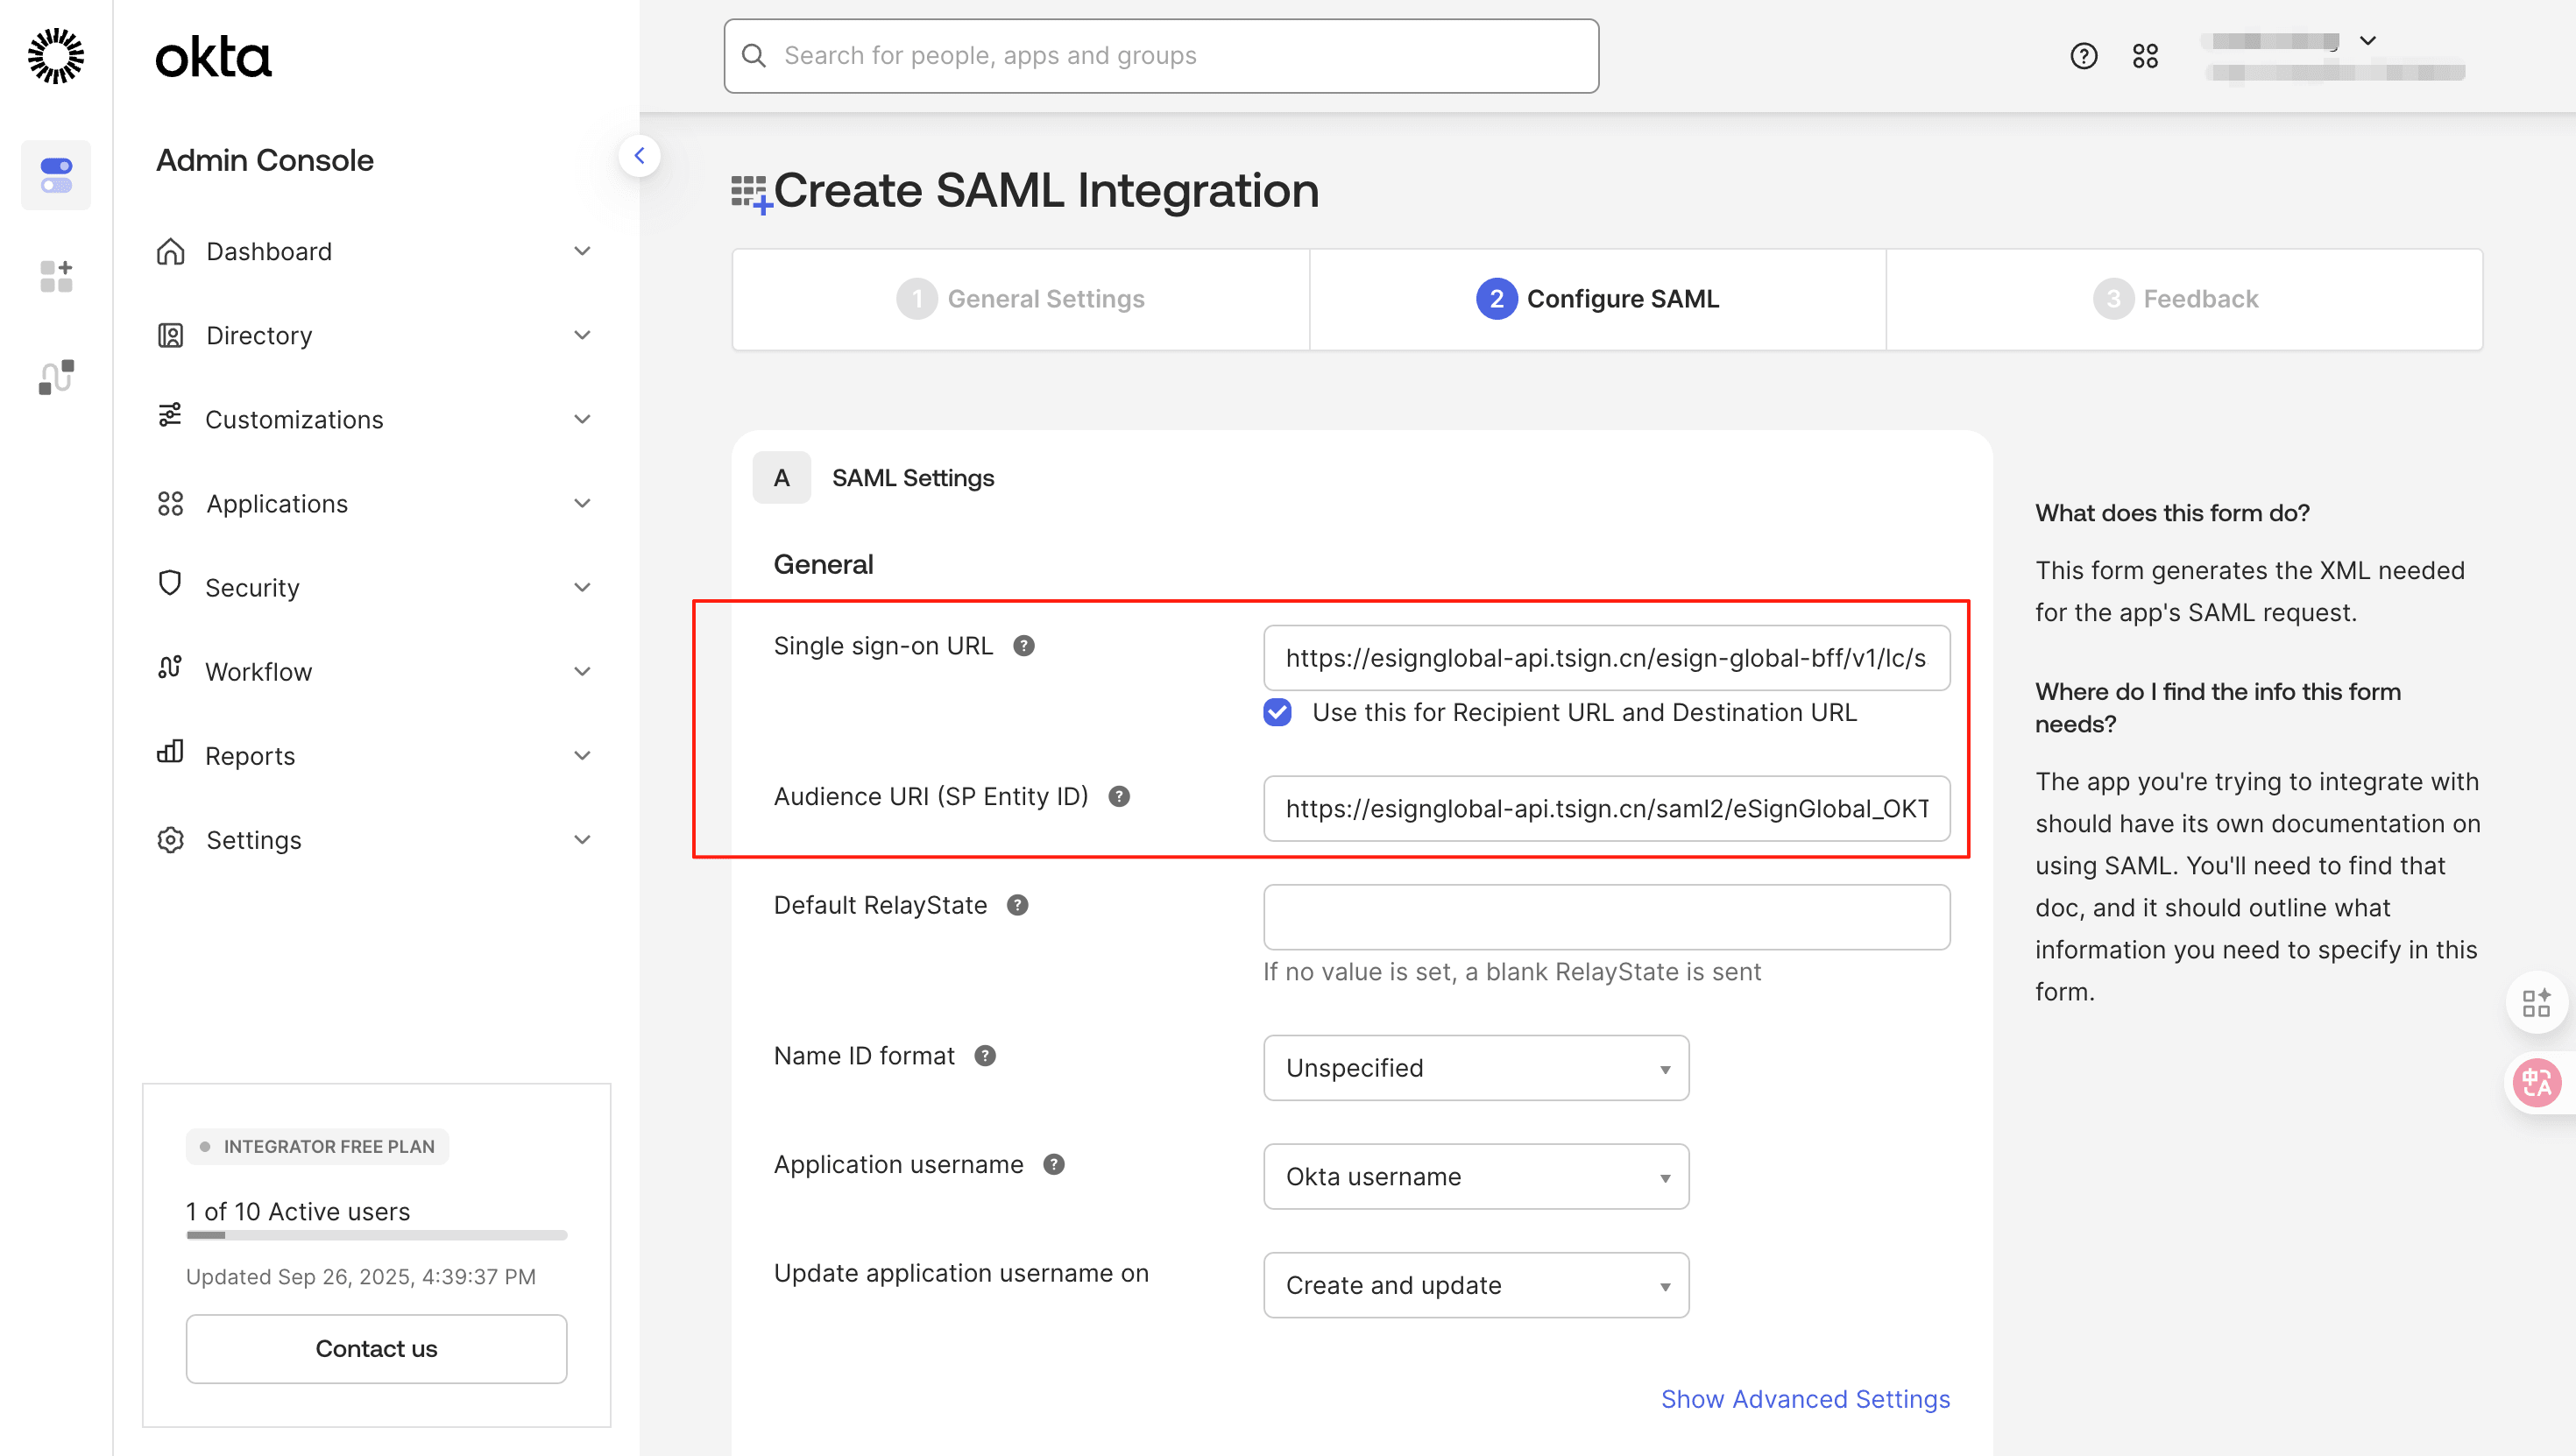
The [Audience URL] (Service Provider Entity ID) in eSignGlobal corresponds to the [Audience URL(SP Entity ID)] in OKTA;
The [ACS URL] in eSignGlobal corresponds to the [Single sign-on URL] in OKTA.
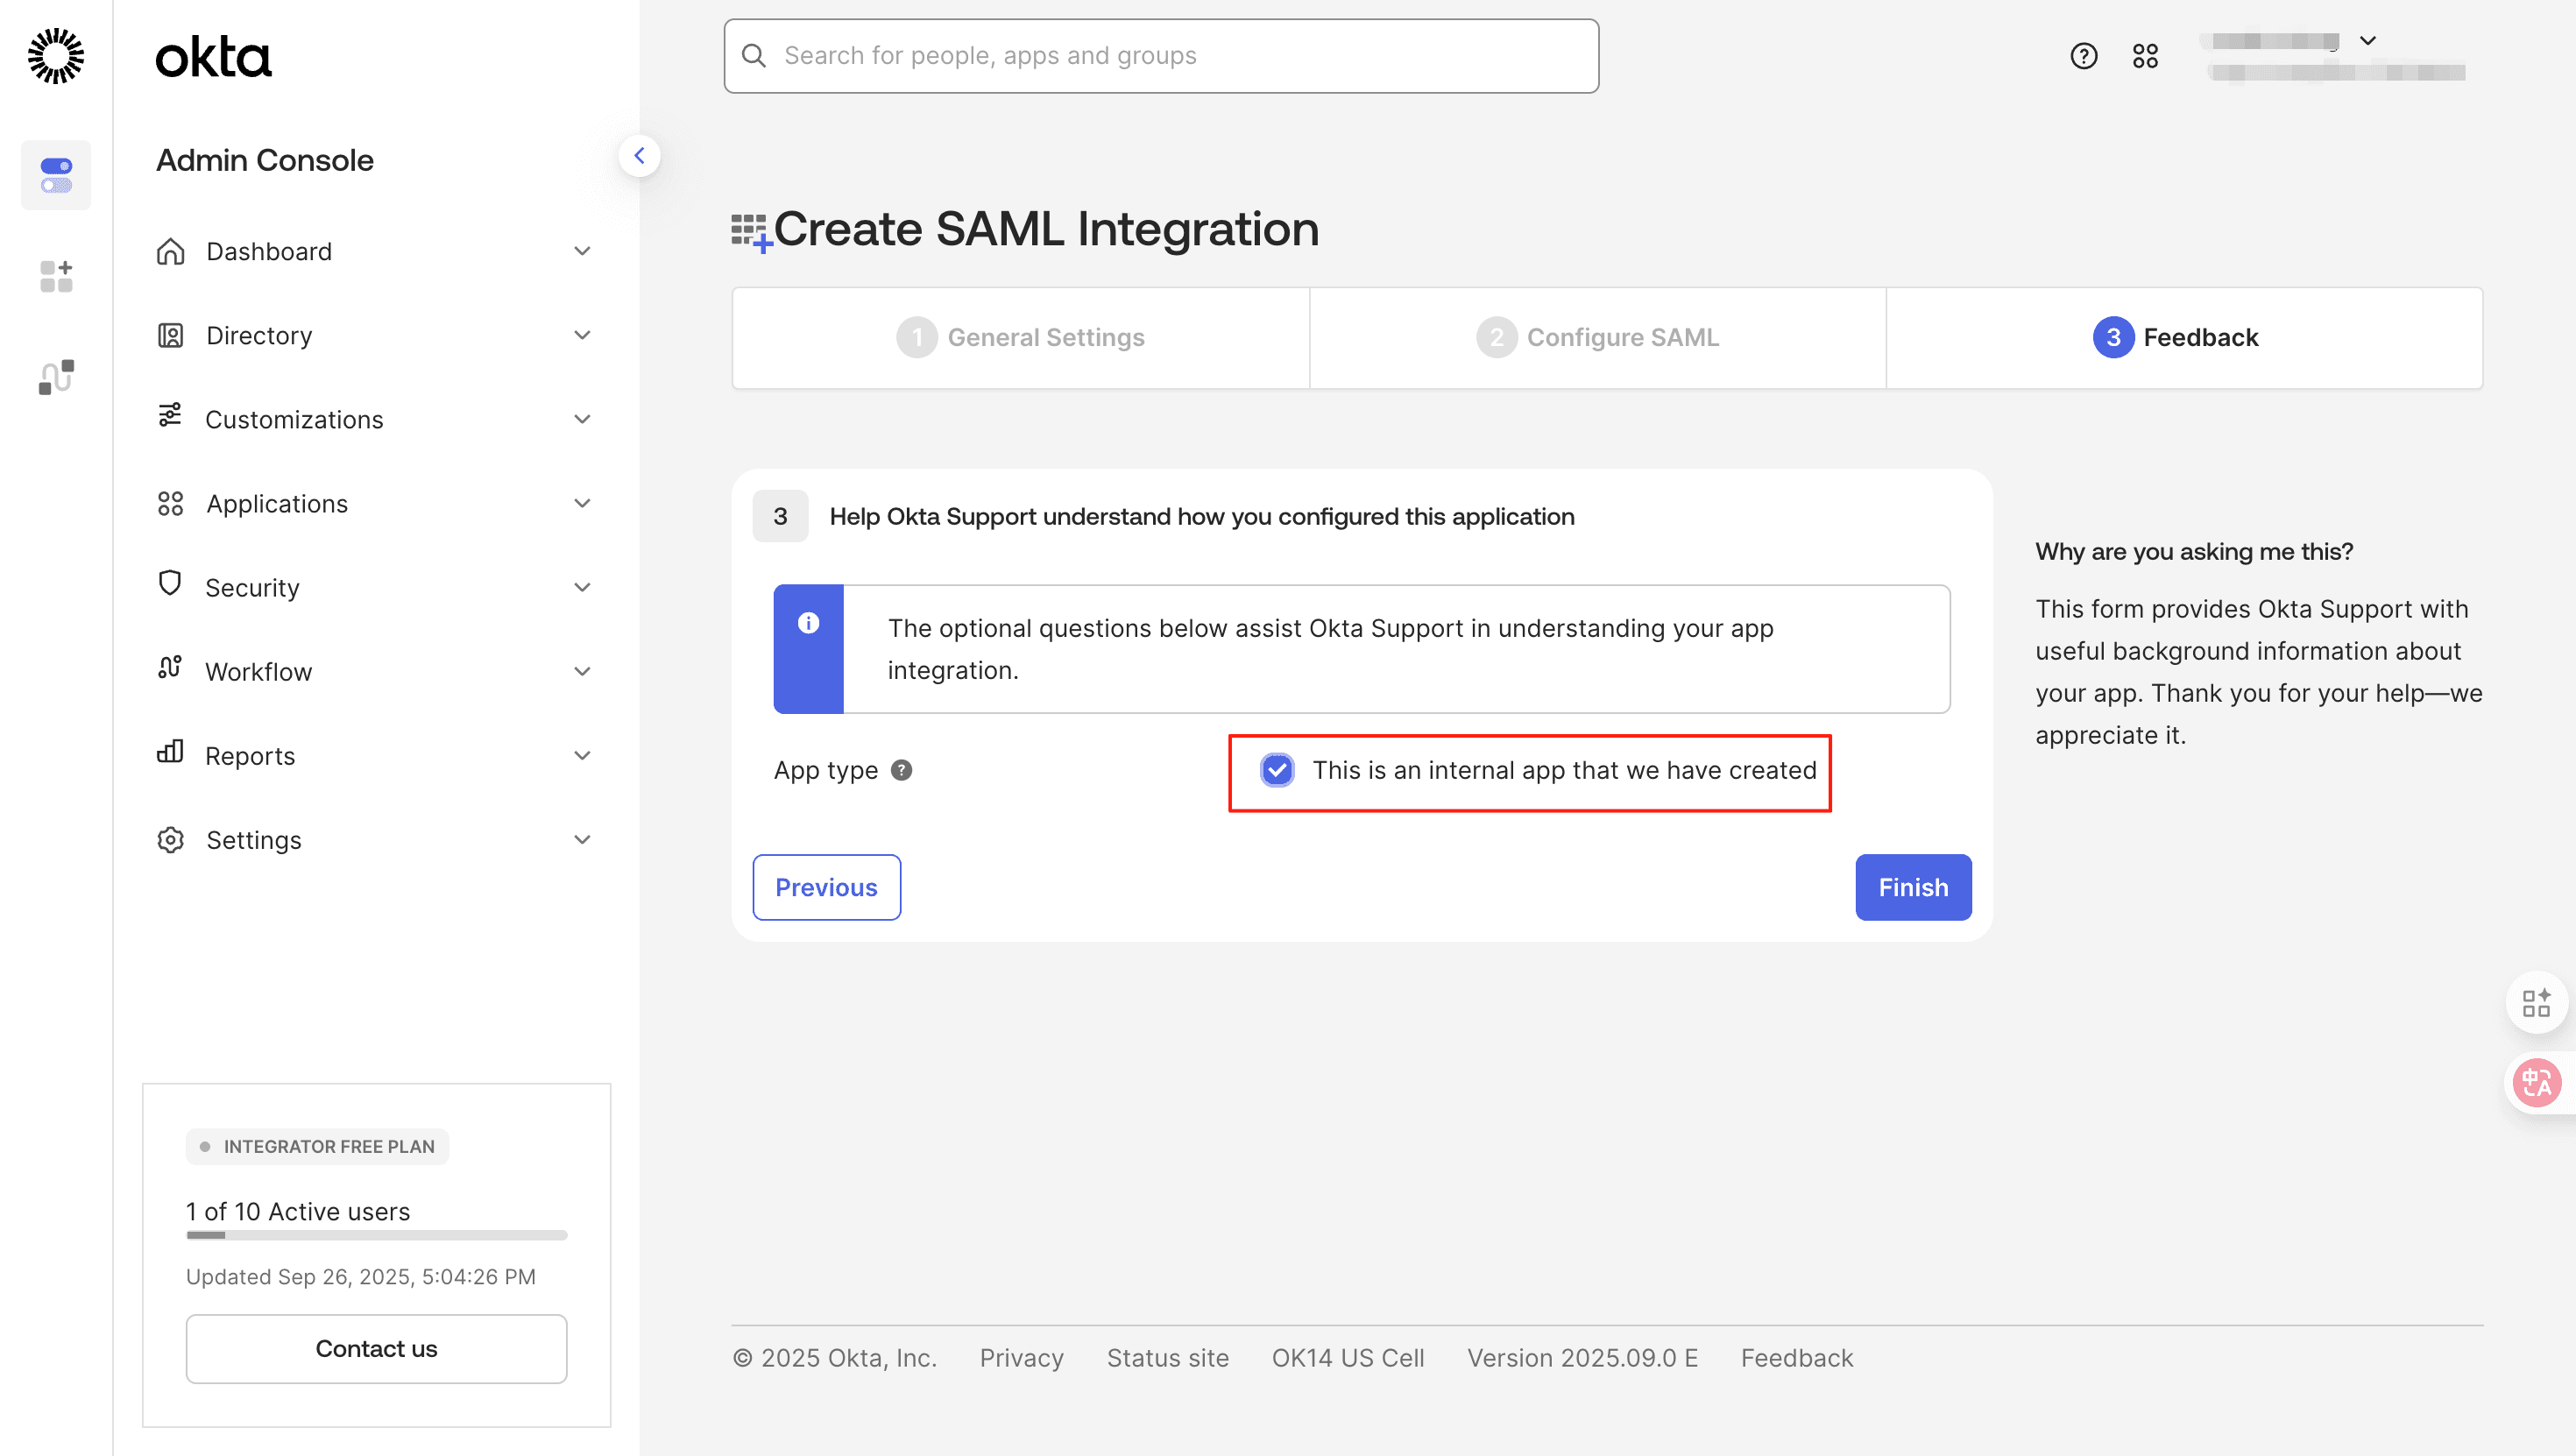
- Next, check [This is an internal app that we have created] and click [Finish].
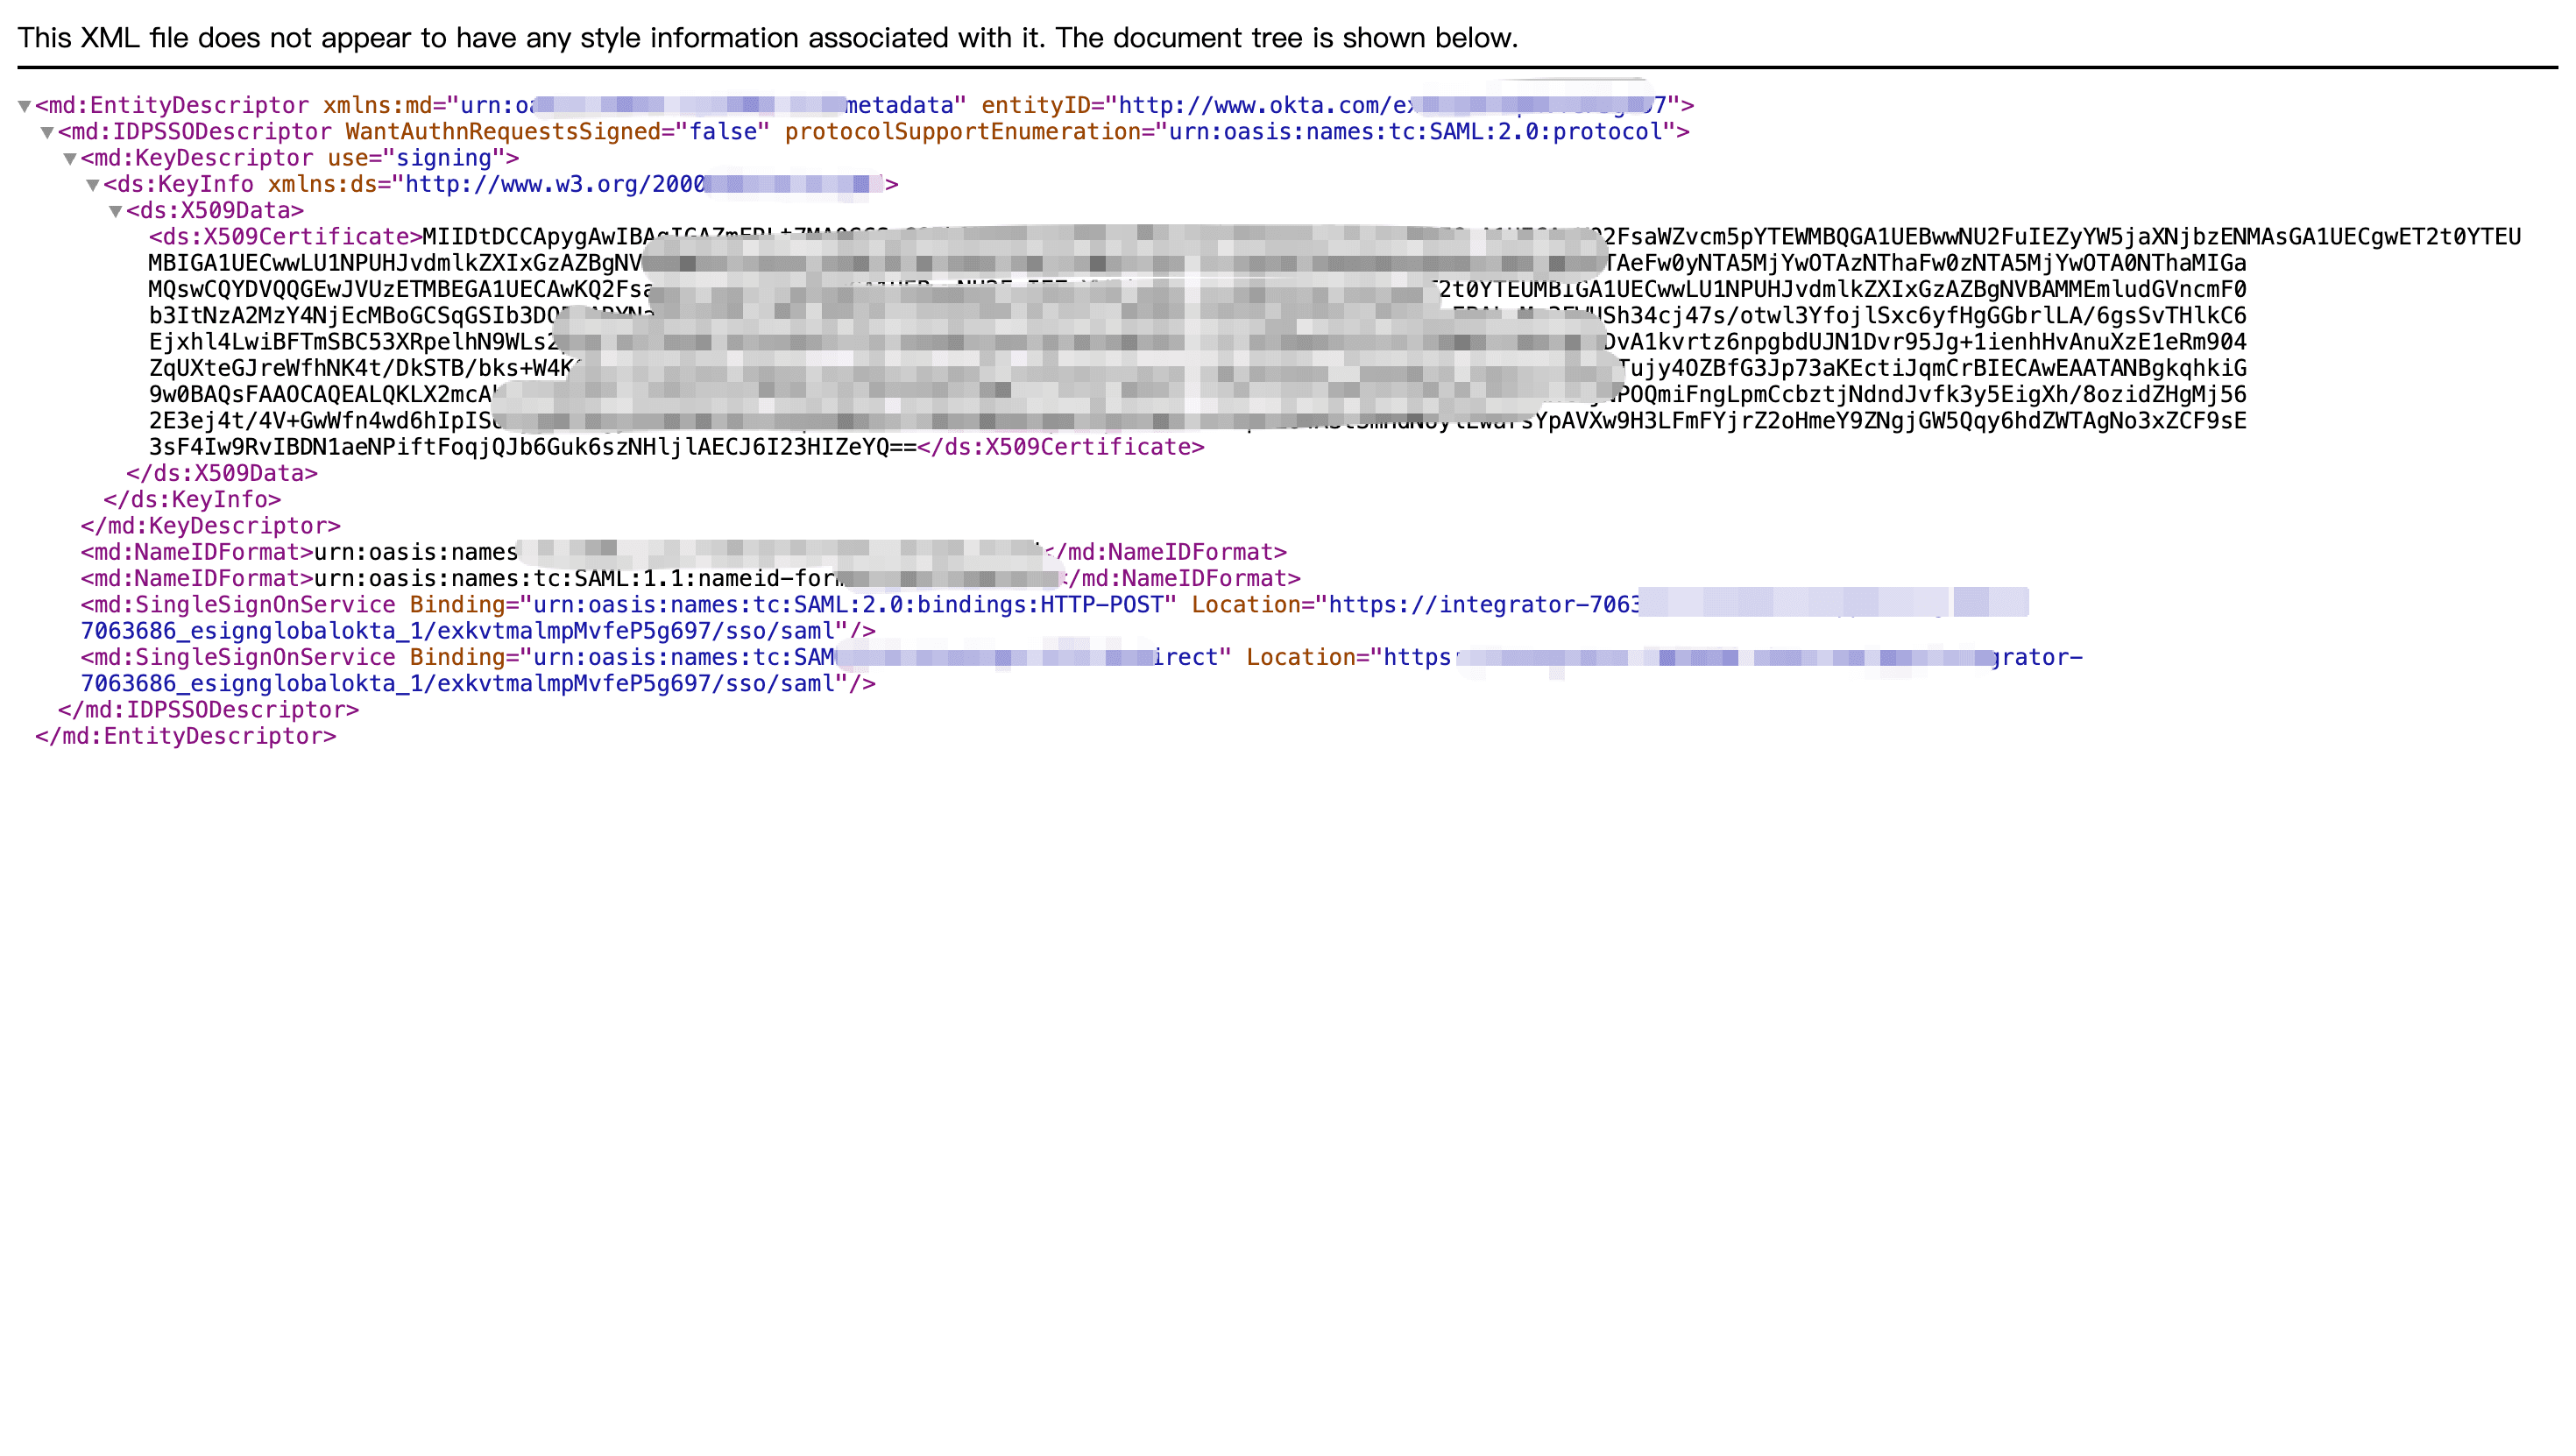
- Download the XML file.
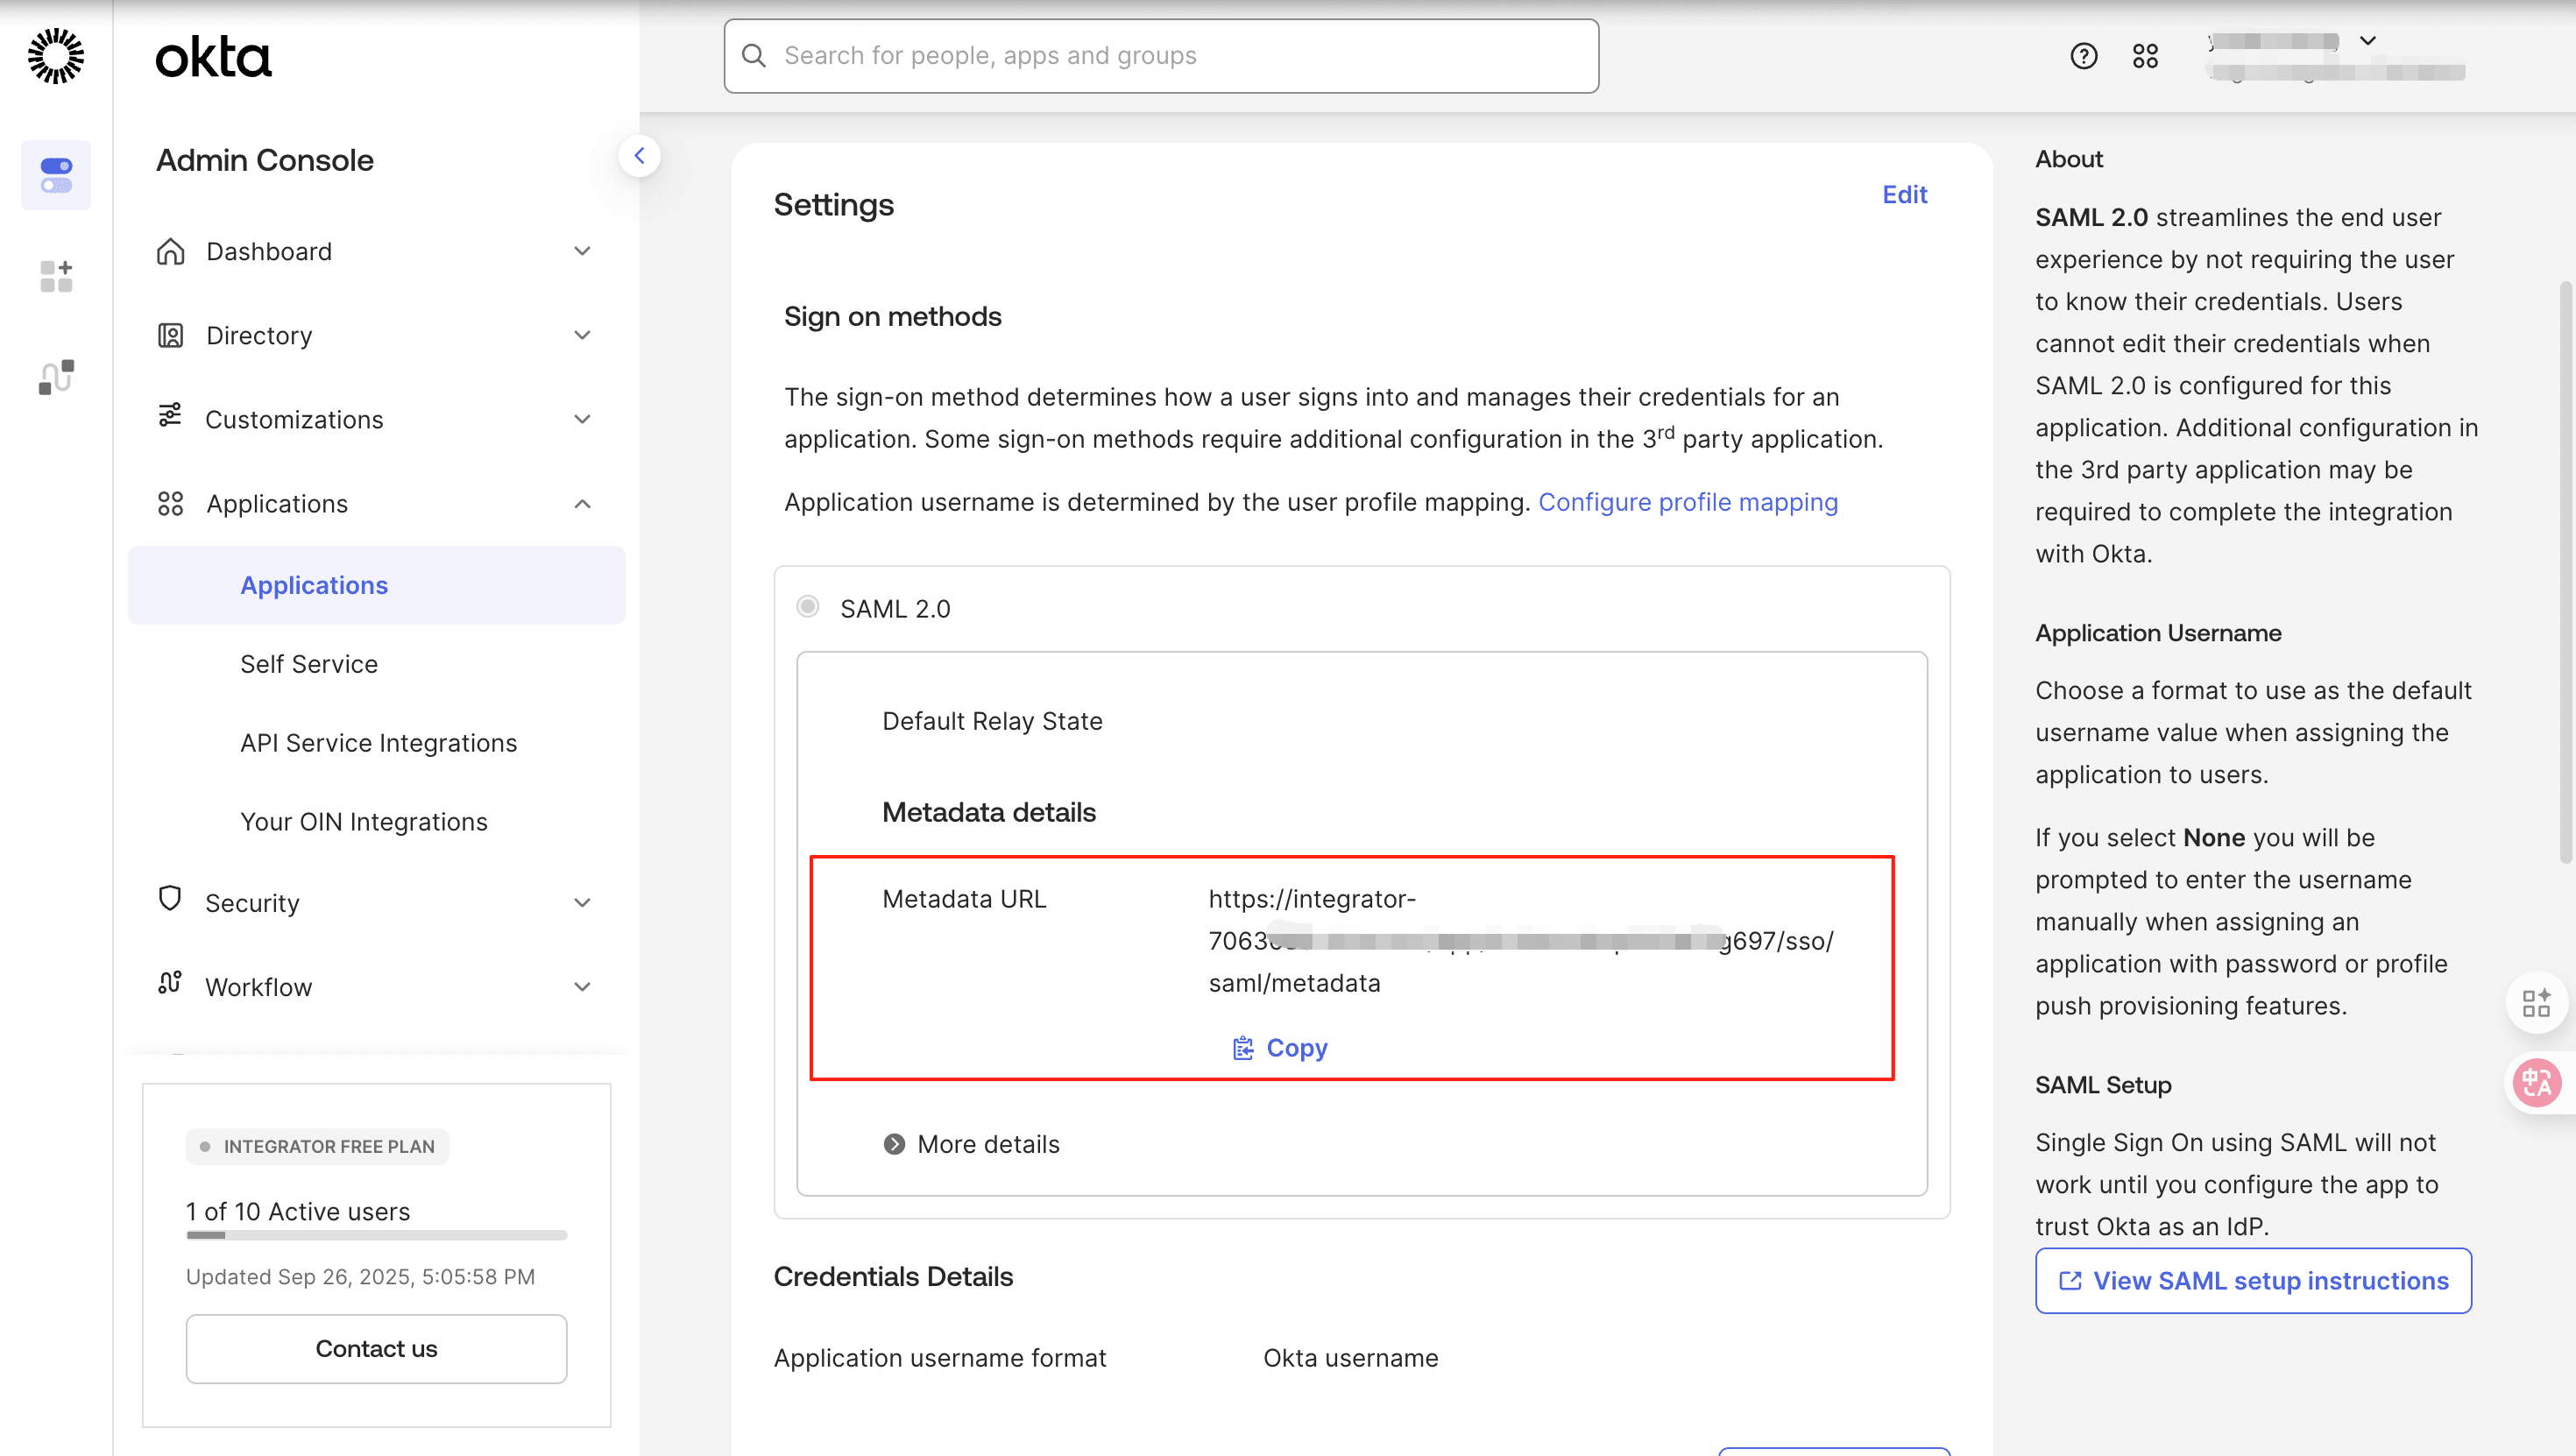
- Open it with a browser and save it as an XML file.
- Return to the eSignGlobal [Add Configuration] page, click on Upload the downloaded XML file.
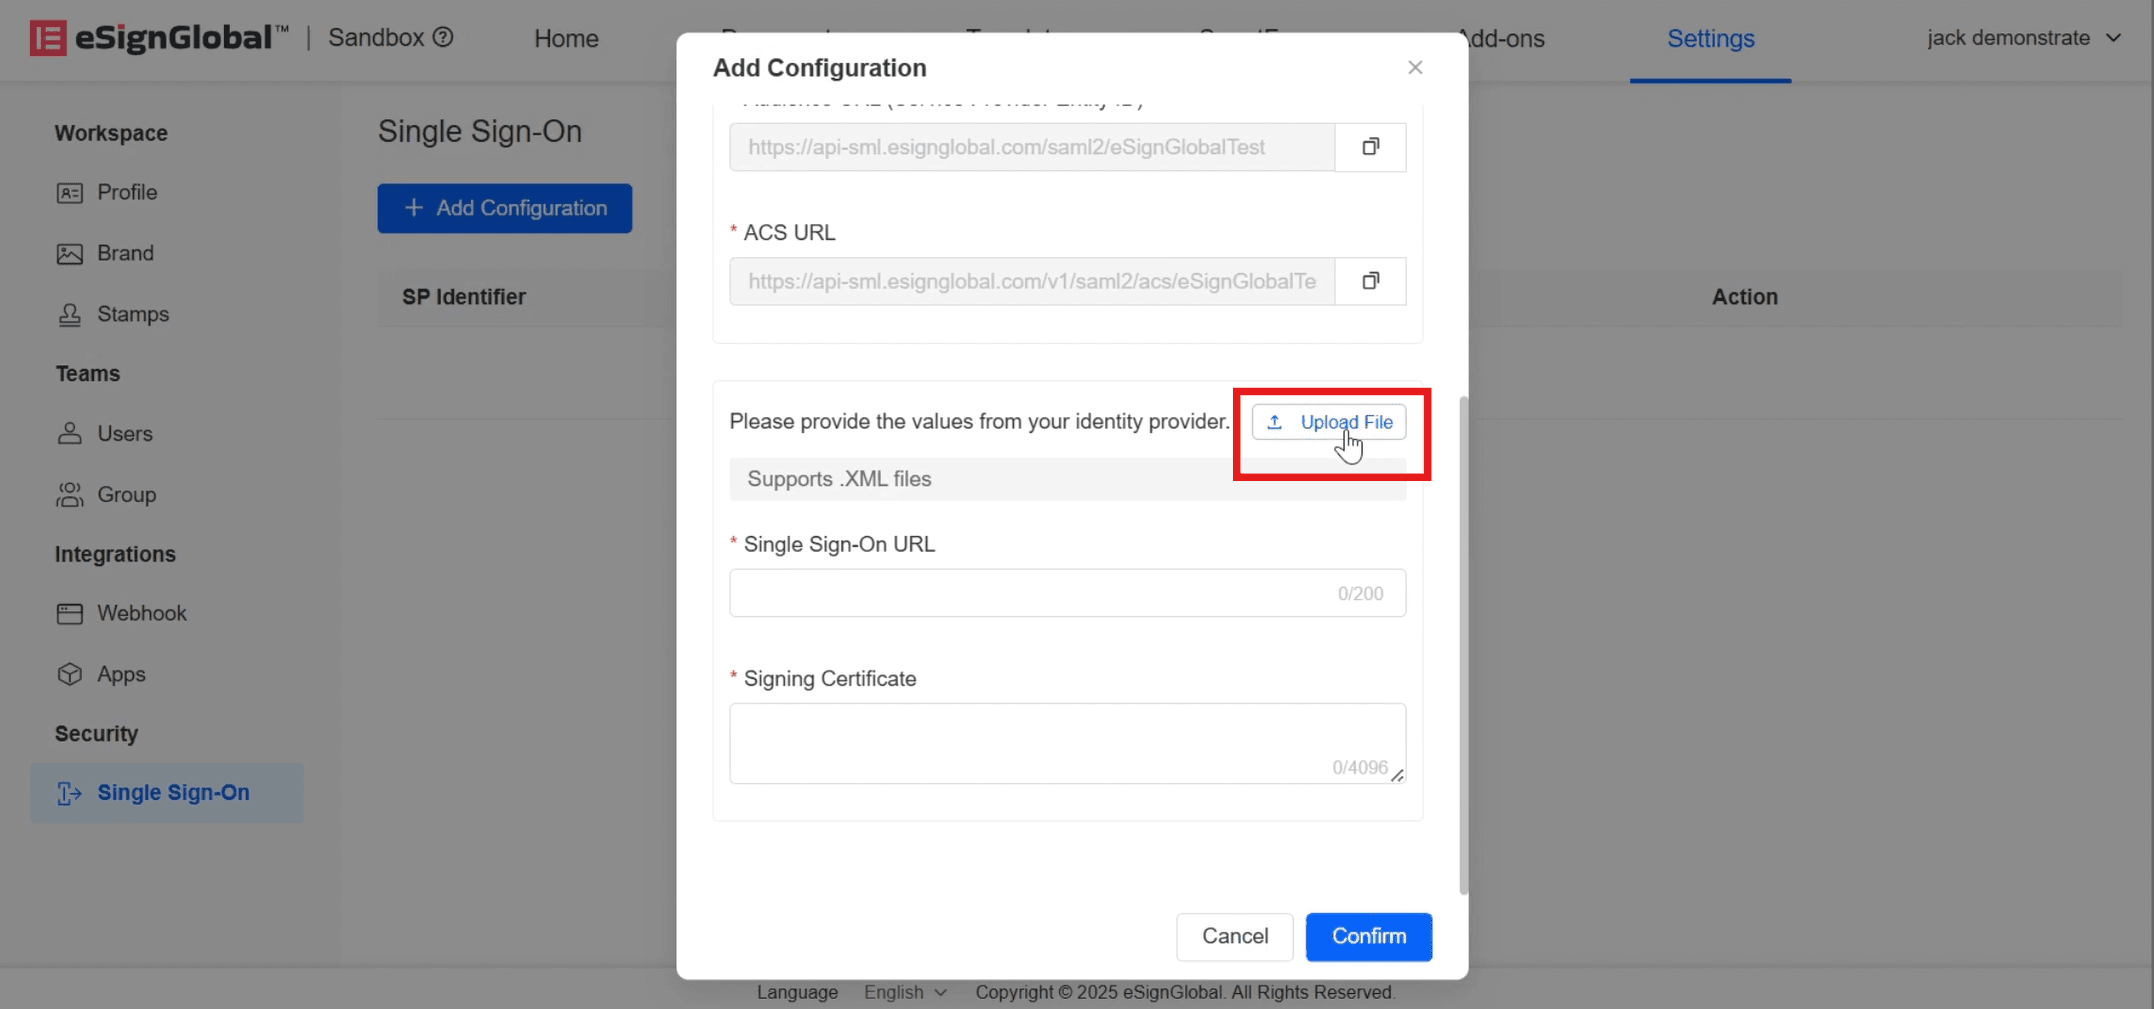
- After successful upload, the [Single Sign-On URL] and [Signature Certificate] will be automatically filled in. Click [Confirm] at this point.
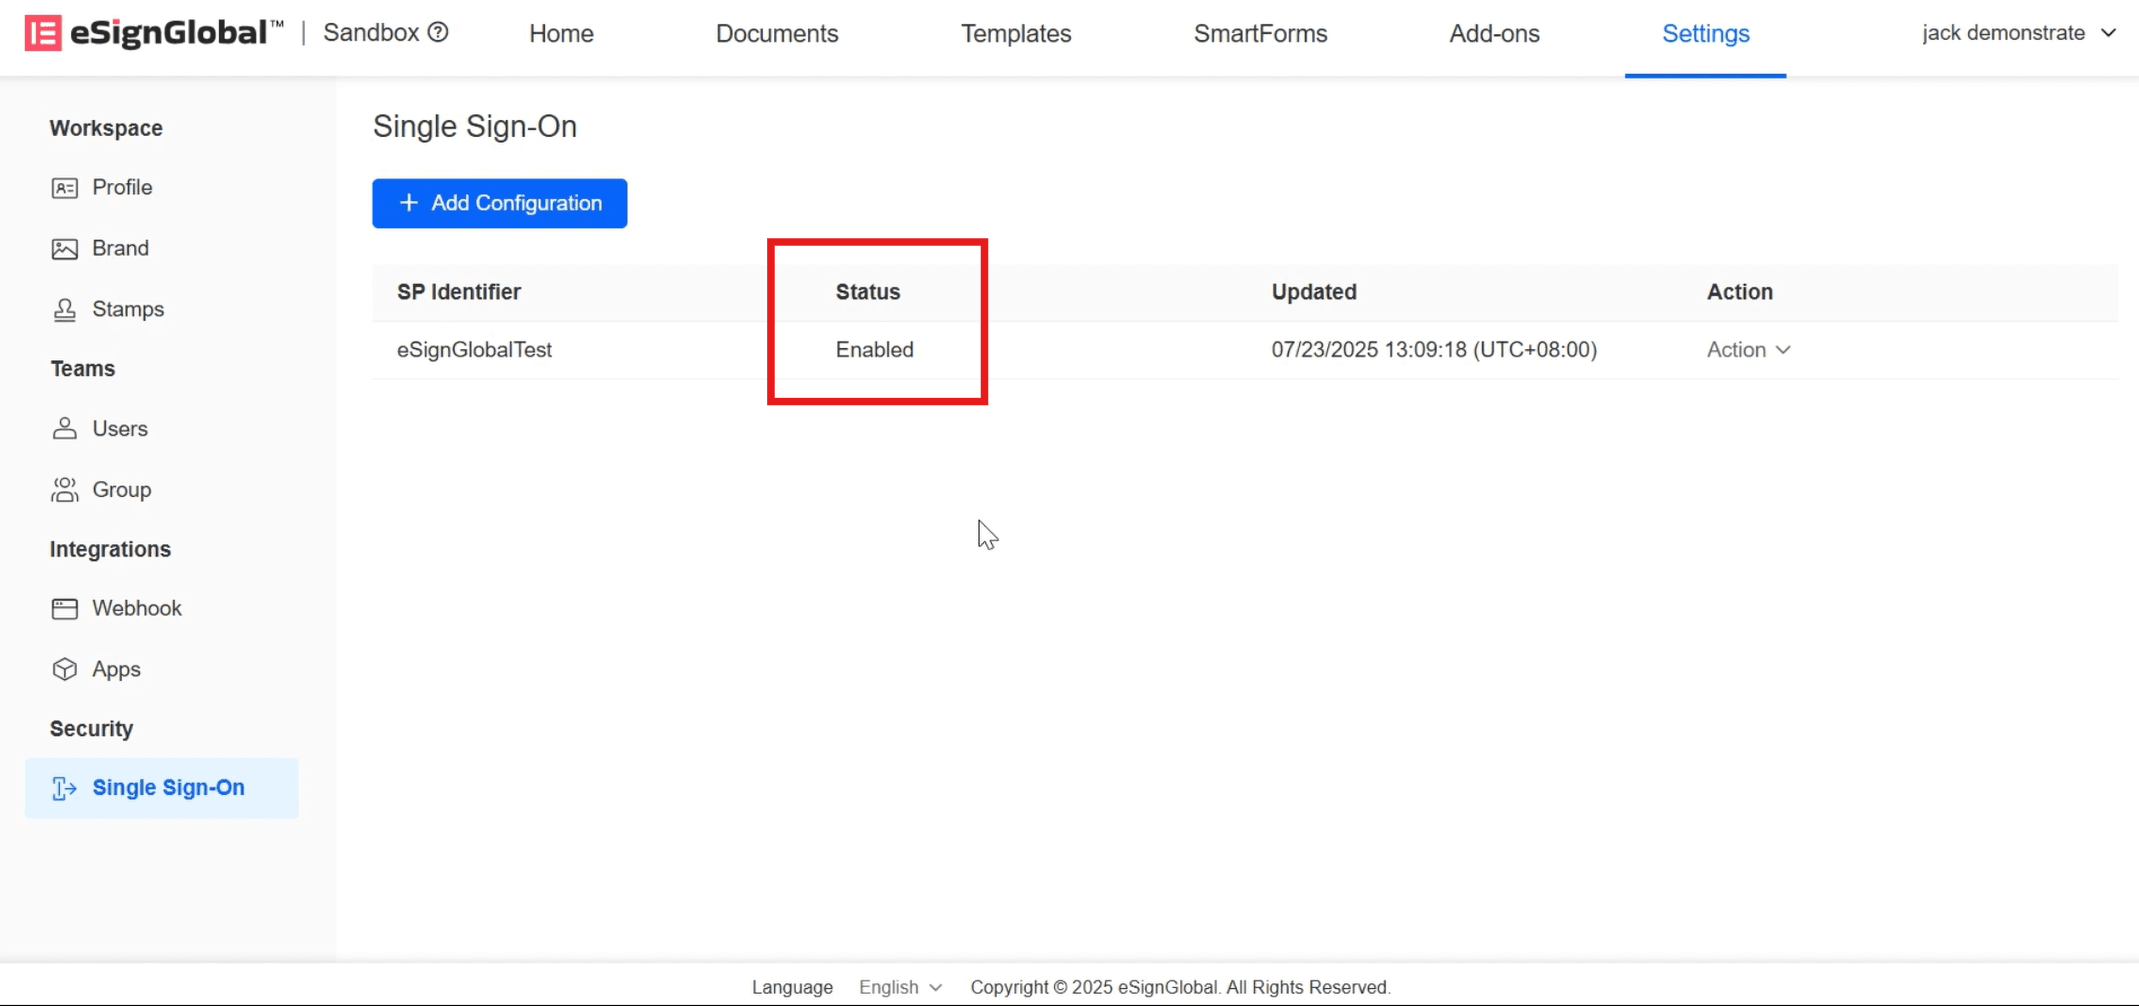
- The status will display [Enabled] when the SSO configuration is successful.
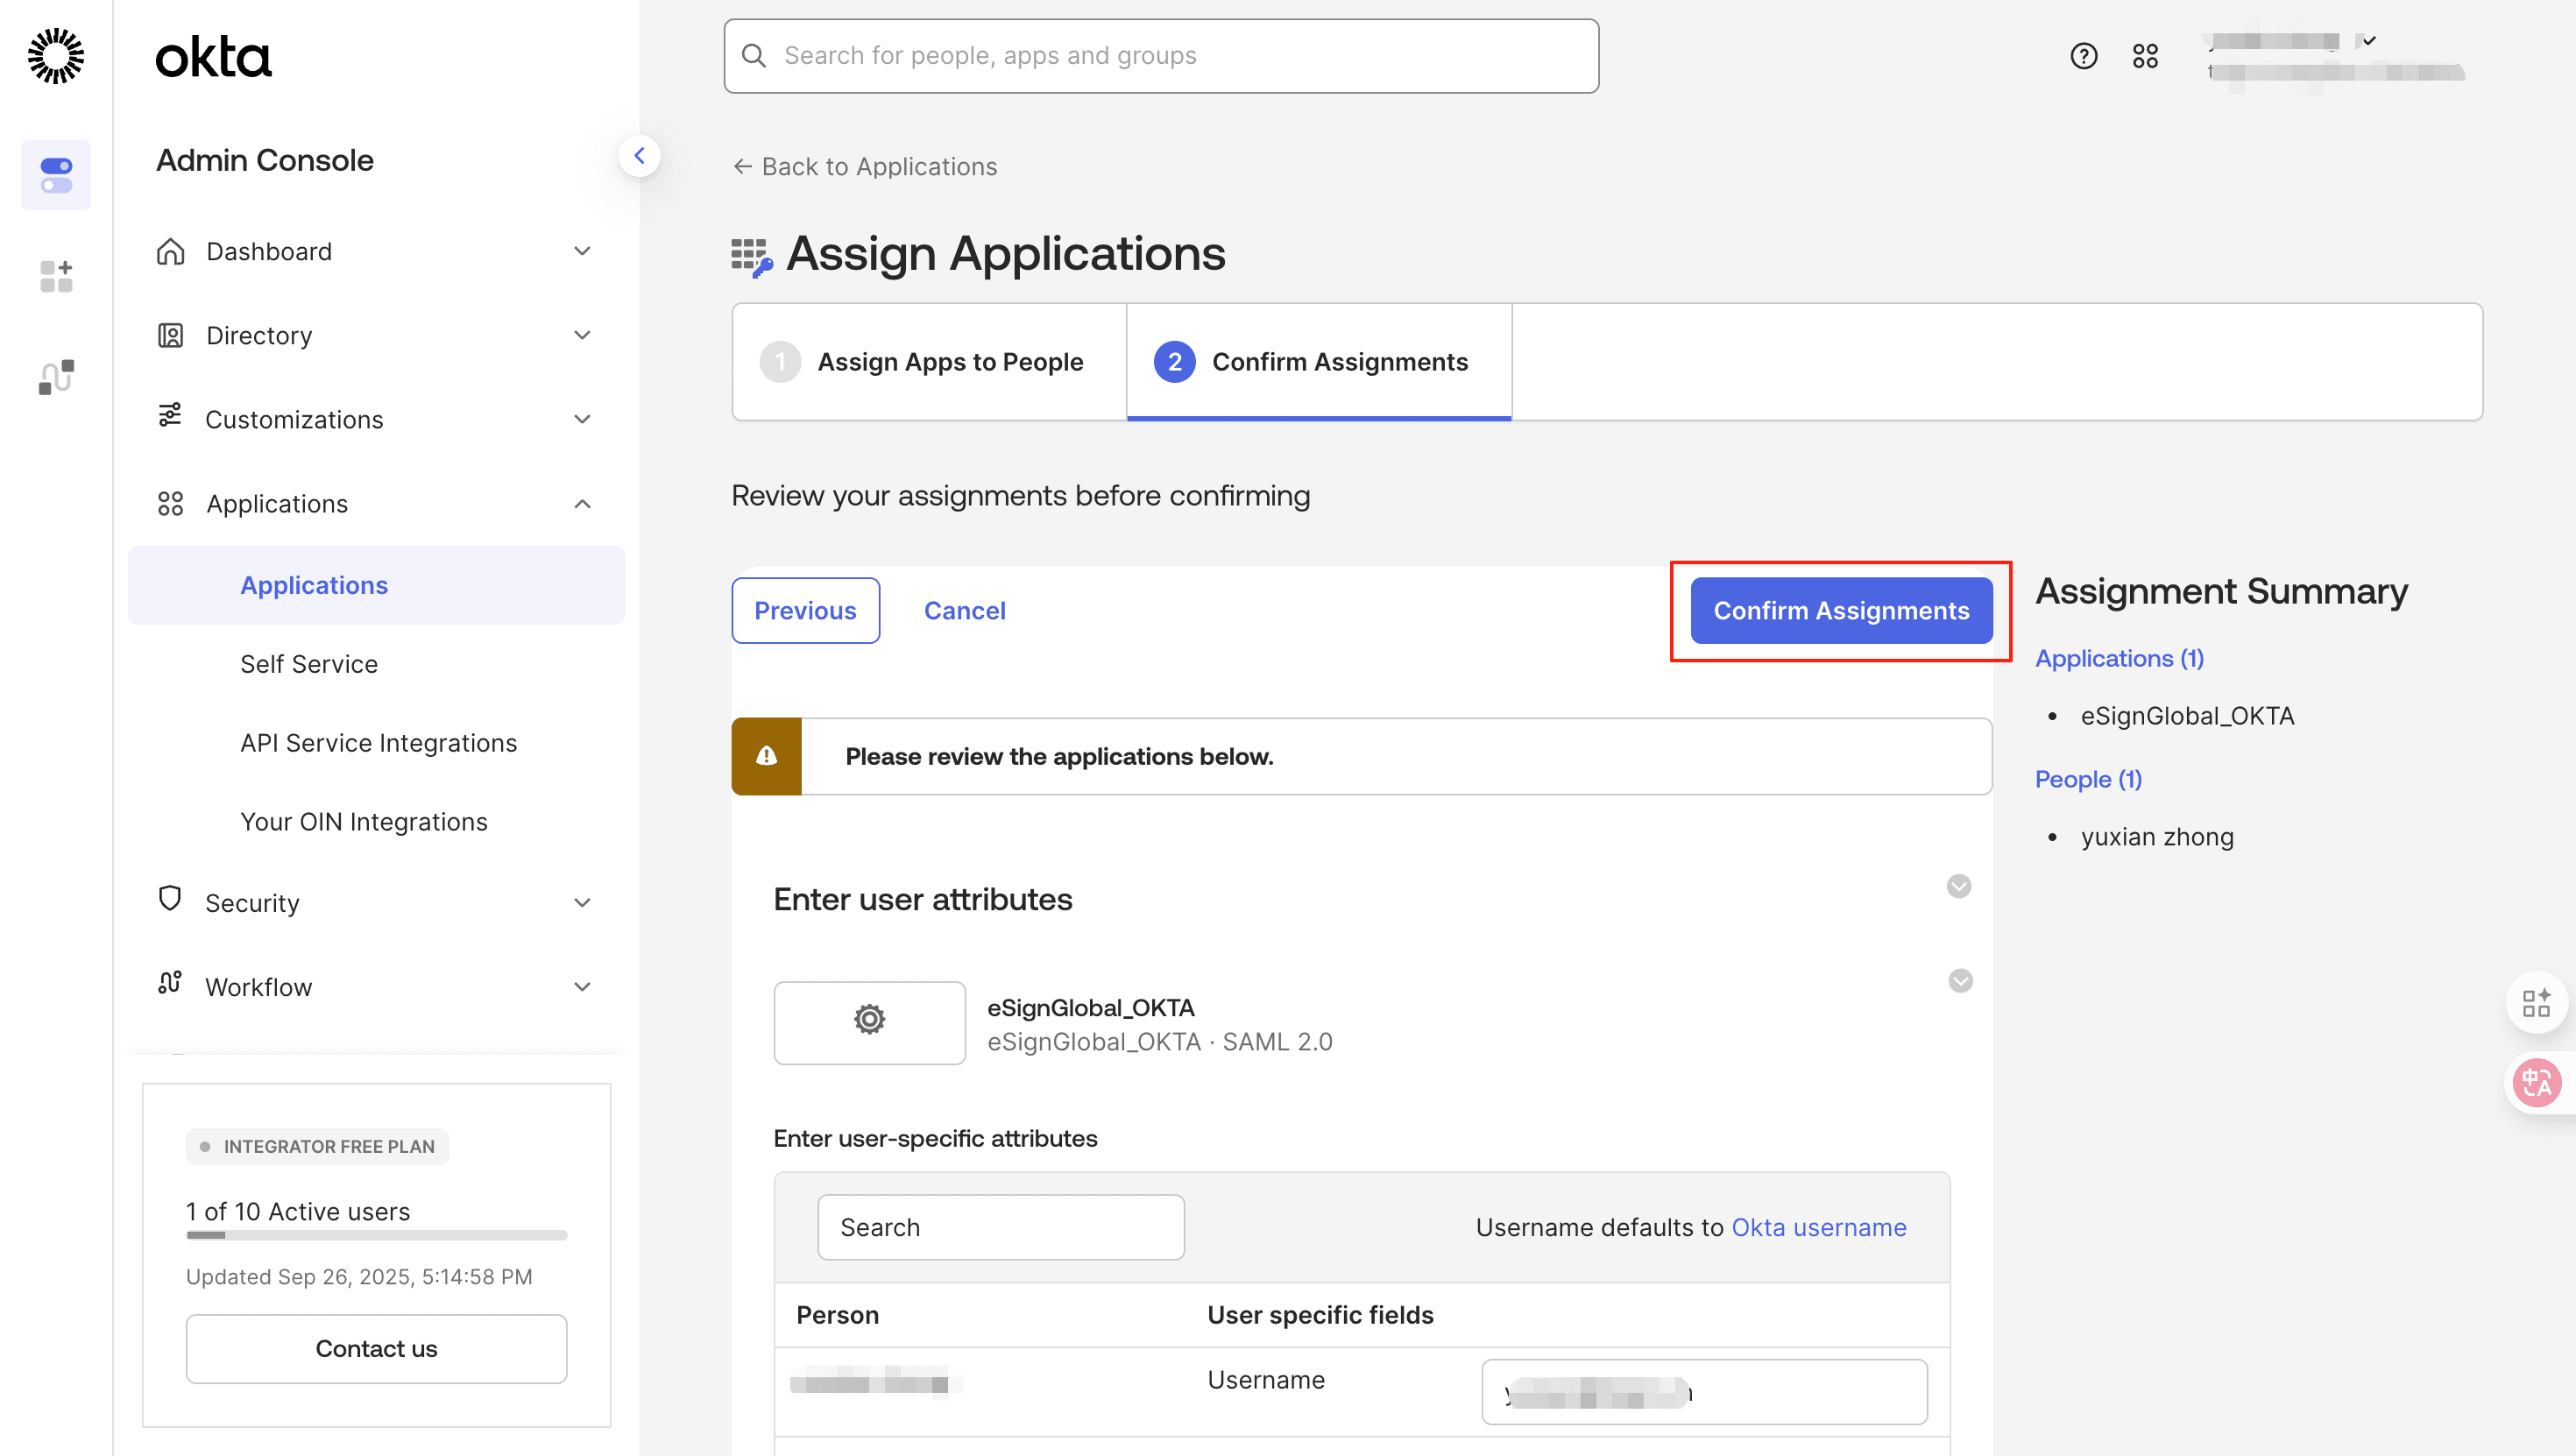
Configuring User Access Permissions
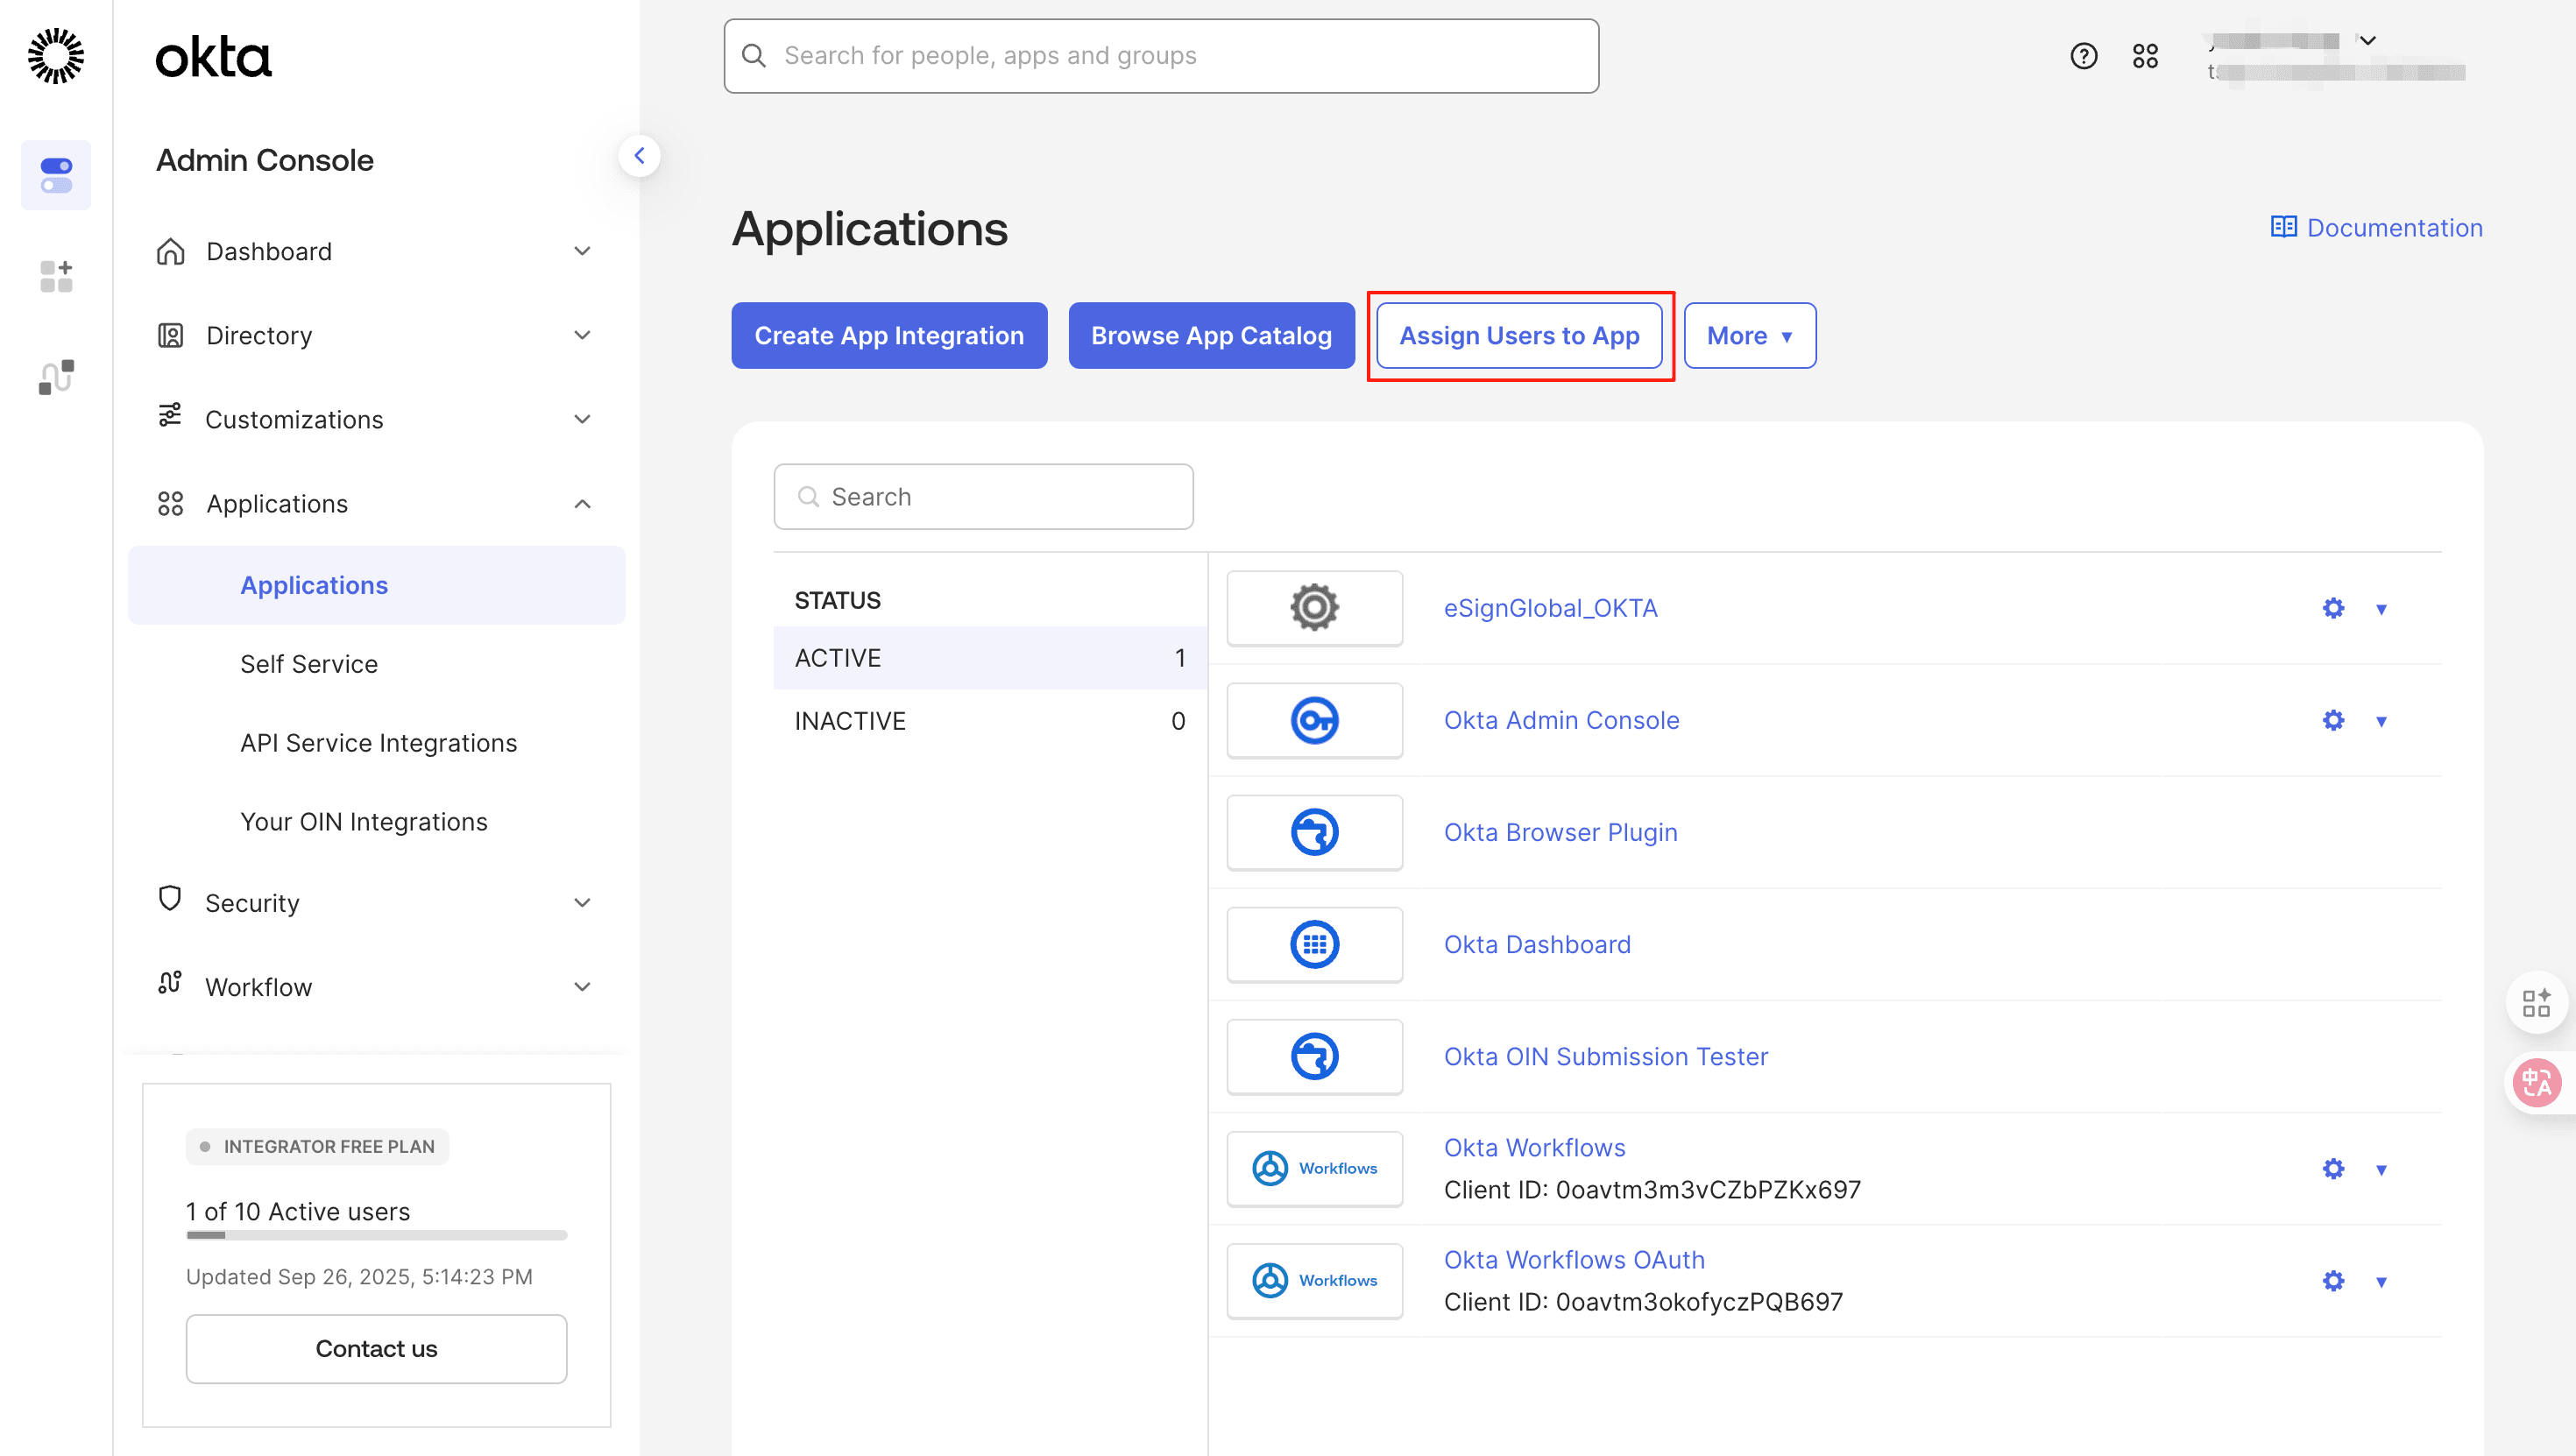
- Click on [Assign Users to App].
- Select the application and users, and click [Next].
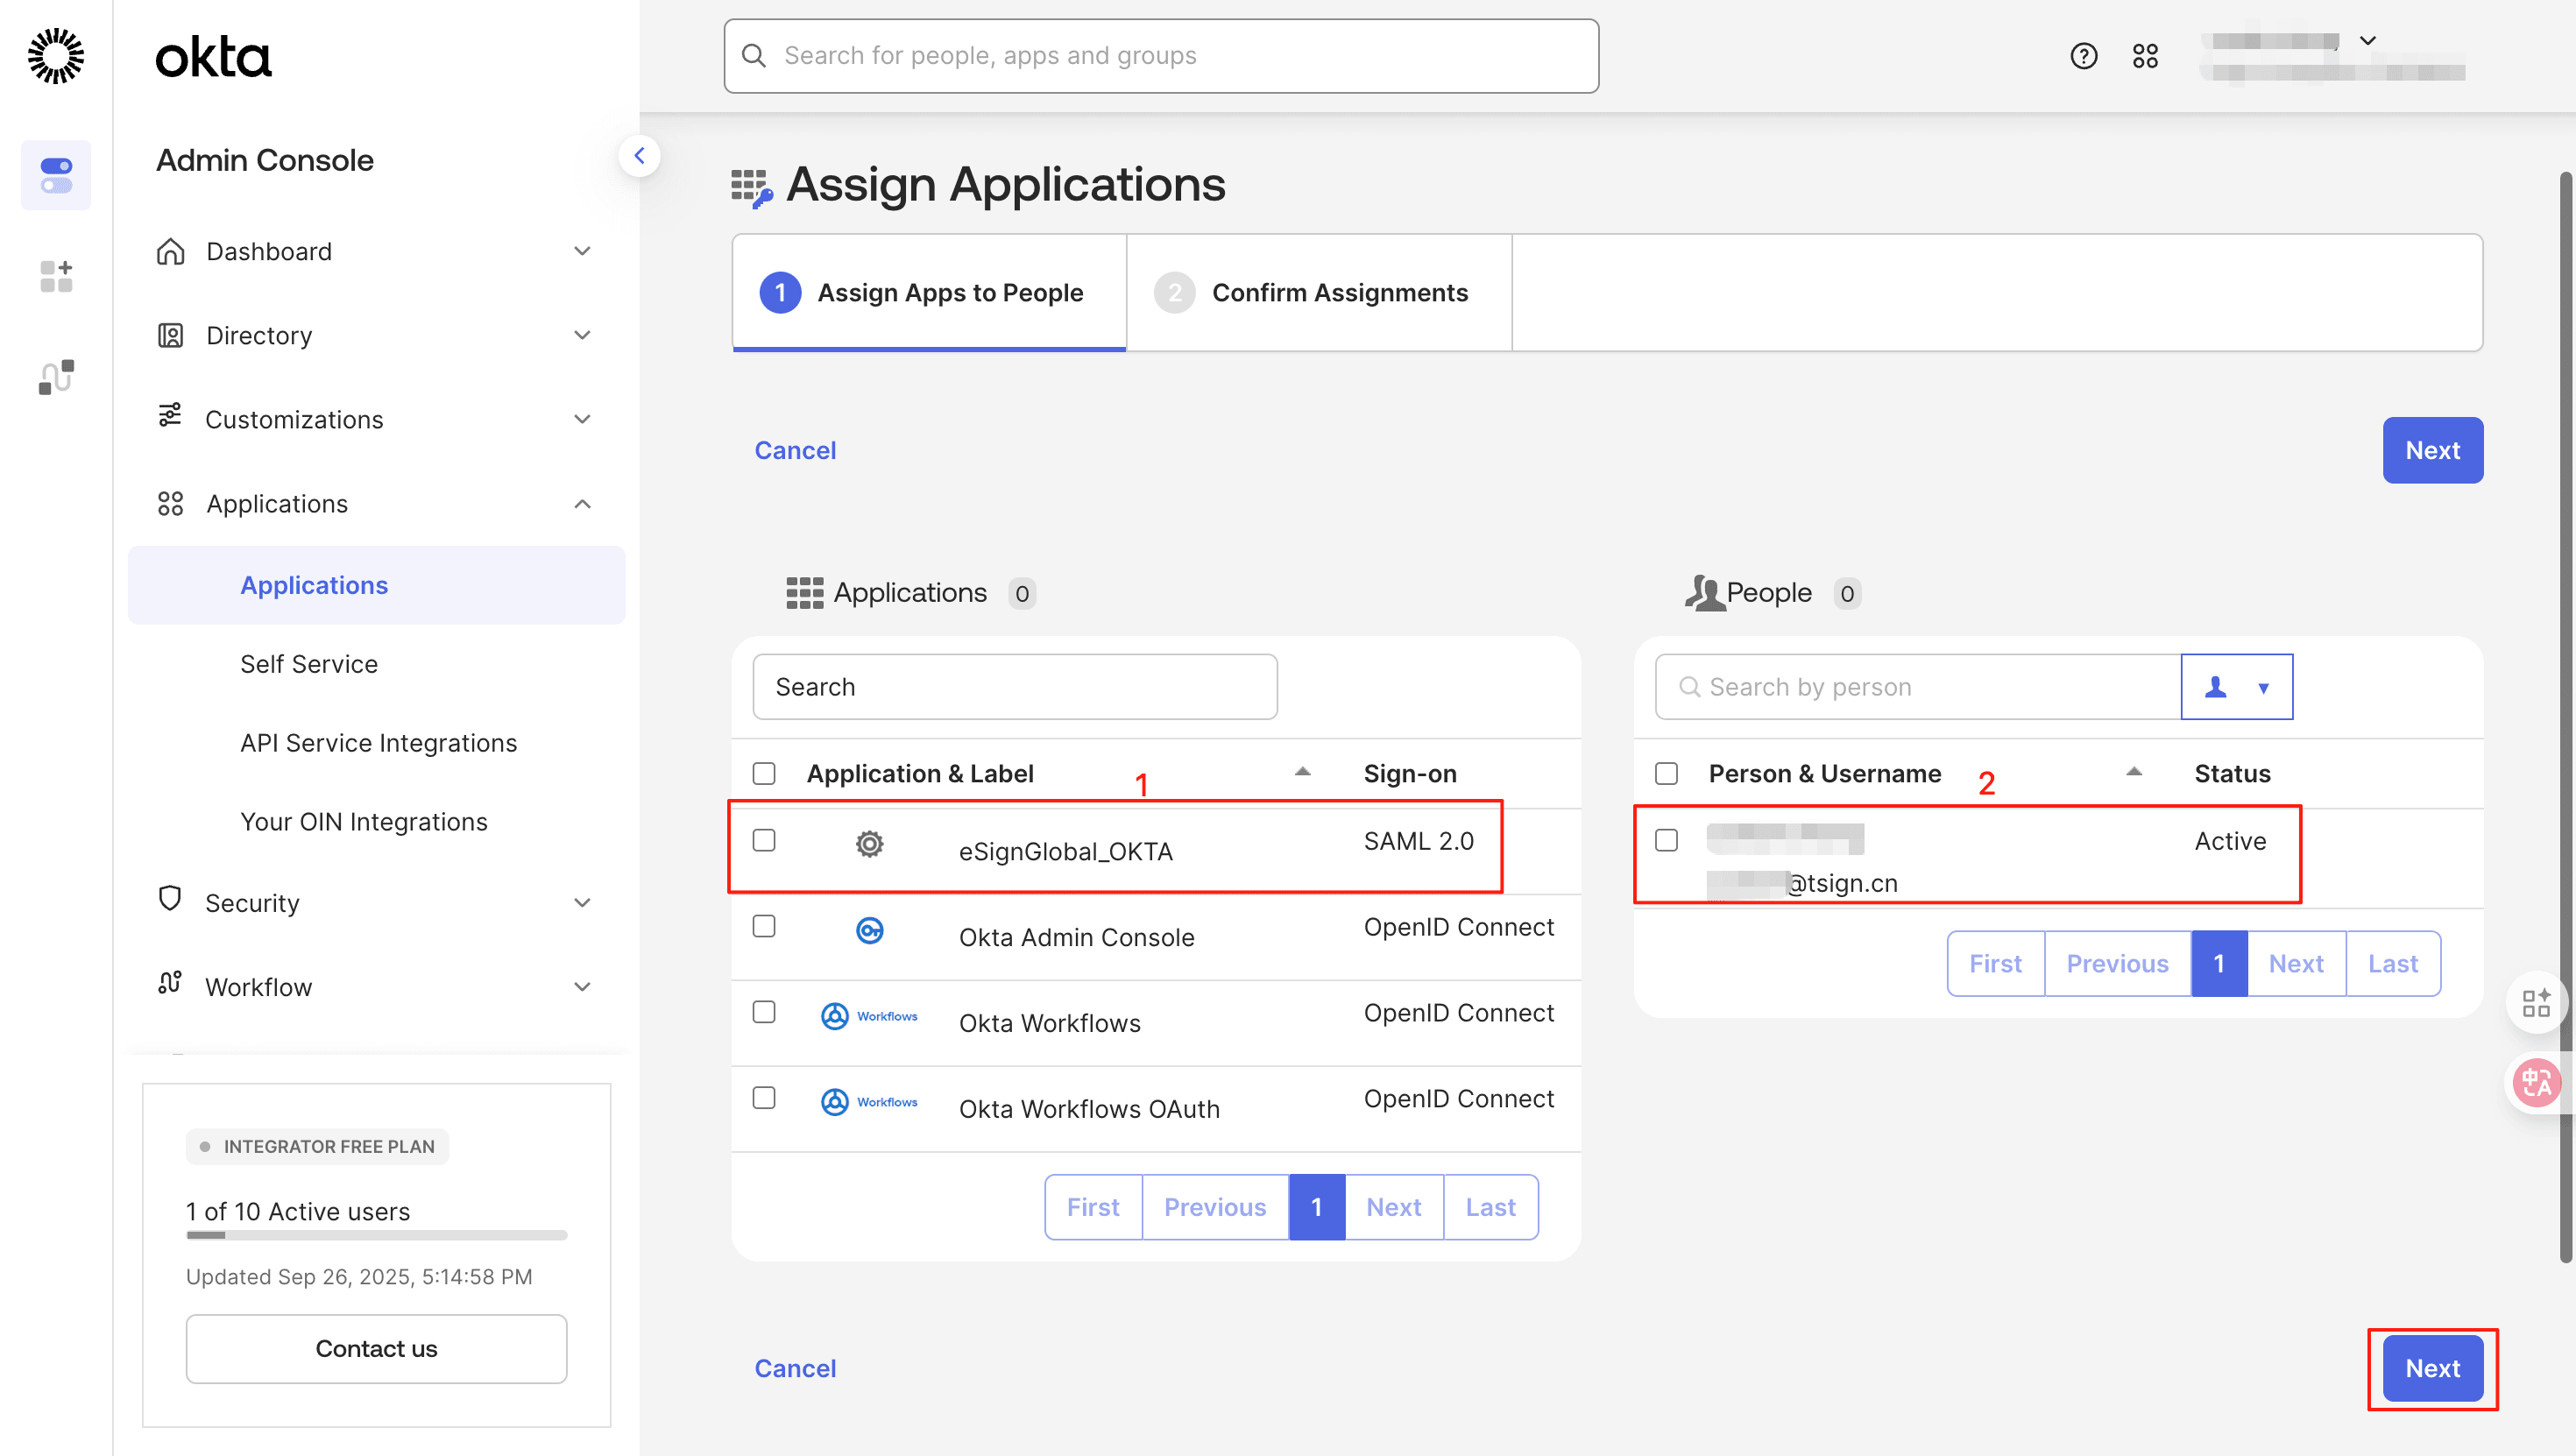
- Click on [Confirm Assignments] to confirm again.
Verifying SSO
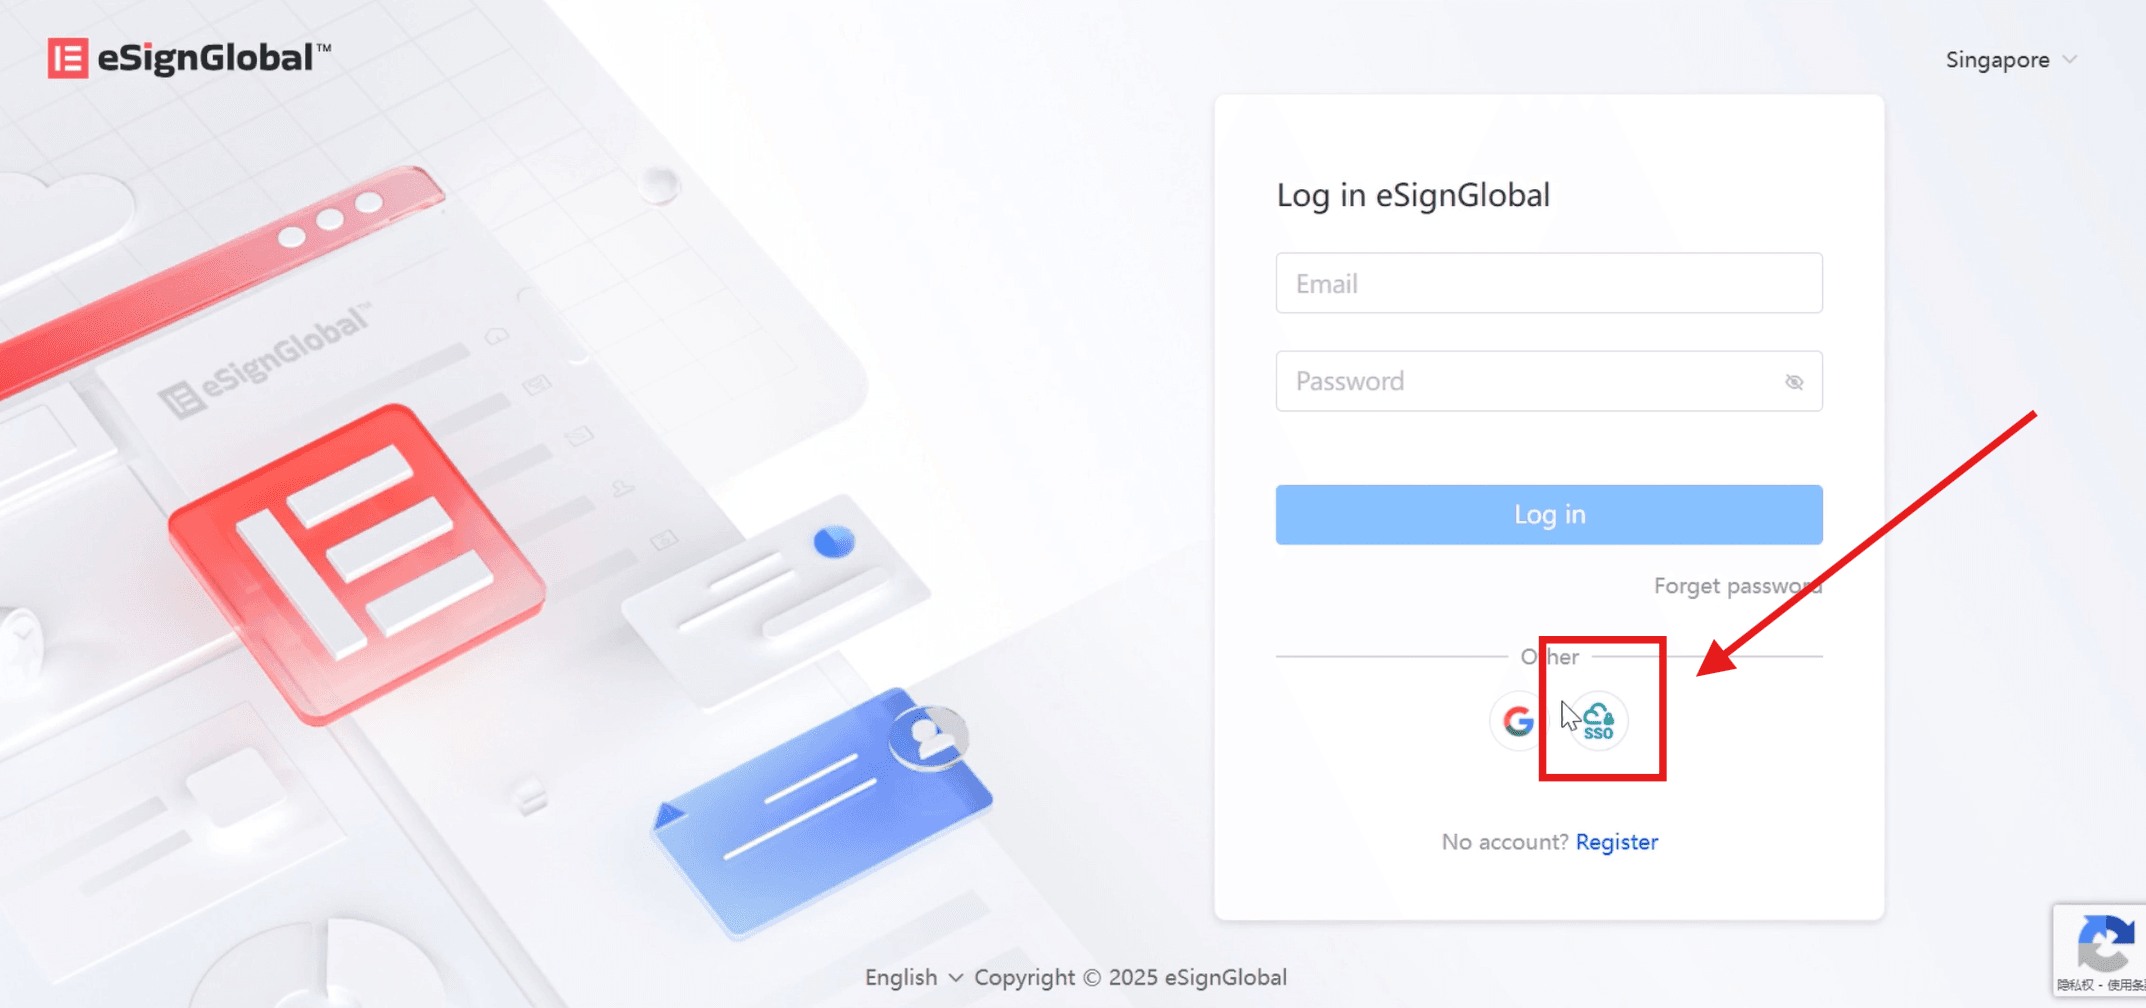
- On the eSignGlobal login page, select SSO login.
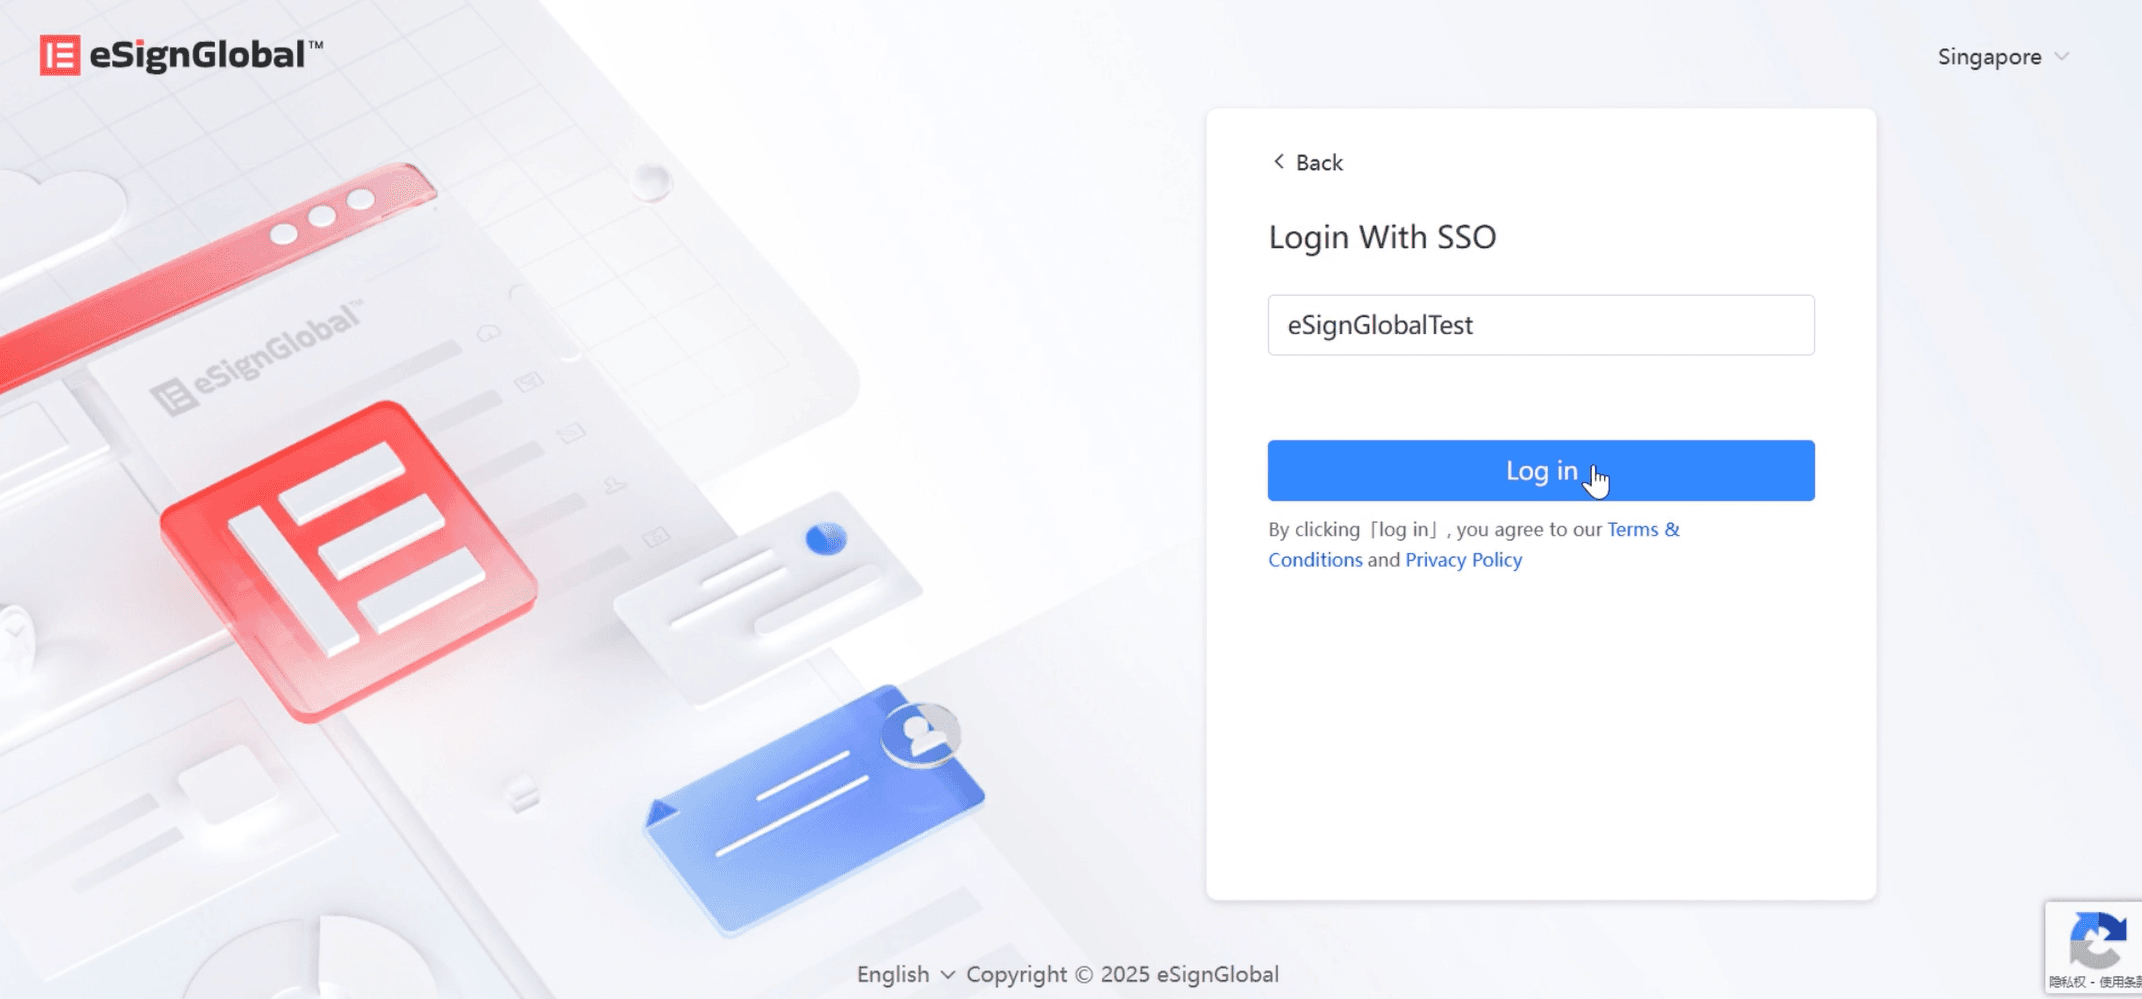
- Enter the identifier of the workspace you belong to and click Login.
-
The page will redirect to the OKTA login.
-
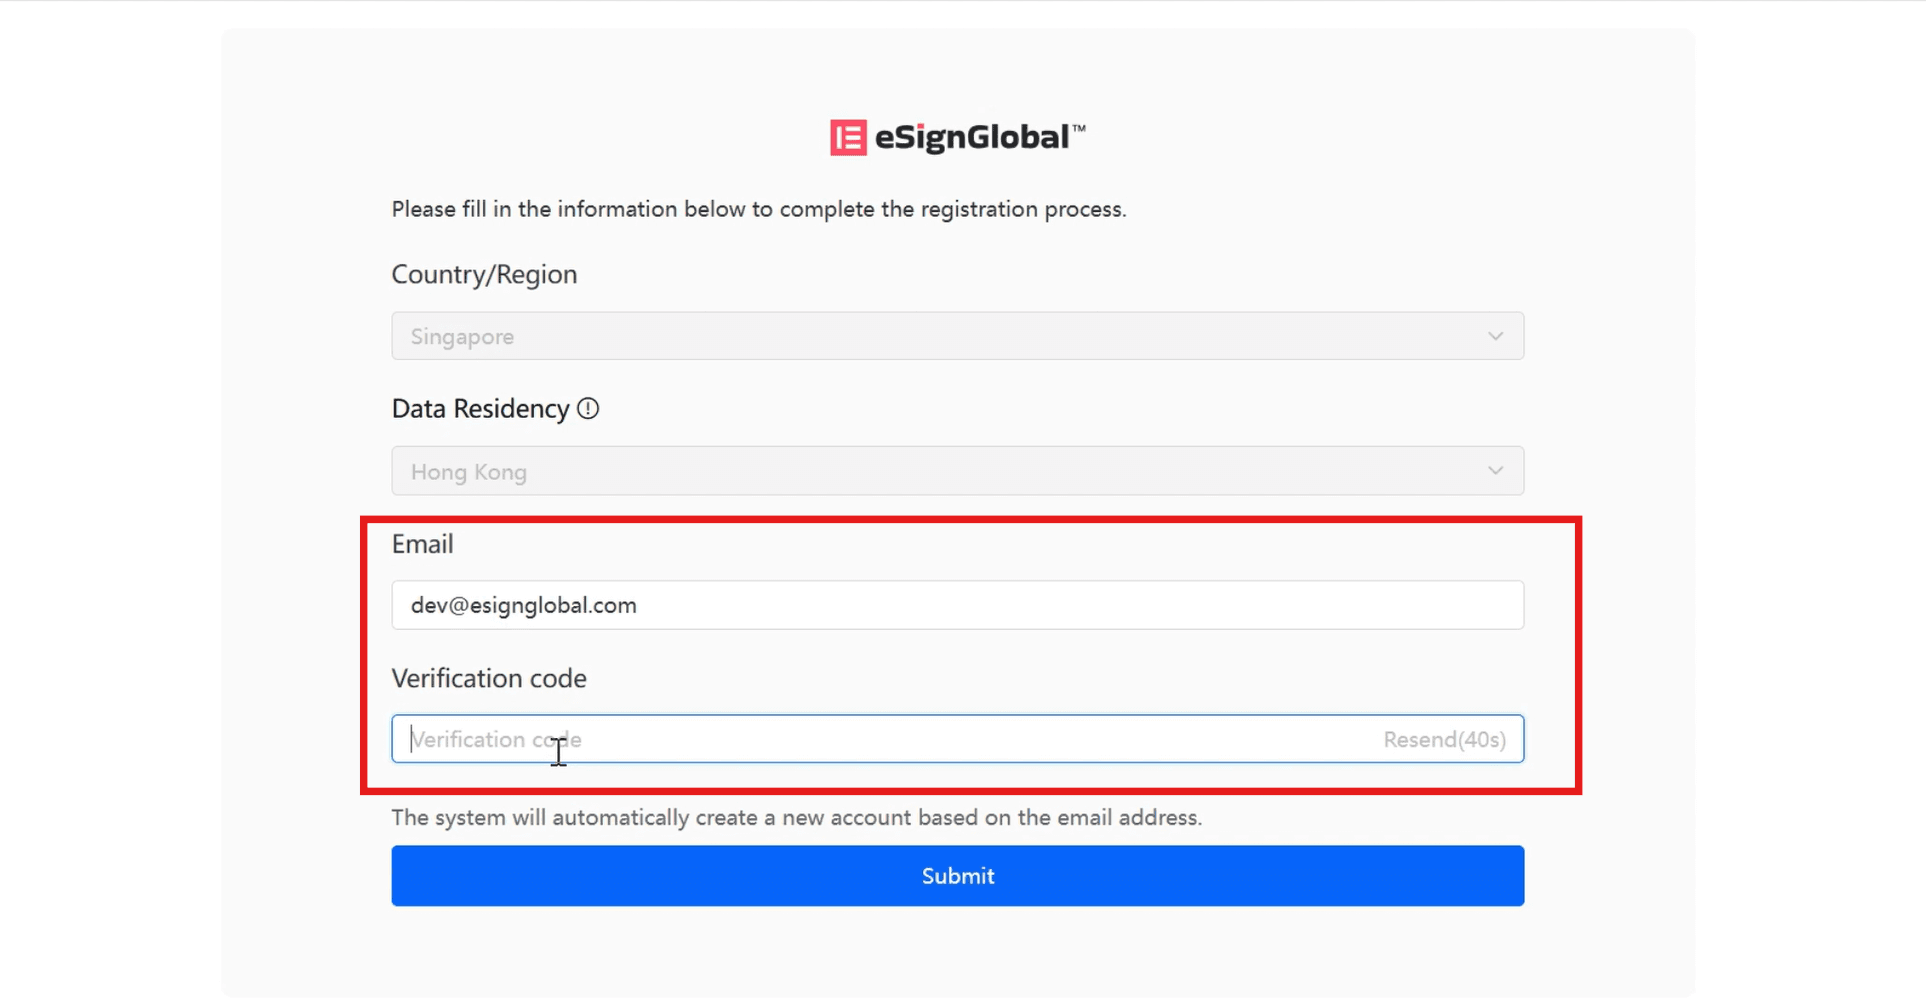
On the redirected page, enter your email and the verification code sent to your email, click [Submit] to log in to the eSignGlobal homepage.
Note:
The email address used for SSO login cannot be used as the login account for the eSignGlobal platform.


